
Starting Your Own Seeds
Today I am going to plant my seeds and put them into the light hut.
If you missed the first post explaining:
- What is a Light Hut?
- Where did you get this idea?
- How do I build one?
Go here. In short, a Light Hut is super-easy, super-cheap way to start your own seeds indoors. It’s basically a cardboard box and a light bulb on steroids.
Now that the Light Hut is built we can get our hands dirty and have some fun.

As you may have noticed in the picture with the seeds, I did purchase a bag of organic soil. I could have walked out to my compost bin and grabbed a bucketful of the free stuff.
I bought soil for 4 reasons:
- I wanted clean soil with the ideal ratio (peat moss/ top soil/ compost) for starting seeds.
- I didn’t want weeds. It’s guaranteed that if I get a tablespoon of soil from my yard it will have approximately 47 weed seeds in it. All these weed seeds will adore my light hut. They will germinate before anything else. Then they will become man-eating, blue-ribbon winning, super-weeds who will kill all my sweet baby tomato plant seeds.
- I don’t like weeding Light Huts. It’s hard enough to deal with the weeds in my garden. I really don’t want to deal with them in my kitchen.
- I didn’t want to take any chances. If you have ever had blight in your midst, you know how easy it is to spread and how hard it is to get rid of. By purchasing clean soil, I don’t have to worry about any funky molds or fungus or other things lurking in the soil that I don’t want on my baby plants.

I am using cardboard egg cartons as “trays” for my seeds.
Why?
- Everyone we know saves egg cartons and gives them to us (because we have chickens); therefore, I have a zillion of them – so they’re free
- I’m recycling, repurposing, reusing, which is always a good thing
- I can fit a lot of seeds in a small space
- It naturally allows for drainage
- They are completely biodegradable
- When I move the seedlings into larger containers I can keep them in the cells. This reduces the stress, chances of shock and stunted growth.
Begin by cutting the lid off the egg carton. You can put the lid (you just cut off) under the egg cell side if you want. This provide a little more support for your plants and creates a bit of a drainage tray.
I am opting for foil pans under my cell cartons instead. By using foil pans under my seeds, I will create more light in my hut. Another bonus is that water can’t seep through foil. I am horrible at watering. I forget to water. I water too much. It’s either a dessert or a swamp. I know this makes me a terrible gardener.
When I over-water my seeds:
- The water seeps through the cells
- Next it seeps through the egg carton top (because it’s not water tight either)
- Last it seeps through the cardboard box that is supposed to be containing these baby plants for the next 3 months.
No thanks. Since my watering skills can’t be trusted. I need something water tight under my seeds.

Fill the egg cells with potting mix.
Now, we are going to need some seeds. In general, I am a skatter-brain. I forget why I went to the basement. I forget what I did with the answer key to my daughters math book. I forget where I hid the chocolates my Dad gave me (so my 4 children wouldn’t eat them all).
I am just as random with my seeds as I am with life. I save seeds from my garden. I beg friends for seeds. I am given seeds from customers at the pawnshop. I buy organic seeds. I buy seeds on sale. I do not discriminate. I have quite an assortment of seeds in my possession.
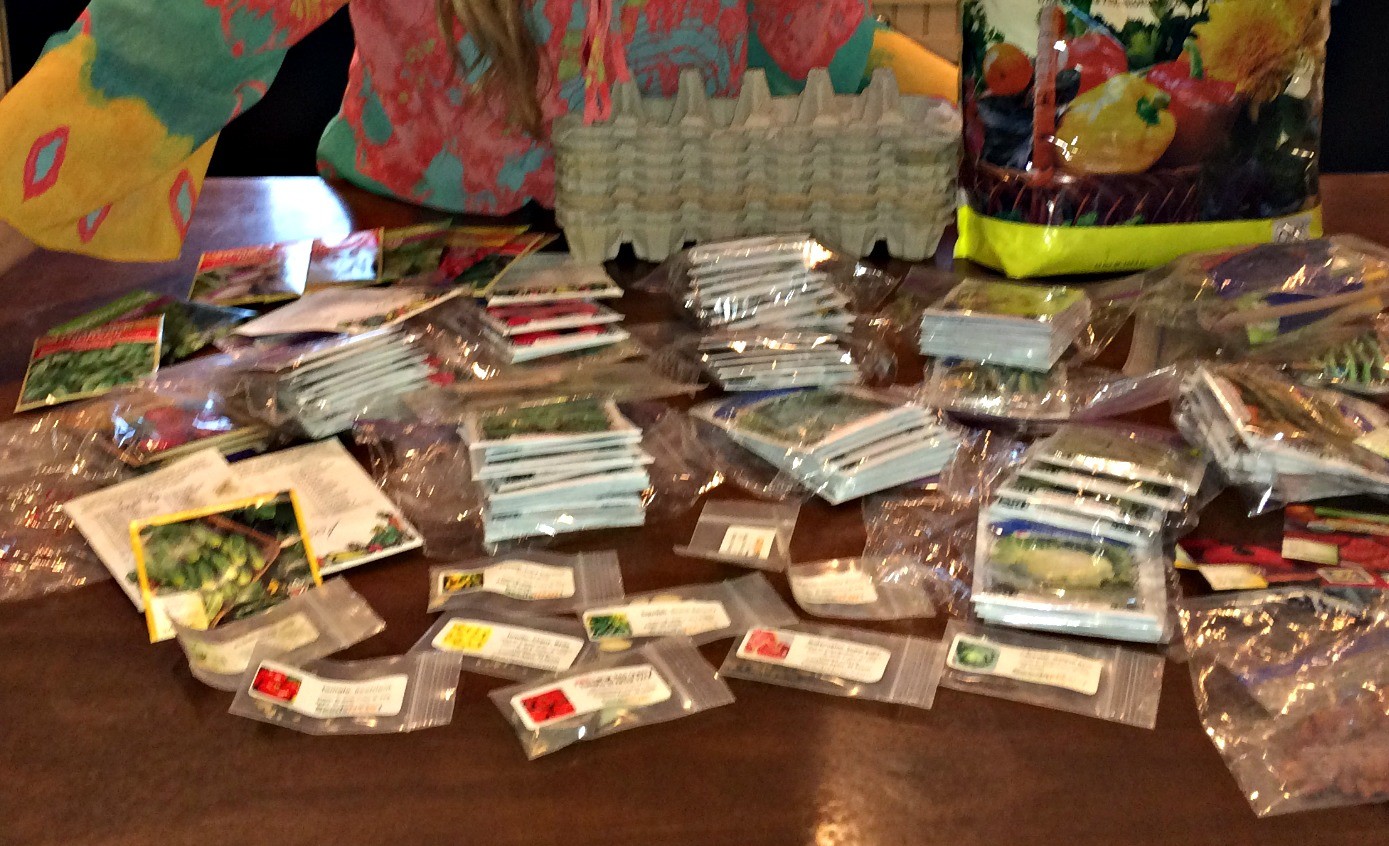
I looked at my kids over the sea of seed packets and said, “Do you know how much food this is?”
Really – This is a ton of food. It’s just in the form of seeds right now and you can’t tell how many small countries I could feed.
I love that pounds and bushels and jars of food all start as these tiny, little seeds.

I am not recommending that you purchase your seeds from a particular company. I do like these. They are organic and non-GMO. Nope, they aren’t paying me. Although, I wish they were. I just like these seeds. That’s all.
I placed 2 seeds in each cell. Gently push the seeds to the depth recommended per plant. If you don’t know how deep to plant, sowing depths can usually be found on the back of the seed packet.
Be sure to label all your seeds. Sometimes I make the mistake of thinking, “I’ll remember what kind of tomatoes those are” and I don’t. I label everything. My brain doesn’t work.
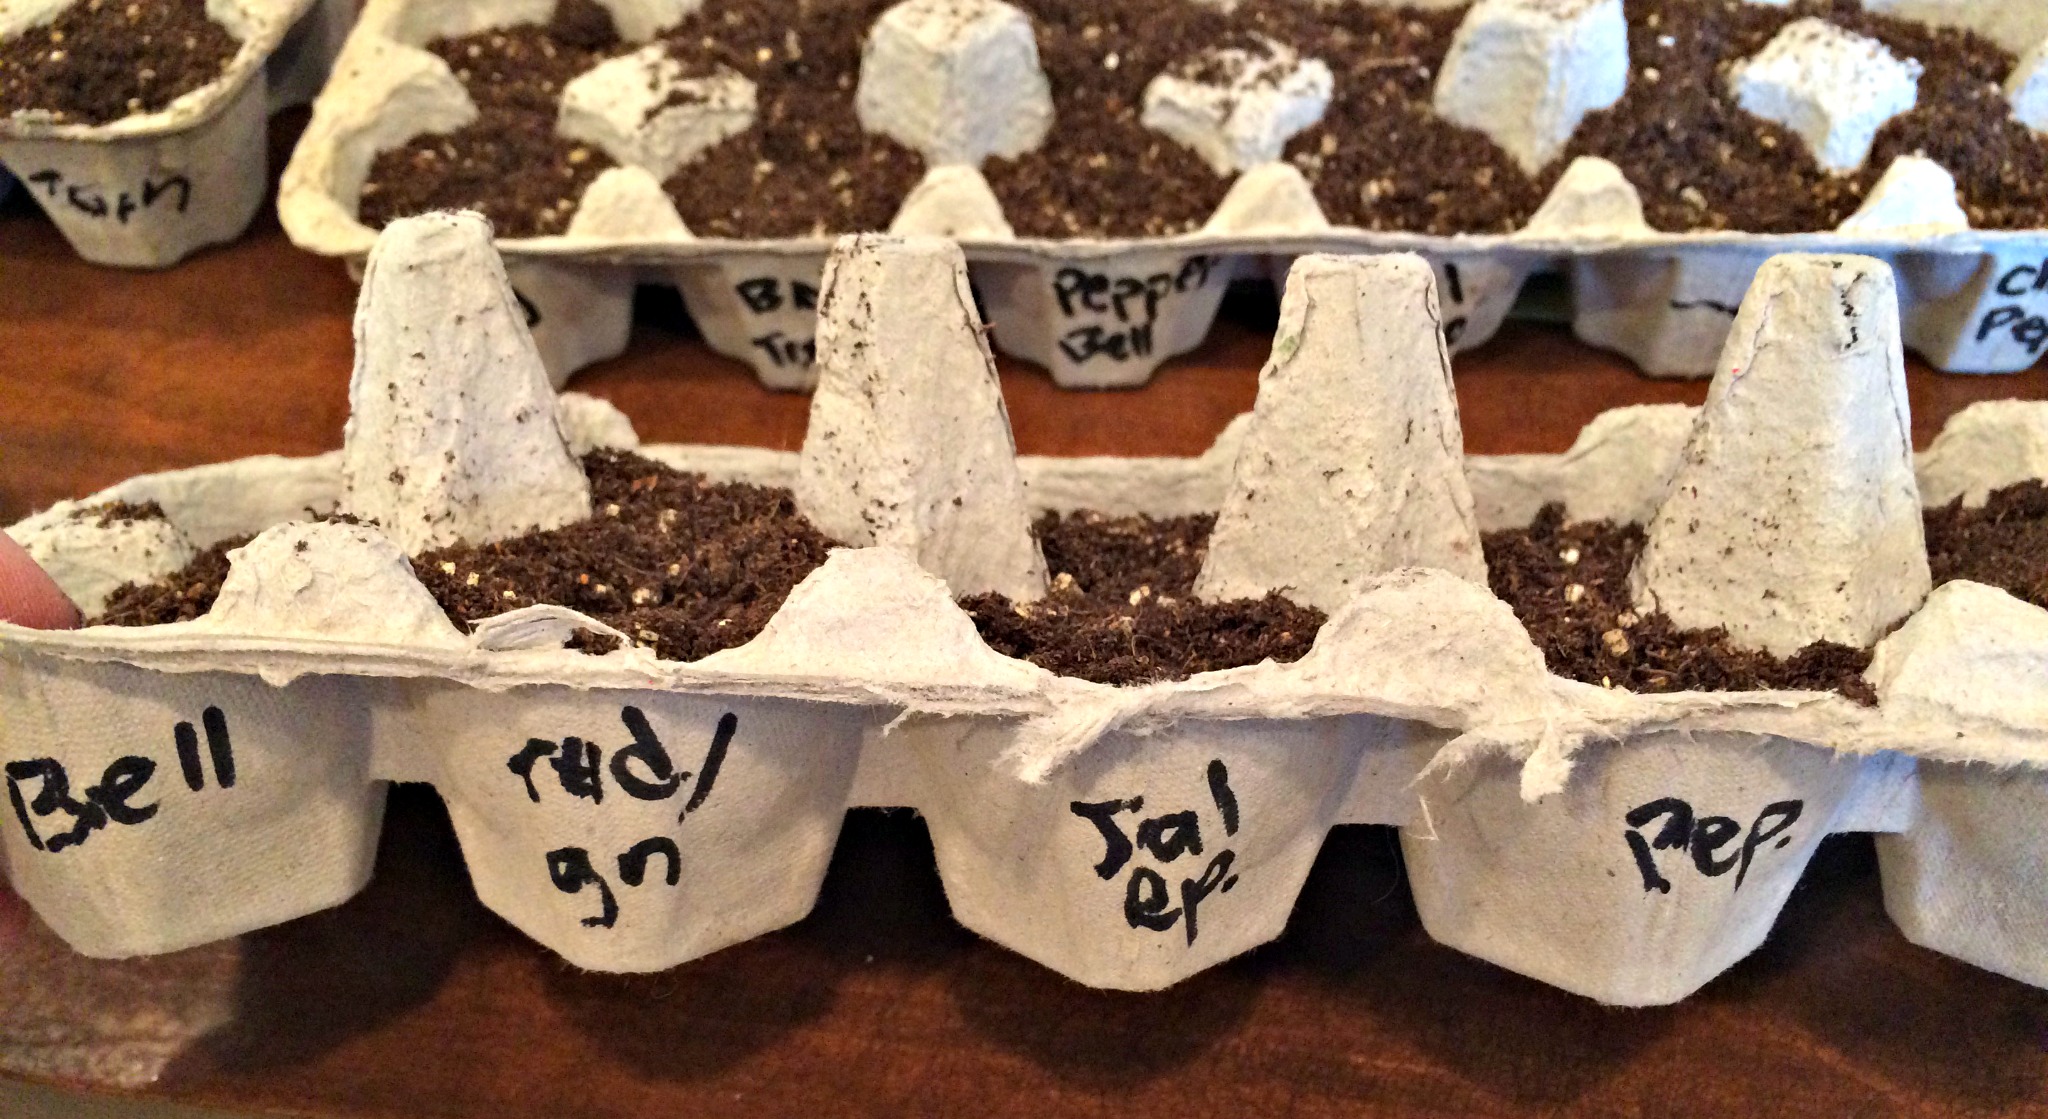
I wrote on the outside of the cartons (in the worst handwriting possible) what was planted in the cells.
After all the cells are planted and labeled, water your seeds. You can use a spray bottle or a dropper or turn the sink on “trickle” and dribble a little water in each cell. You want to get the soil moist so the seeds will germinate, but not too wet.
Some seeds are high maintenance and need the perfect amount of moisture, the perfect amount of light, the perfect temperature, for the perfect amount of time – before they will become baby plants for you (I hate you spinach). For these obnoxious seeds, you need to keep things moist but not too wet.
For the rest of the seeds in the Light Hut – they’ll be coming up on no time.
Here’s what’s growing in my Hut:
Tomatoes
I am growing 6 different varieties, colors, sizes and shapes. In the past, I have started tomatoes in my garden (as seeds) but they require a long growing season. If I want to eat a tomato before July I have to start them in my house.
Peppers
I also planted a fun variety of peppers. Pepper plants need months to grow into big plants that will make beautiful colorful peppers for me to eat. In Kentucky we do not have the kind of time pepper plants need to reach maturity- these have to be started indoors (or a greenhouse).
Spinach
Because it’s high maintenance & impossible to start outdoors, I start my spinach in the Light Hut. In the Hut I can maintain the right temperature, moisture, etc for the little pain-in-the-neck plant. Sowing spinach directly in my garden is always a failure. I might as well sow it in the chicken coop.
Squash & Zucchini
I will say that it is tremendously easy to start squash seeds in your garden if you don’t have a mole. It germinates quick. It grows fast. It is ideal for starting directly in the garden. Unless you have Mr. Mole. If you have a mole living in your midst, don’t bother putting any squash, gourd, pumpkin or any other large seed in the ground because he will eat every one of them.
Cucumbers
Yes, it is easy to seed cucs directly into the soil in your garden. They are like squash. They also germinate quick. They grow fast. Because of the trouble I had last year, (thanks to Mr. Mole) I am starting some in my Light Hut this year.

Picklebush is the only cucumber I grow. The plant remains in a “bush” form so you don’t need 2 miles of space for it to trellis around. The cucs remain small, crisp and perfect for all things fermented. They hold up will in my fridge for weeks if I use this trick. They keep faithfully as pickles in my basement during winter.)
Basil & Cilantro
Many herbs can be seeded directly into the garden. Some herbs are easier to start indoors. Cilantro and Basil are 2 that I can’t wait to get my mouth on & will give a head start by starting them inside.
Cabbage Family
If you like green worms, you should start all your cabbage related plants in the Light Hut. I don’t like green worms, but seem to like to go through green worm experiences repetitively. Plants you may want to start: Broccoli, Cabbage, Chinese Cabbage, Bok Choi, etc.
There are several plants I will seed directly into my garden. I won’t be using the Light Hut for them. These seeds will be planted right where they will grow into big plants and give me food. There are many other spontaneous plants I may end up adding to this list, but here’s a few I usually grow:
- Lettuce
- Peas
- Turnips
- Radishes
- Beans
- Beets
- Corn
- Garlic
- Onions
- Some Herbs
- Potatoes
- Kale
Coming next in the “Start Your Own Seeds Indoors” series will be “Thinning & Transplanting.”
- What’s thinning?
- Why would you murder a baby plant?
- When to transplant?
- Why transplant?
- How to transplant?
Be sure to customize your growing decisions based on your circumstances. Where you live and how long your growing season is will have a great influence on what you’ll want to start in your Light Hut. You will also want to take into consideration how much growing space you have and what you like to eat. Another deciding factor may be your plans for canning and sharing. If you like to can or want to give away bushels of tomatoes, be sure to plant extra.
As soon as my seedling start to sprout you’ll be the first to know. Stay tuned!
To get old fashioned tips and homesteading fun delivered straight to you be sure to subscribe via email (here).
XO,
Candi


Marie Thompson
02/12/2016Thank you so much for this series! I just might be able to handle this “easier” way of starting my own plants – verses the ways that my friends do and the $$ that they spent!
Candi
11/07/2016Welcome, Mam’!
Joan
02/12/2016Hi Candi,
Thanks for the tip on how to keep your cucumbers fresh. I’ve been organic gardening for 50 year and just learned something new.
When I started gardening, I didn’t know people used chemicals on their vegetable gardens (ignorance is bliss), so I never did and never will.
I’d like to give you a little hint about Cilantro. Most people don’t realize it, but Cilantro prefers growing in cool weather. Most people put it in the same category with other herbs that prefer warm weather. Try starting the seeds in late summer or very early spring and experiment with starting them directly where they’ll be growing, they really don’t like their roots being disturbed. Cilantro, Basil, and parsley all do well in large container or pots. Doing so makes it easy to cover them with plastic or a piece of row cover if you’re expecting a cold snap.
Cabbage related plants: Starting them in a greenhouse or under lights is fine, but if you’re having trouble with cabbage worms it’s because you have moths laying their egg on or near your plants. May I suggest using a row cover after you plant in the garden, and for extra protection use a toilet paper roll around the little plant and in the ground about a 1/2” deep as you plant.
Moles: If you have some chicken wire (and what farmer doesn’t) around the farm, move your soil over and lay out a 2 foot wide strip of wire. Replace the soil, and plant your seeds. The roots will be able to grow, but the wire will stop the moles. At least that will give your plants a chance at a good start. Using the wire is a pain in the ‘you know what’, but it can be removed at the end of season and rolled up for next time.
Hope this information helps.
Candi
02/13/2016WOW! Thanks for the tips. Experience is the mother of all teachers isn’t she? I love learning from people like you. Some of these things you just don’t find in many books.
Oh yes, I am familiar with the little yellow “moths.” My children think are “pretty butterflies.” Ugh. I tried to build some row covers a few years ago – I used a DIY method that was a bust. I need to invest in some real ones if I want to grow anything cabbage related – the moths have found me & they seem to like it here.
Teal
01/17/2017HI there! If we use an egg carton to start the seeds, do we need to make holes in the bottom for water? I do not have a green thumb & it is science project time. ? Is it ok to just start the seeds in their “big boy beds?”
Candi
01/18/2017YESSSSSS! If you are doing this for the science class project I’d start the plants in the “big boy” beds for sure. There are some great reasons to start them in the egg cartons (space, biodegradable & deep transplanting) but if you’re not growing a garden you can totally start and finish them in larger pots.
Yes, the vessels must have holes in the bottom for drainage.
You’re going to do great – Have fun!
-Candi