
How to Make Butter
Making butter is surprisingly easy and delicious. If you have raw cream (not pasteurized or homogenized or processed in any way) your butter is going to be tremendously healthy.
When milk (and cream) are processed, they lose most of the nutritional value. Just look at store bought sticks of butter and you can see the difference. Homemade butter is bright yellow unlike the pale, pasty stuff sold at the grocery store.
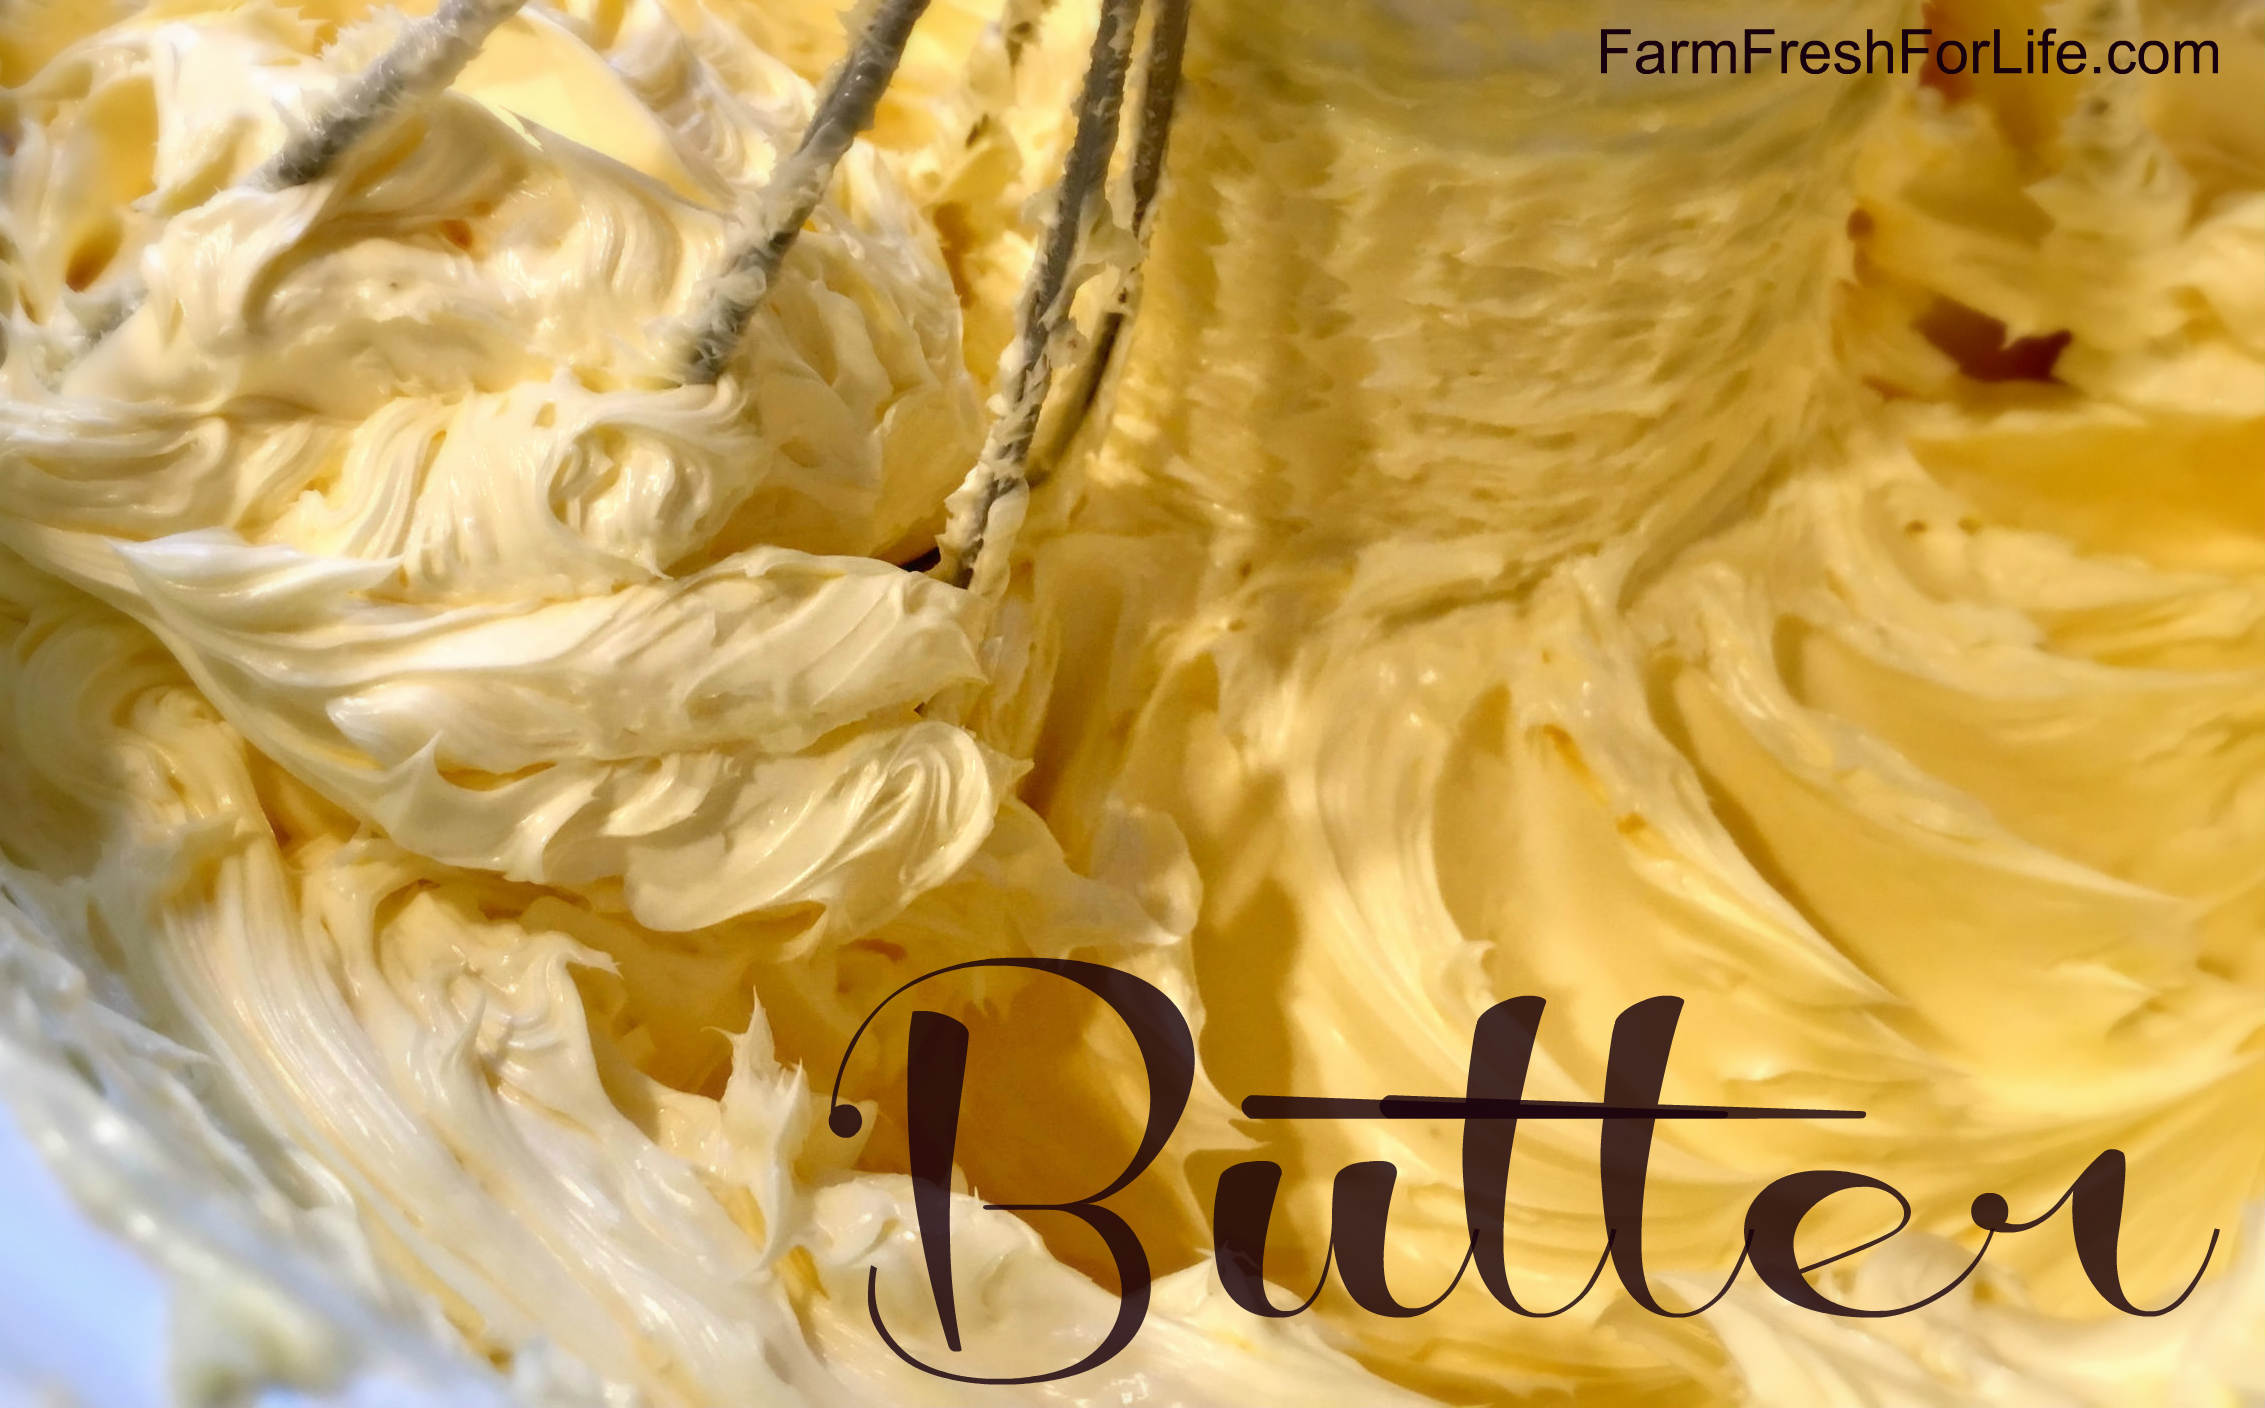
It’s So Yellow!
Why is homemade butter so yellow? It is because it is raw and because my cow is grassfed. Grass-fed animals are naturally going to eat a more nutritious diet. AND, the cream has not been processed which means all the vitamins and minerals and good bacteria are still intact. Vitamins equal color.
Vitamin K is what gives butter its yellow color. Raw butter has more vitamin K so it is more yellow.
Making butter involves only agitating the cream. It is not heated or cooked – so everything good in it stays in it throughout the butter-making process.
Why am I qualified to tell you how to make your own butter?
This is why.
I make a lot of butter. I have a Jersey cow. Who loves me and gives me lots and lots of cream. A girl can only eat so much ice-cream. I just can’t let the beautiful jersey cream go to the pigs – so I make butter.
Because of my many butter failures experiences, I can tell you how to make sweet, perfect butter every time.
Steps to Making Butter:
- Churn the cream until the butter “comes”
- Strain off buttermilk (reserve for baking or consuming)
- Wash the butter
- Dry the butter
- Salt (if desired) & Store
Easy, right?
A sweet girl taught me how to make butter in 2010. She was 7 when she taught me how. She and her brother were staying with me for a few days. I had some fresh milk with cream sitting on top and she asked me if I made butter. I told her I didn’t know how. So, she showed me. It was life-changing. I no longer get my butter from Kroger.
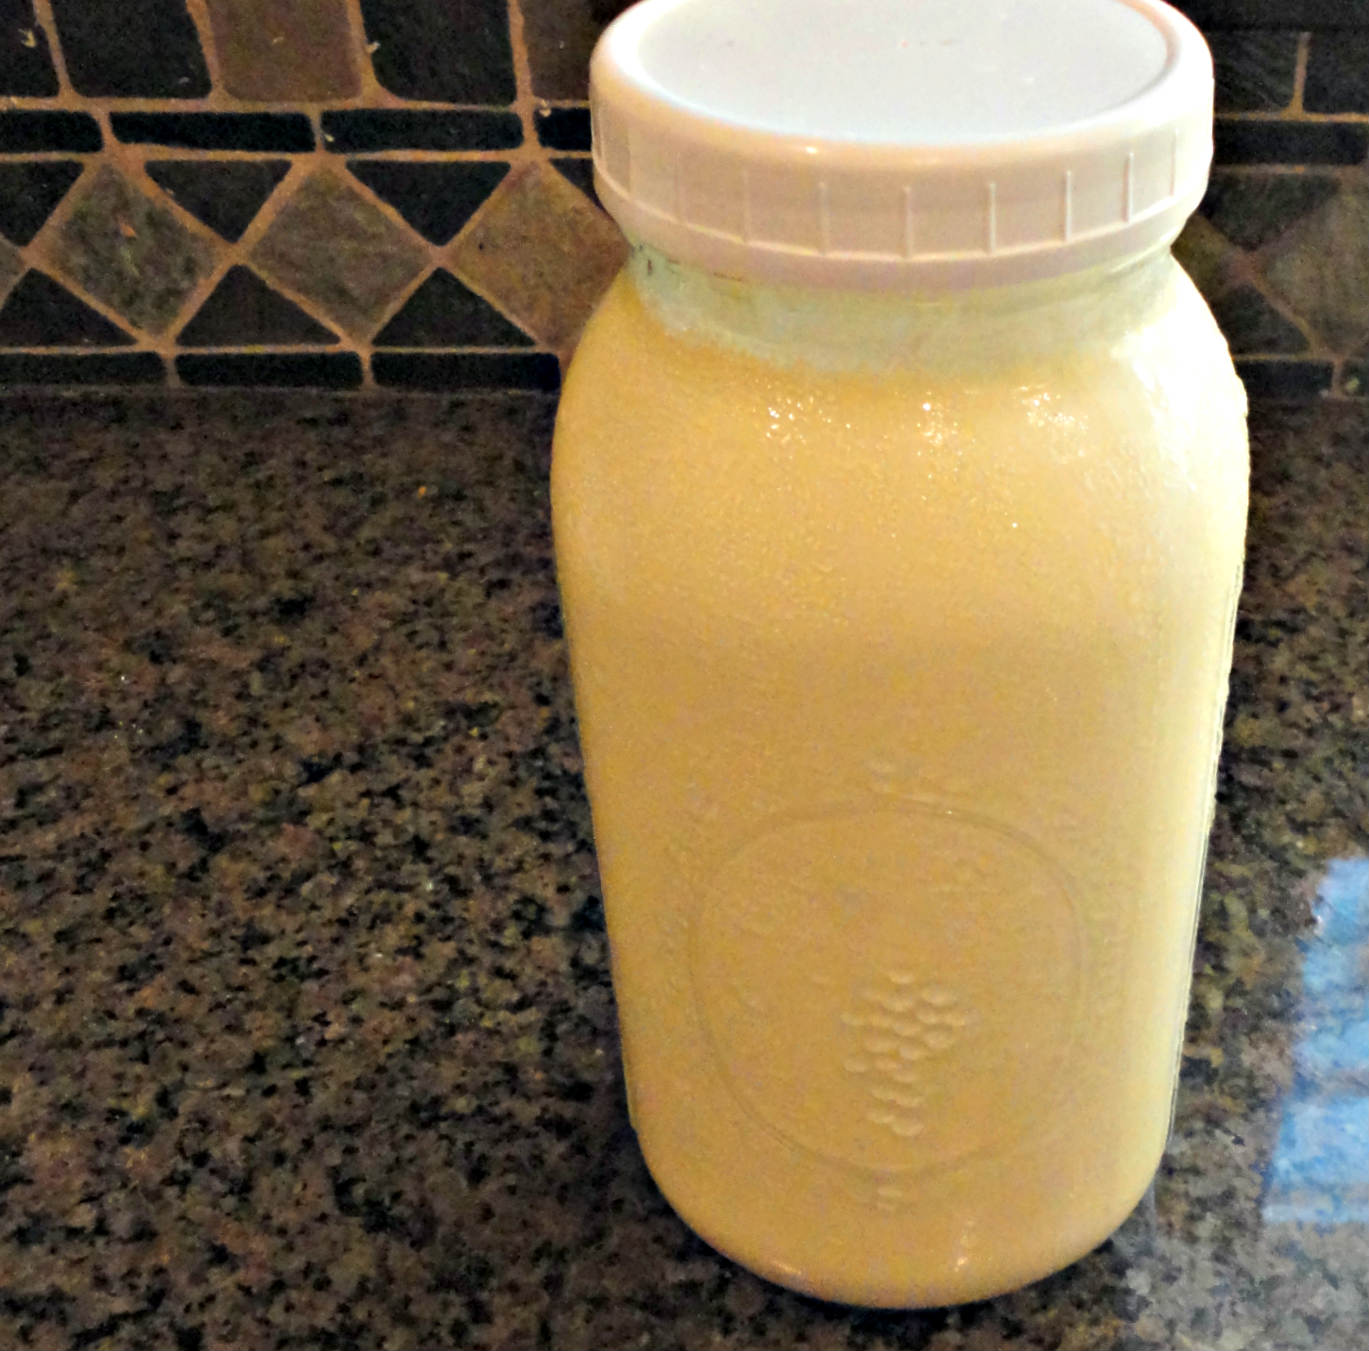
Start with some cream. I have raw cream from the 800-pound pet in my front yard. However, heavy whipping cream from anywhere will do the trick.
See the condensation on the outside of this jar? Your butter will ‘come’ faster if you let the cream sit on the counter for about an hour before you churn it.
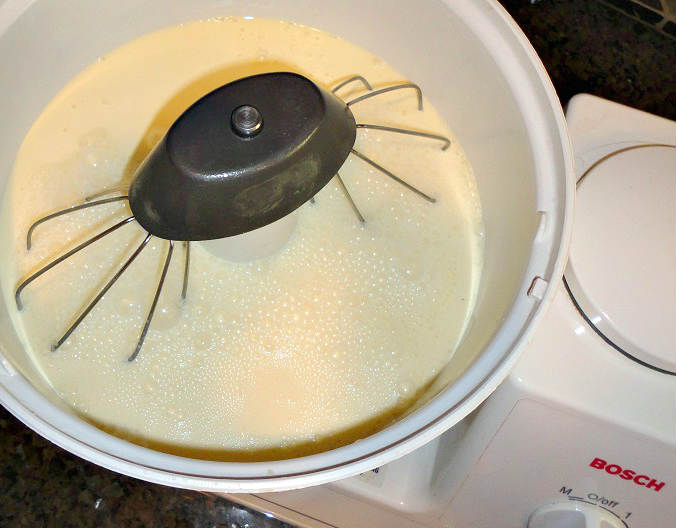
#1 CHURN THE BUTTER
I use my Bosch Universal Mixer to make butter for me. You could use a churn or shake a jar. Even a food processor will make butter.
To use a mixer, insert the whips & pour in as much cream as your model will comfortably hold. Keep in mind that this will expand. The Busch Universal can hold 3/4 a gallon of cream.
Pour the cream into your mixer. To learn more about the Bosch & why I love it go here.
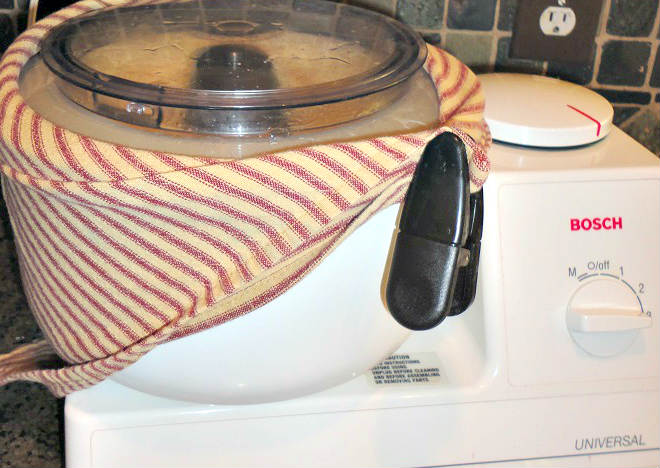
Put the lid on your mixer & wrap it in a towel. This way you won’t spend the next hour of your life cleaning buttermilk off the backsplash, counters, and floor of the kitchen.
Turn the mixer on high and wait for the butter to “come.” Yes, that is the correct word traditionally used when making butter.
This takes about 5 minutes with my mixer.
The cream will go through several stages before the butter breaks or comes.
- It will double in size into whipped cream.
- Then it will deflate.
- It will get big again.
- Then it will get clumpy like the whole batch has spoiled and you’ve ruined it.
Don’t lose hope, you are almost there!
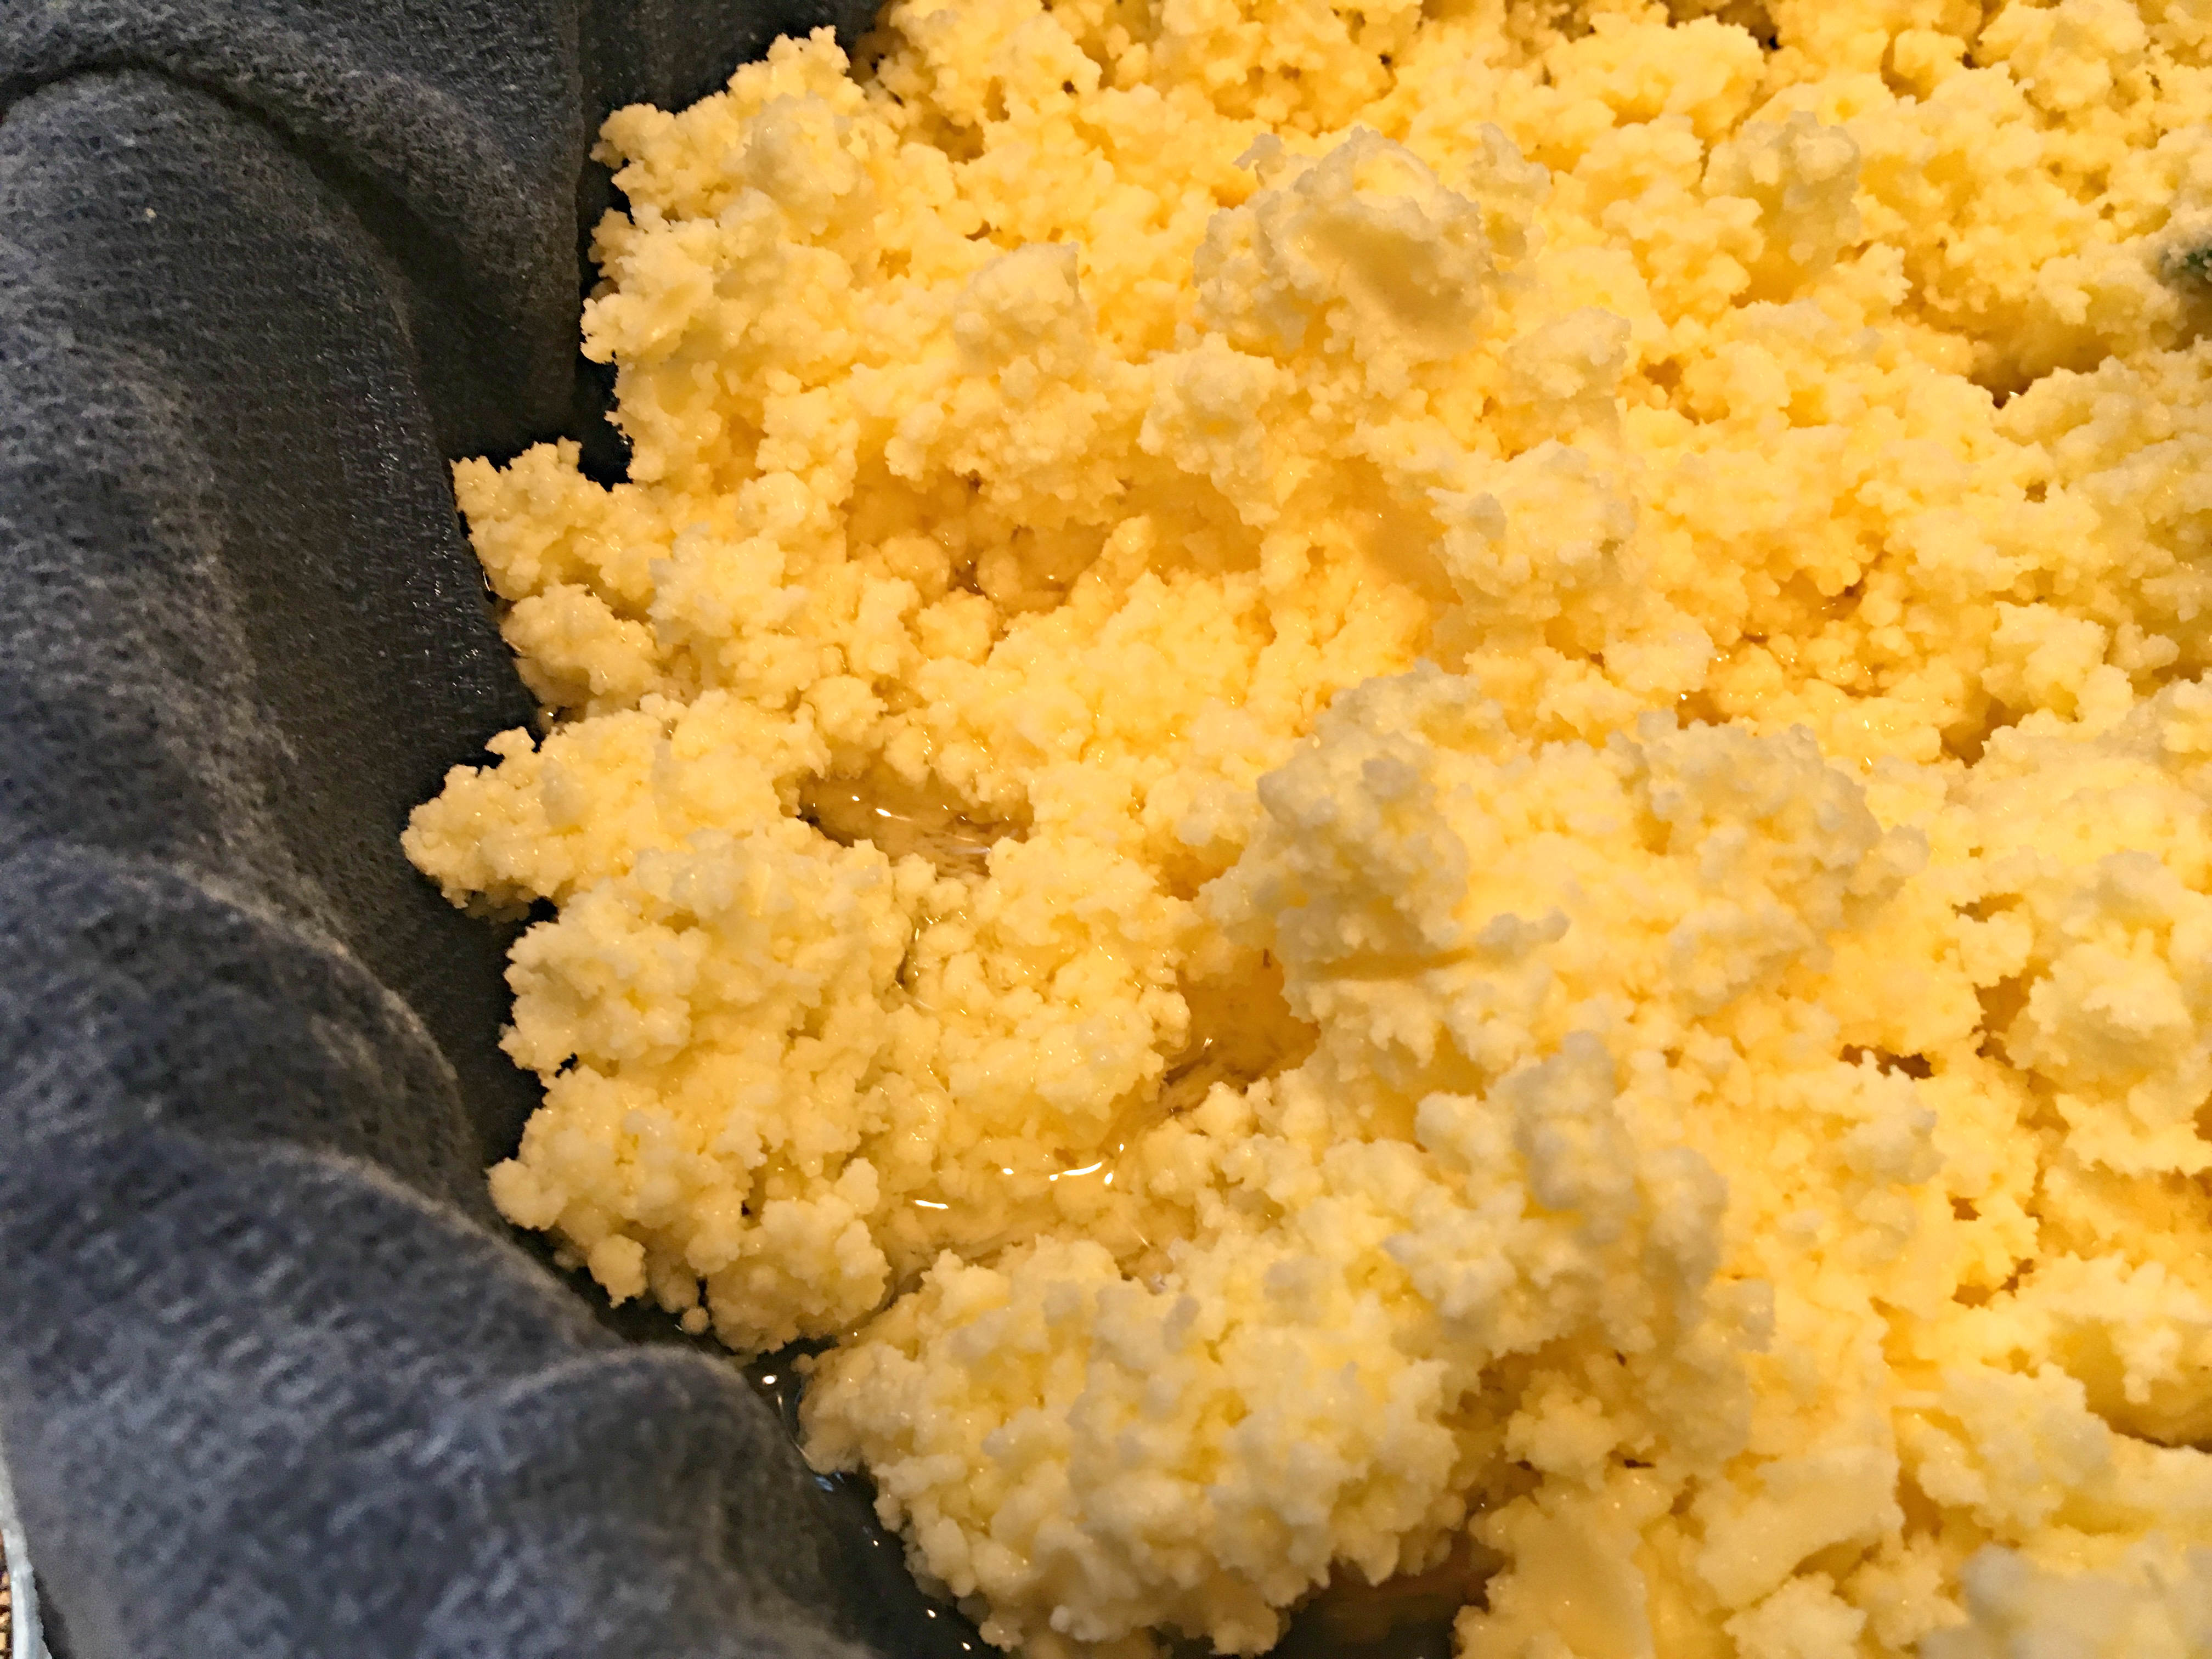
Suddenly, your mixer will sound different. Look into the top of your mixer and you will see yellow clumps and a thin liquid splashing around in circles. Congratulations!
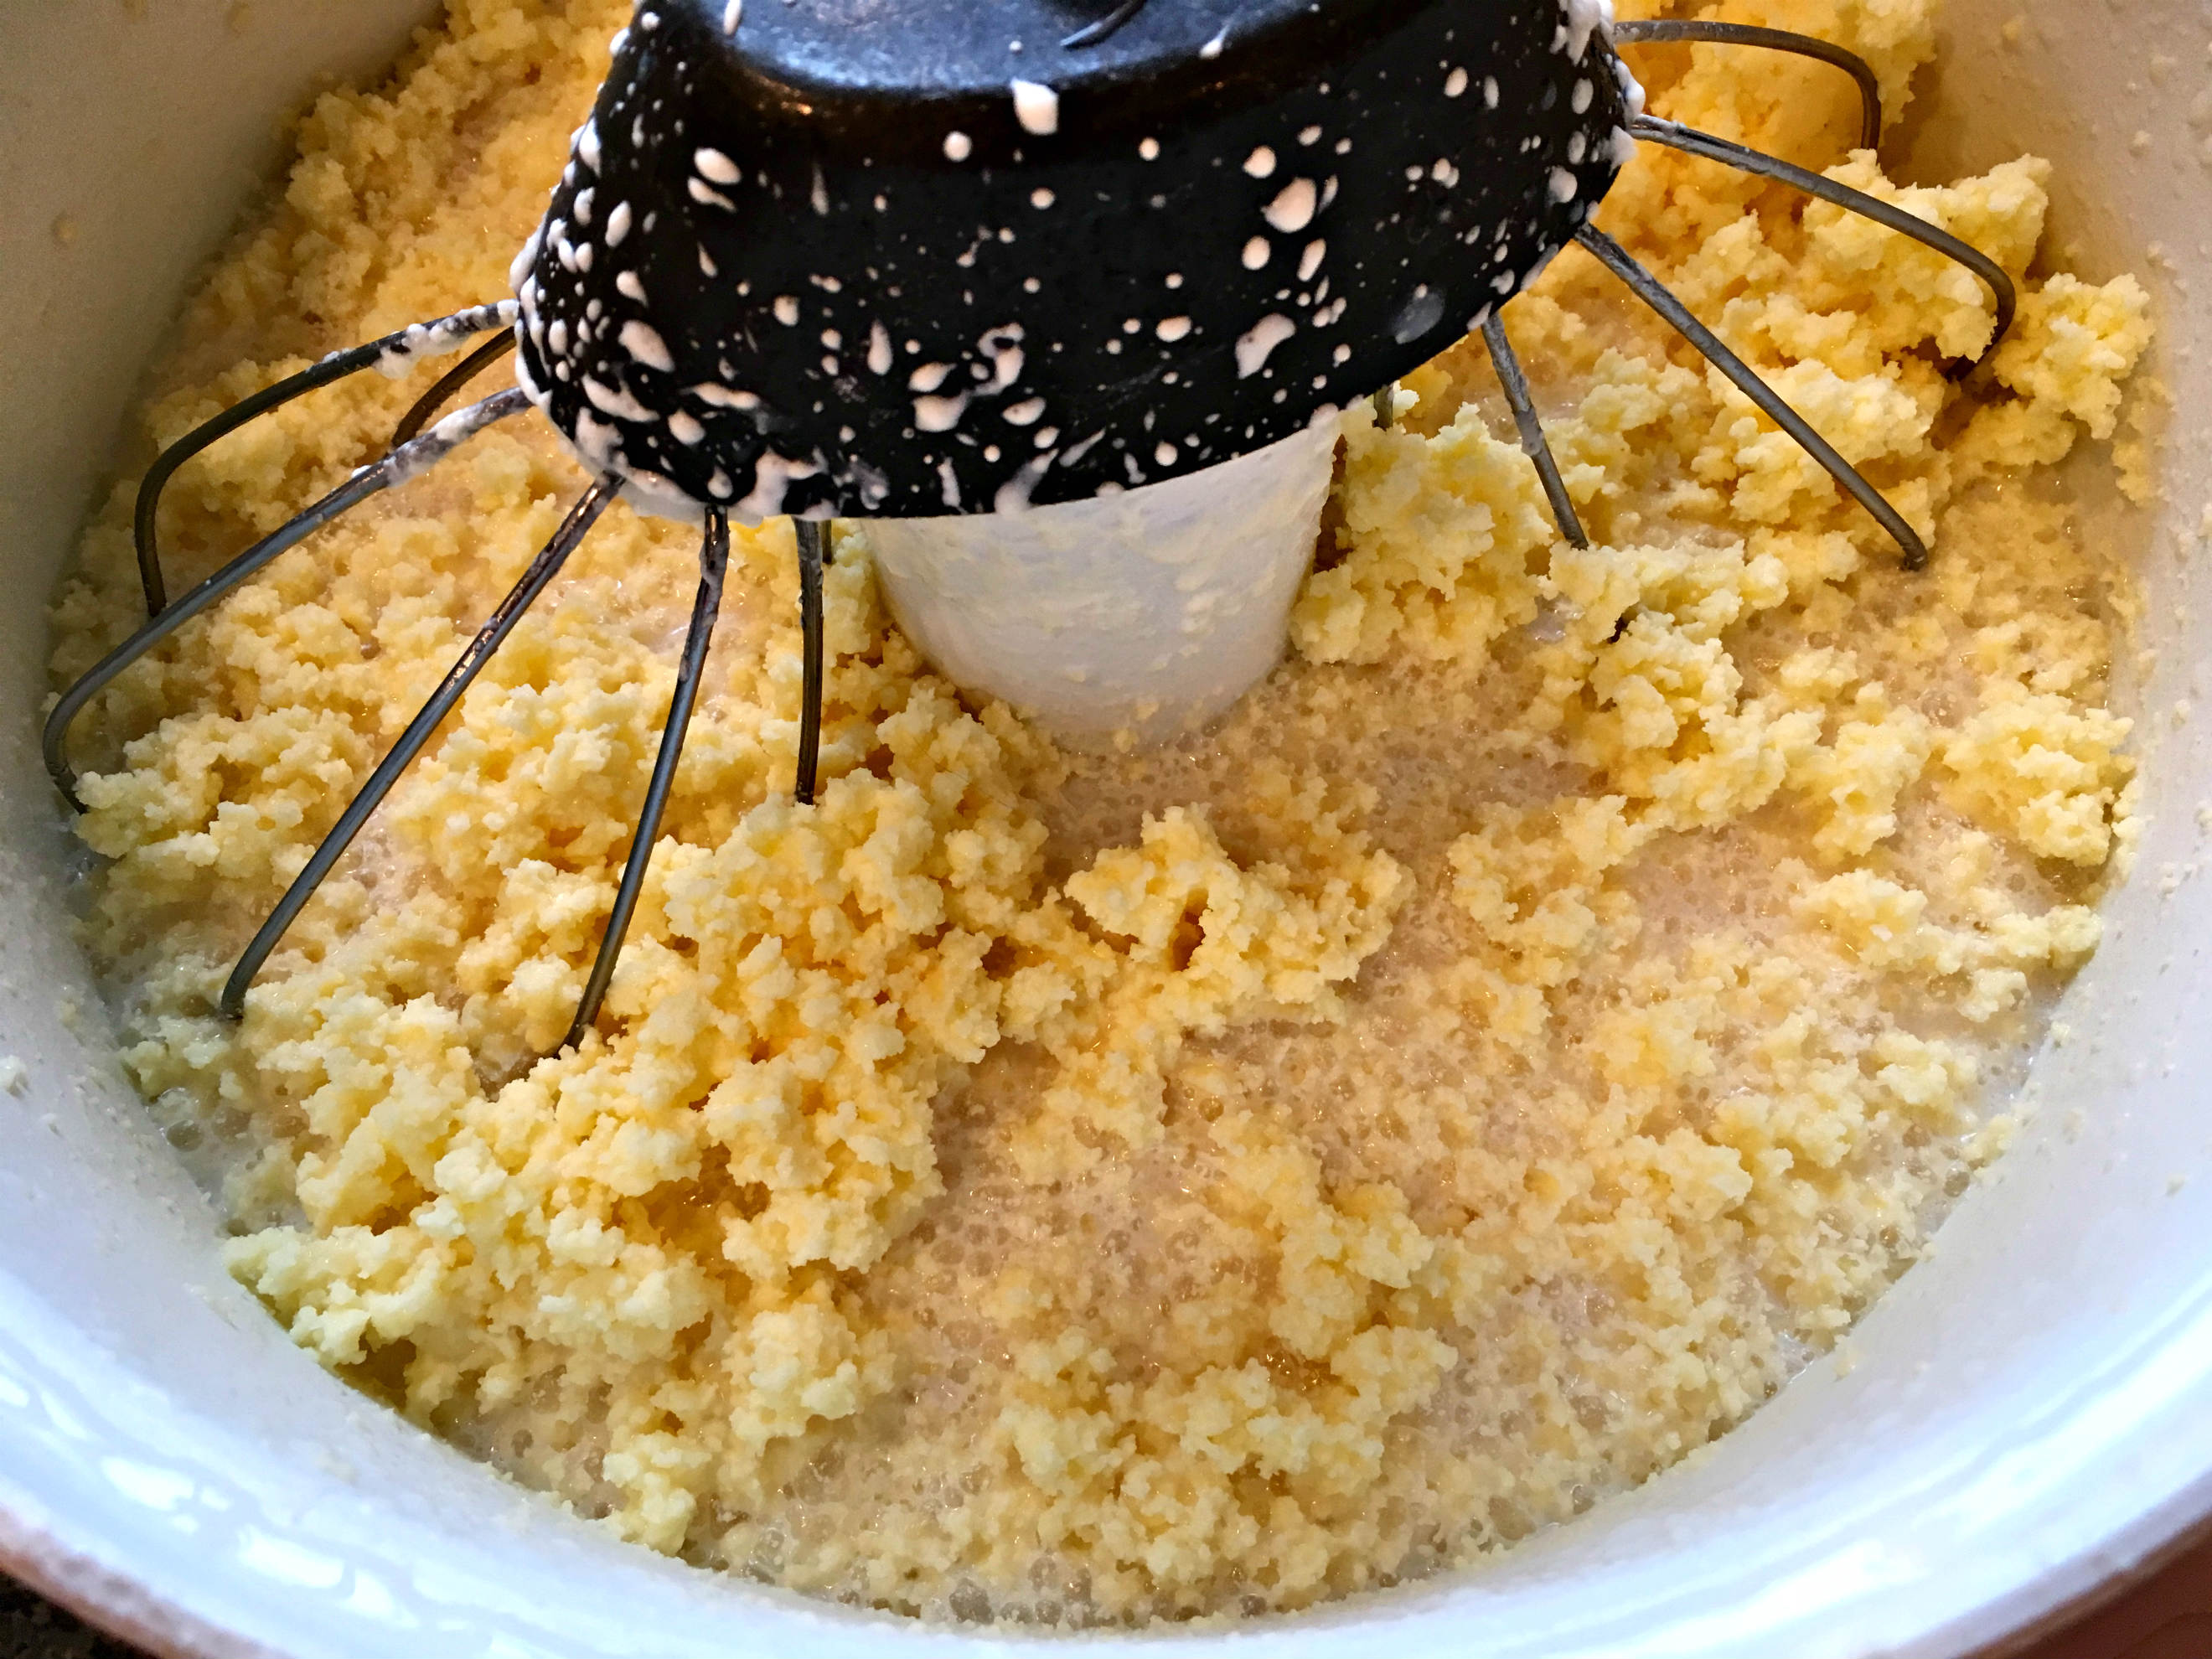
You made butter!
See the bright yellow butter clumps swimming in the thin creamy liquid? The yellow clumps are the butter. The thin liquid is buttermilk. You not only made butter – you made buttermilk too.
Technically, you didn’t really “make” it. I’d say it was in there the entire time, you just transformed the cream into butter and buttermilk.
It is best to catch the butter and stop the “churning” when the clumps are the size of peas. If you happen to be in the bathroom or upstairs, or outside when your butter “comes” and do not turn off the mixer your butter clumps will eventually become one giant clump that will be impossible difficult to wash.
Don’t be like me. Turn off the “churning” as soon as you see yellow butter the size of peas. You will be much happier during the “washing” step.
#2 STRAIN OFF THE BUTTERMILK
The next step is to strain off the buttermilk.
Place a lint-free towel (or a couple layers of cheesecloth) into a large colander.
Next place that colander into a bowl. The purpose of the bowl is to catch the buttermilk.
Once everything is all set pour the entire contents from your mixer into the towel.
When the buttermilk has stopped draining, move it to a sealed container and put it in the refrigerator for future use. Next, we need to wash the butter.
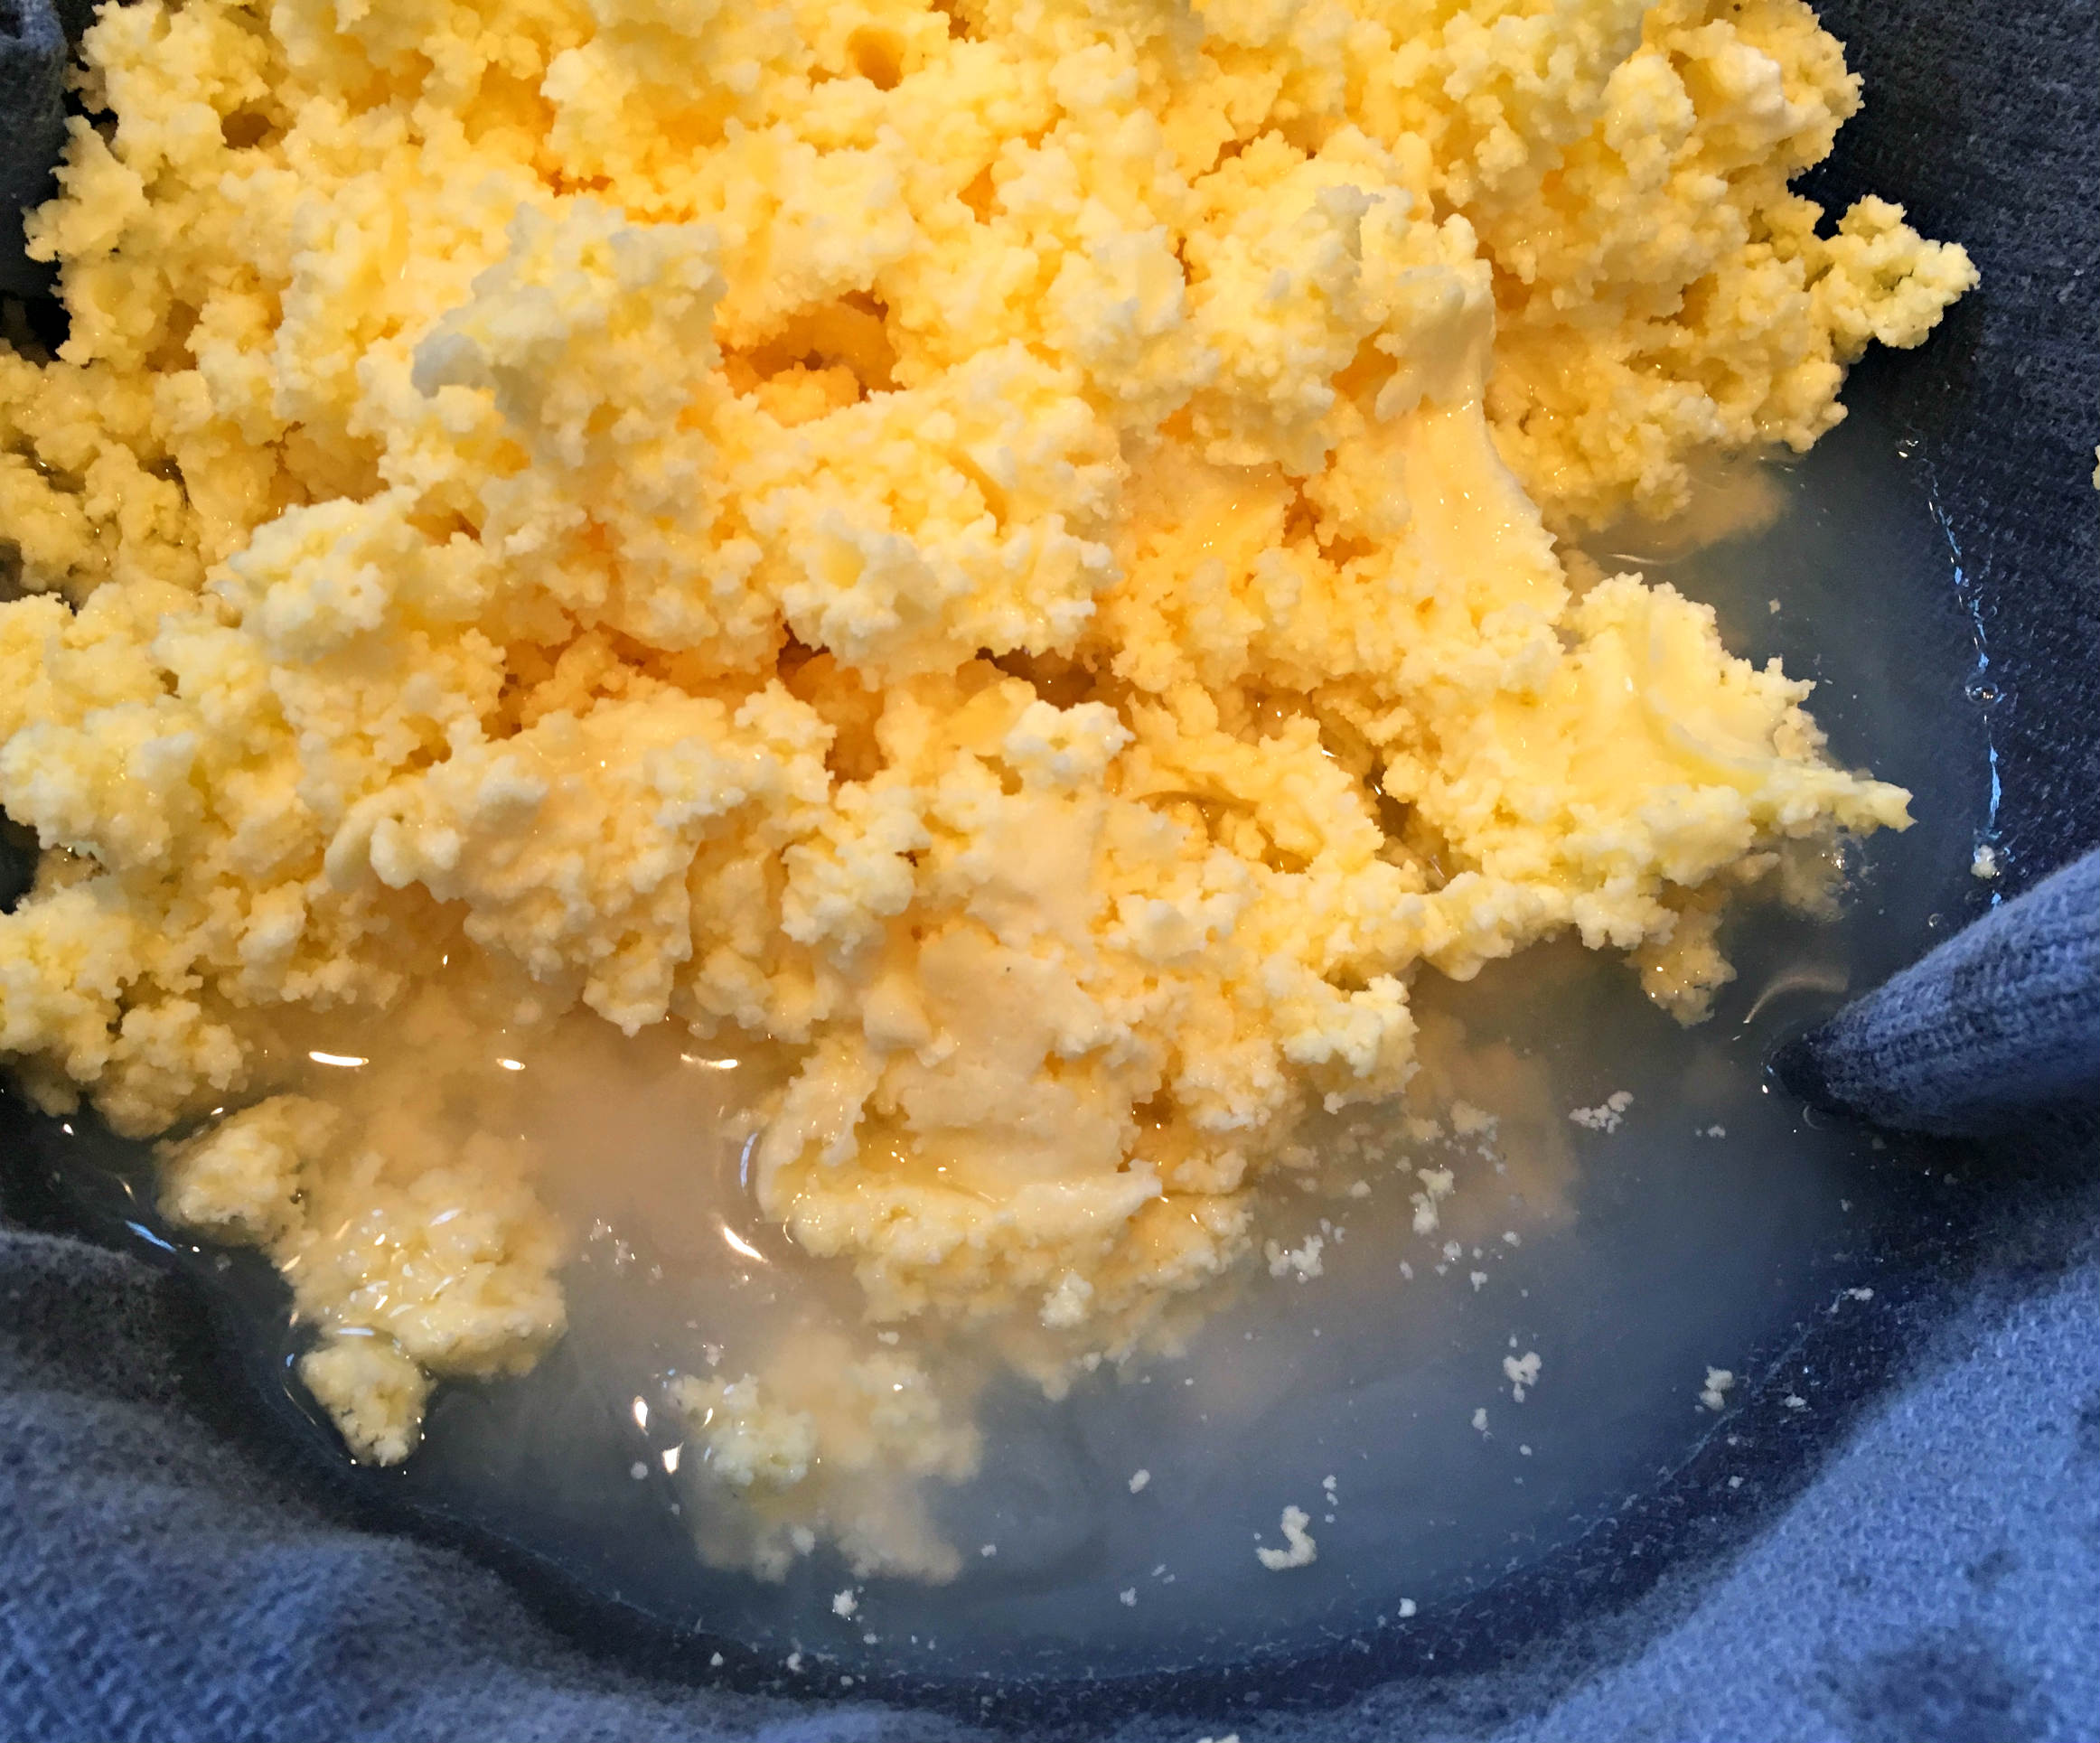
#3 WASH THE BUTTER
Even though you just strained off the majority of your buttermilk, there are still traces of it laced throughout your butter. If you don’t wash all the buttermilk off the butter, the buttermilk will cause your sweet butter to sour quickly.
To prevent this, all you need to do is rinse it well with cold water.
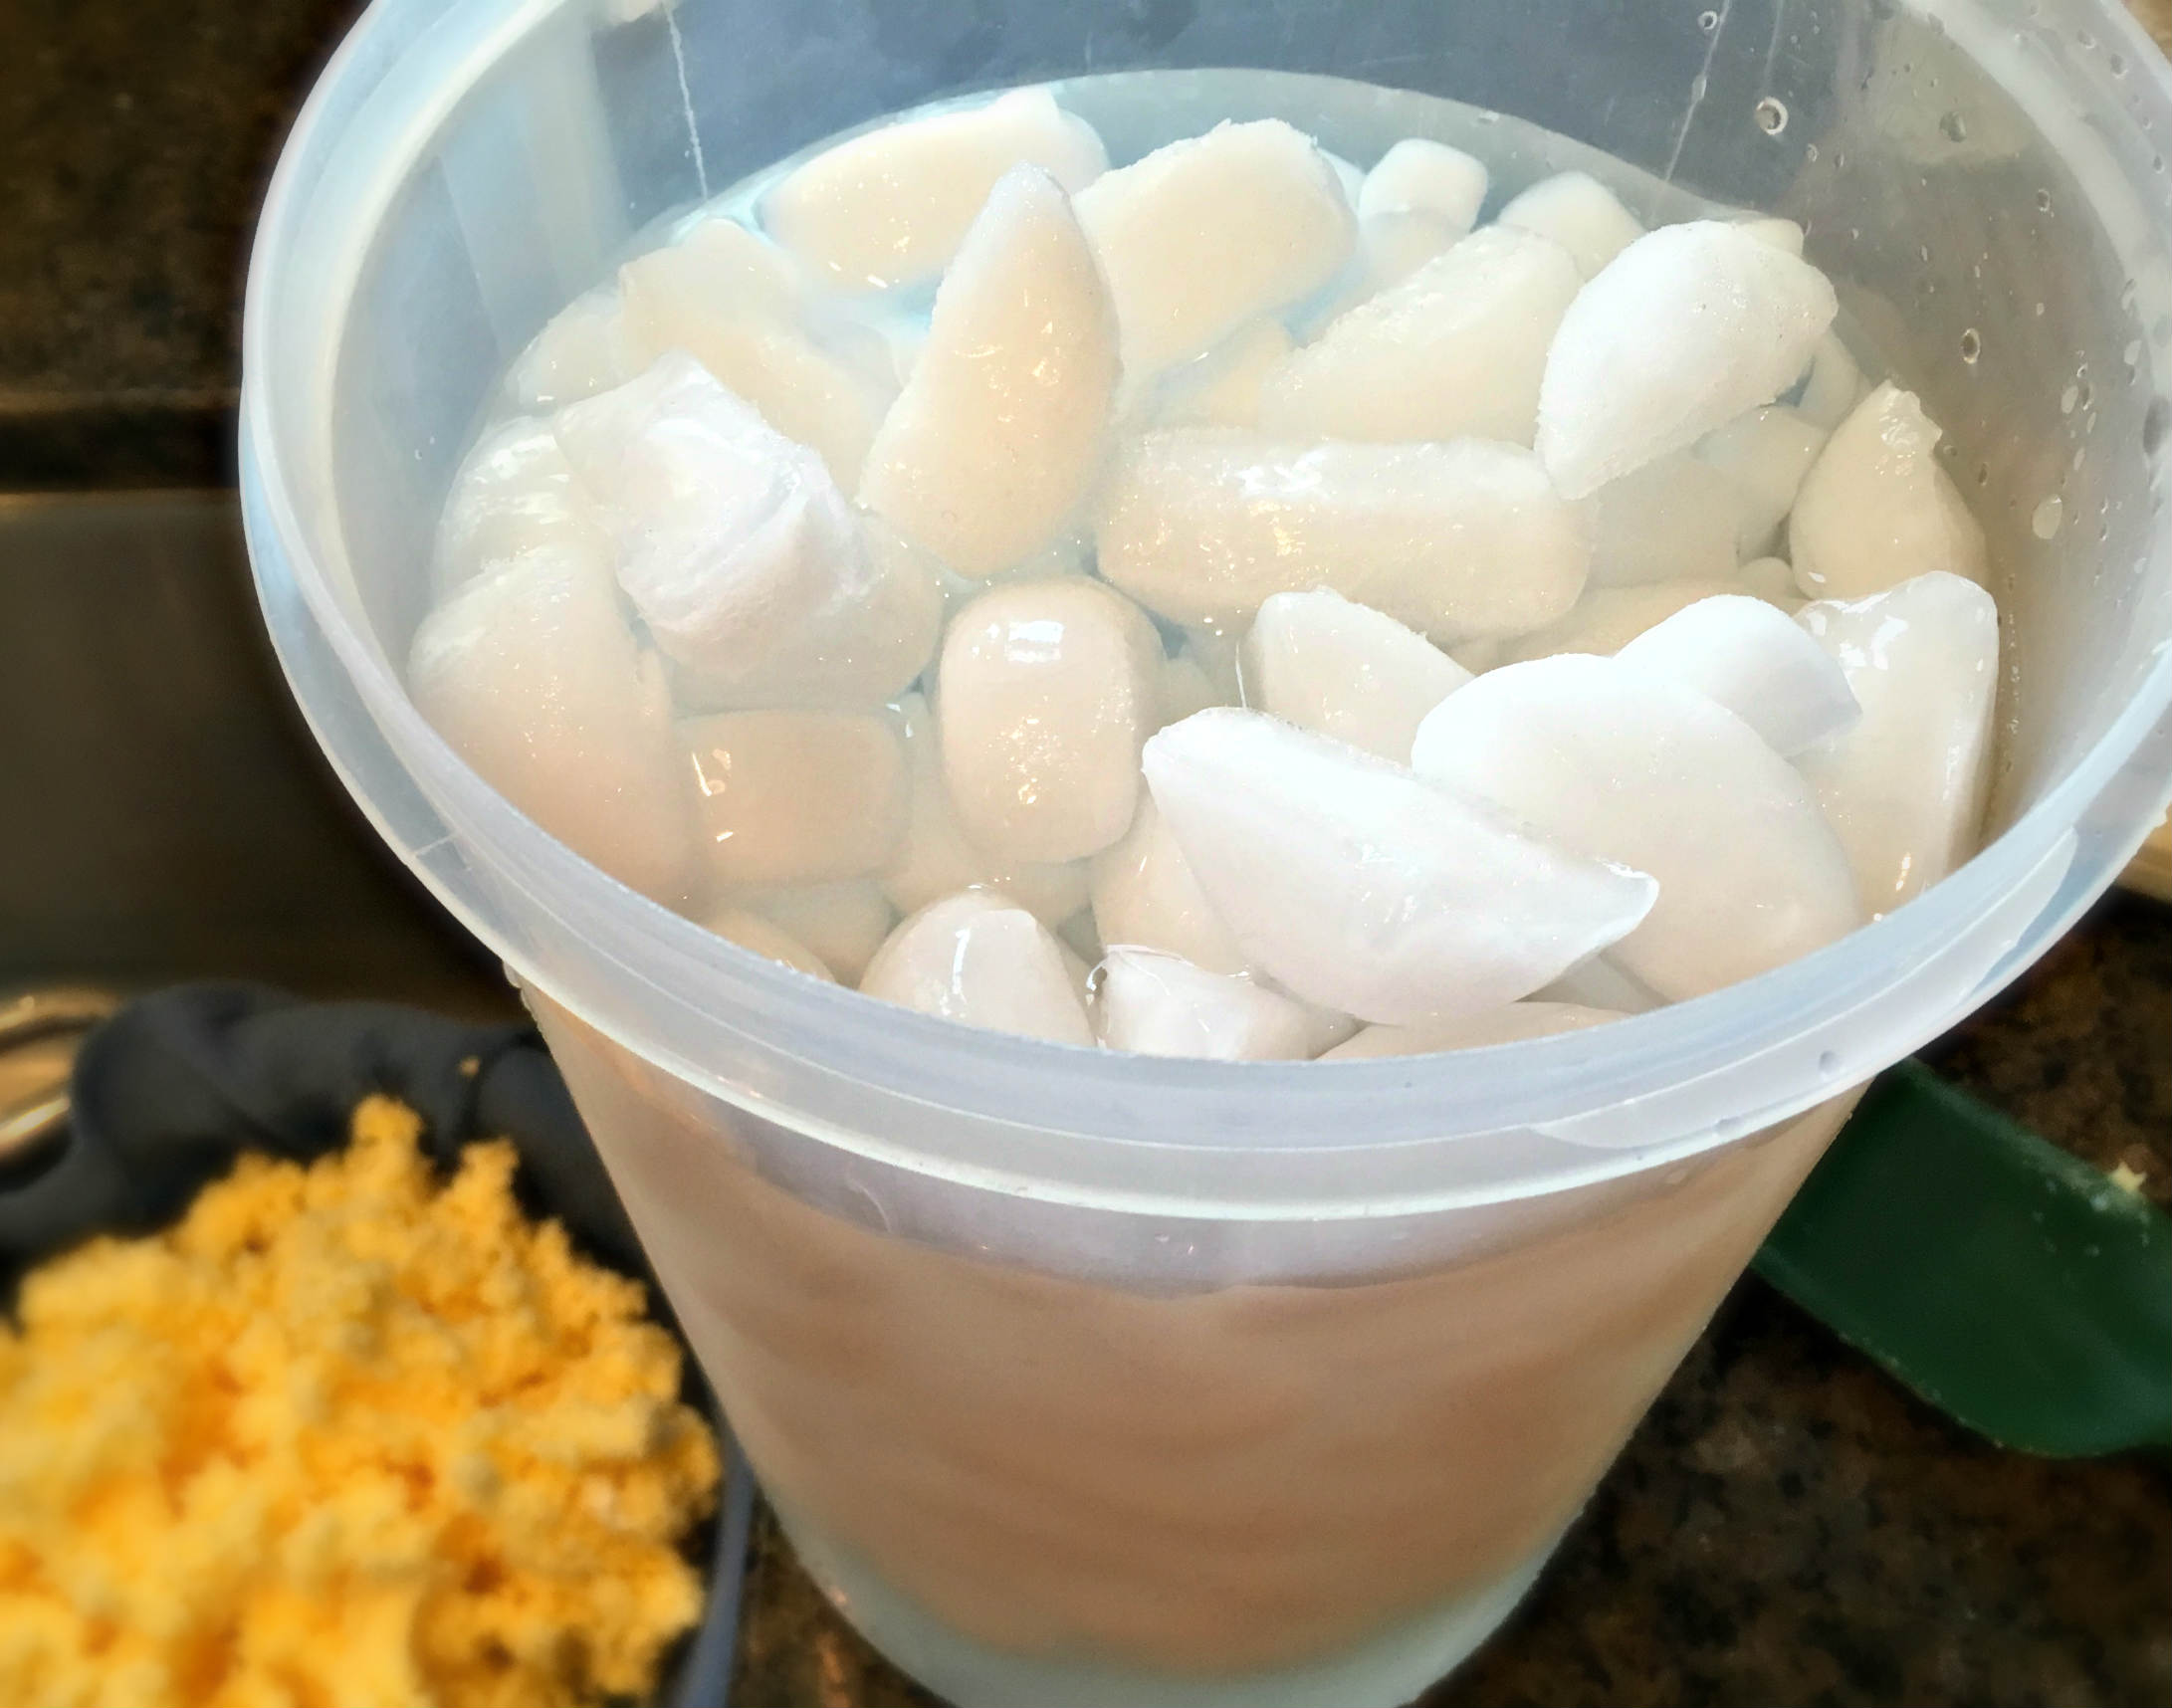
Grab a pitcher and fill it with ice, then cool water. Ice water will keep your butter firm. If you don’t use cold water the butter may melt and wash down your sink. That would make me cry. Please use cold water so I don’t have to cry.
Pour some of the ice water over the butter. See how cloudy the water is? That’s the buttermilk mixing with the water making it cloudy. We want to continue pouring fresh, clean, cold water on the butter to get all the buttermilk rinsed away.
Gently move the butter clumps around with a rubber spatula, wooden spoon or whatever else you have in your hand.
After the water drains through, pour more clean, ice water over the butter. The water will drain through again, and you pour some more clean, ice water over the butter again.
As long as your water turns cloudy after pouring it onto your butter, then there is still buttermilk lurking in there somewhere. Keep rinsing.
Continue this process until the liquid around the butter is clear. When the water stays clear – you know the butter is clean.
#4 DRY THE BUTTER
Time to dry the butter.
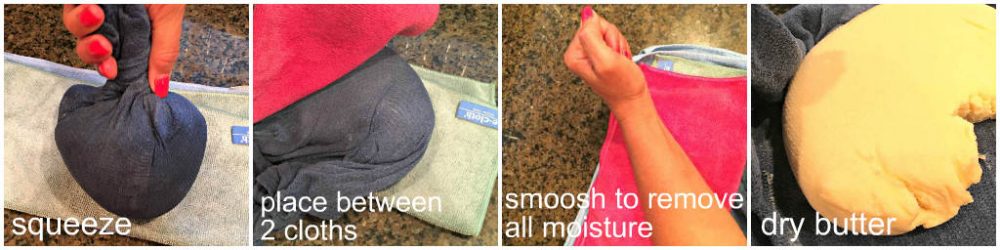
Next we need to squeeze all the water out. There is some water hanging around in that butter & it must go. We don’t want watery butter. Begin by twisting the towel or cheesecloth tightly around that hunk of butter and squish. Squeeze. Harder. Tighter. Put some muscle into it!
When you think you can’t get another drop out, put it on the counter between 2 towels.
Take your hairy arm and use your elbow & forearm to mash, mush, squash, push, keep on mashing it until both towels are wet. Then turn the towels so you have a dry spot, turn the butter clump and continue mashing & squishing that butter.
Get all the moisture out.
#5 SALT THE BUTTER
The last step is to salt the butter if desired.
I am going to salt my butter. You could take this ball of butter and store it & use it & love it. But, if you like salted butter, this is when you salt it.
There are a couple of reasons you may want to add salt. One is for taste. I like salted butter. I prefer to use salted butter. I prefer to cook with salted butter. The second reason you may want to salt your butter is to increase the shelf life. Unsalted butter will last a couple of weeks in the fridge. Salted butter will last a month or longer. Salt is a preservative. My salted butter will stay fresh and taste great sitting on the counter room temperature for almost 2 weeks.
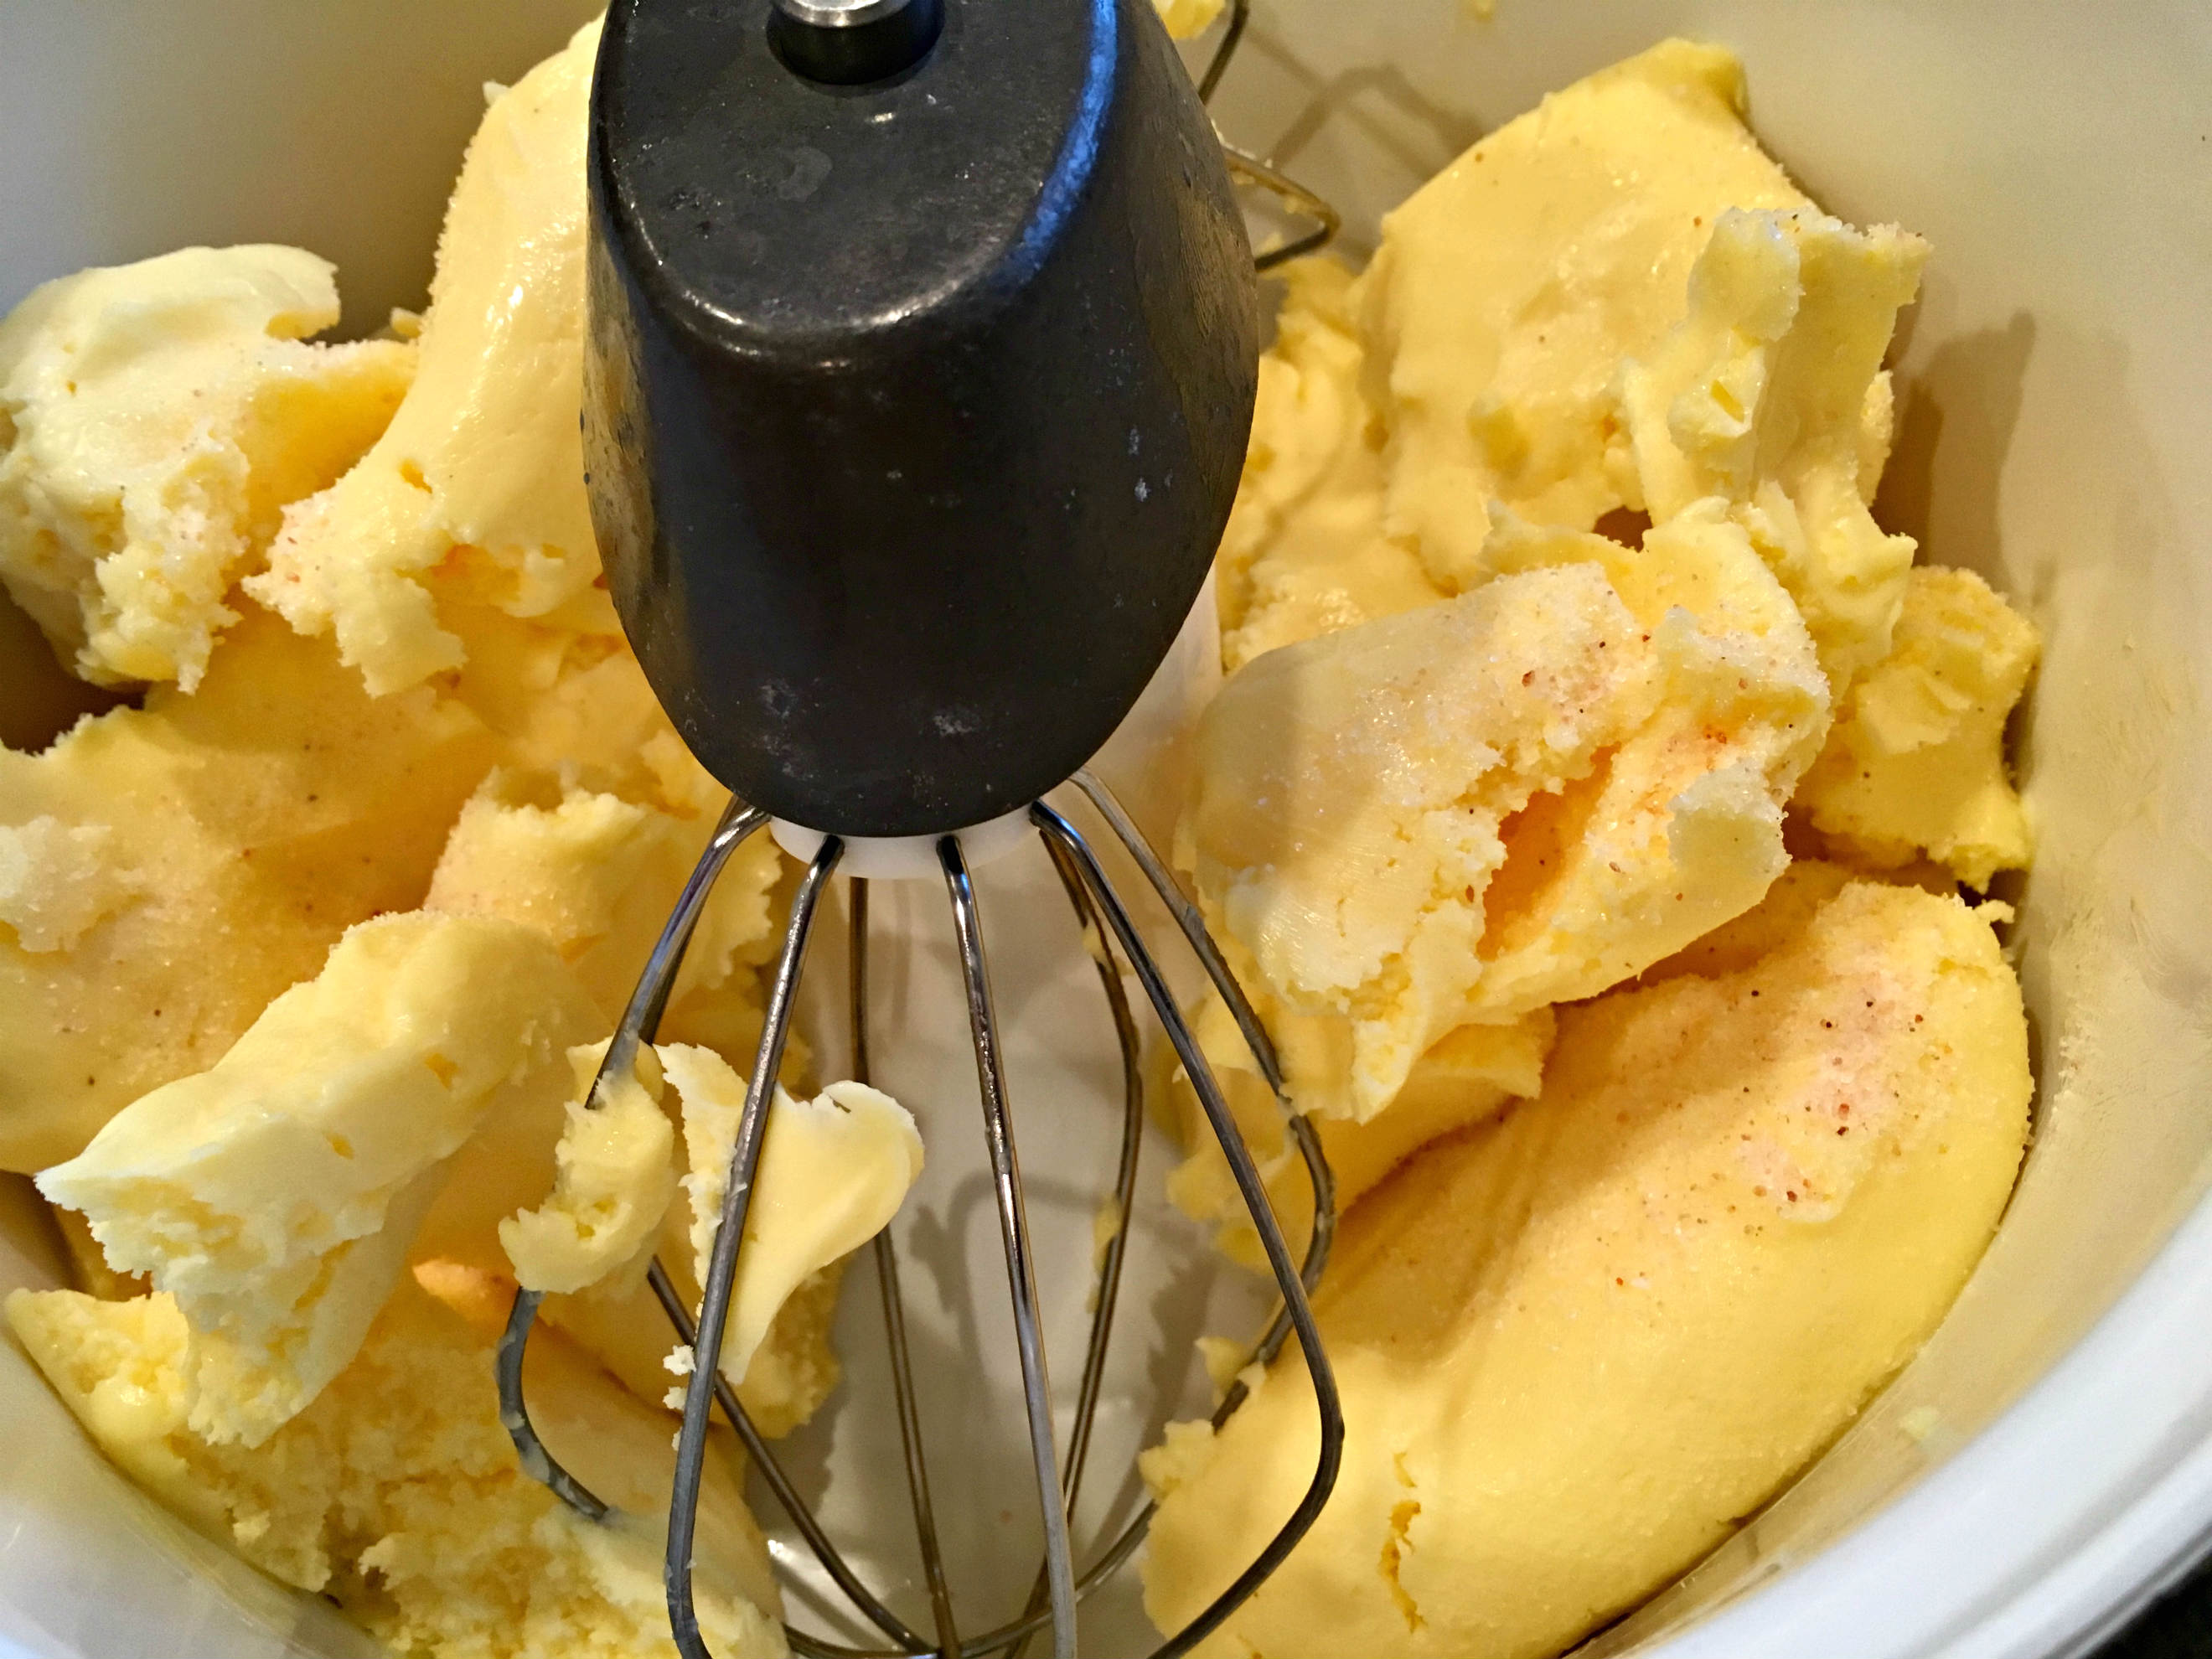
To easily mix salt into the butter I am going to use my Bosch Mixer again (the one I used to make the butter).
After the mixer is good and clean (and dry) add your fresh (room temperature) butter to the bowl. To make this easier on the mixer be sure your butter is room temperature and broken into smaller pieces.
I add 1 teaspoon of salt for each pound of butter.
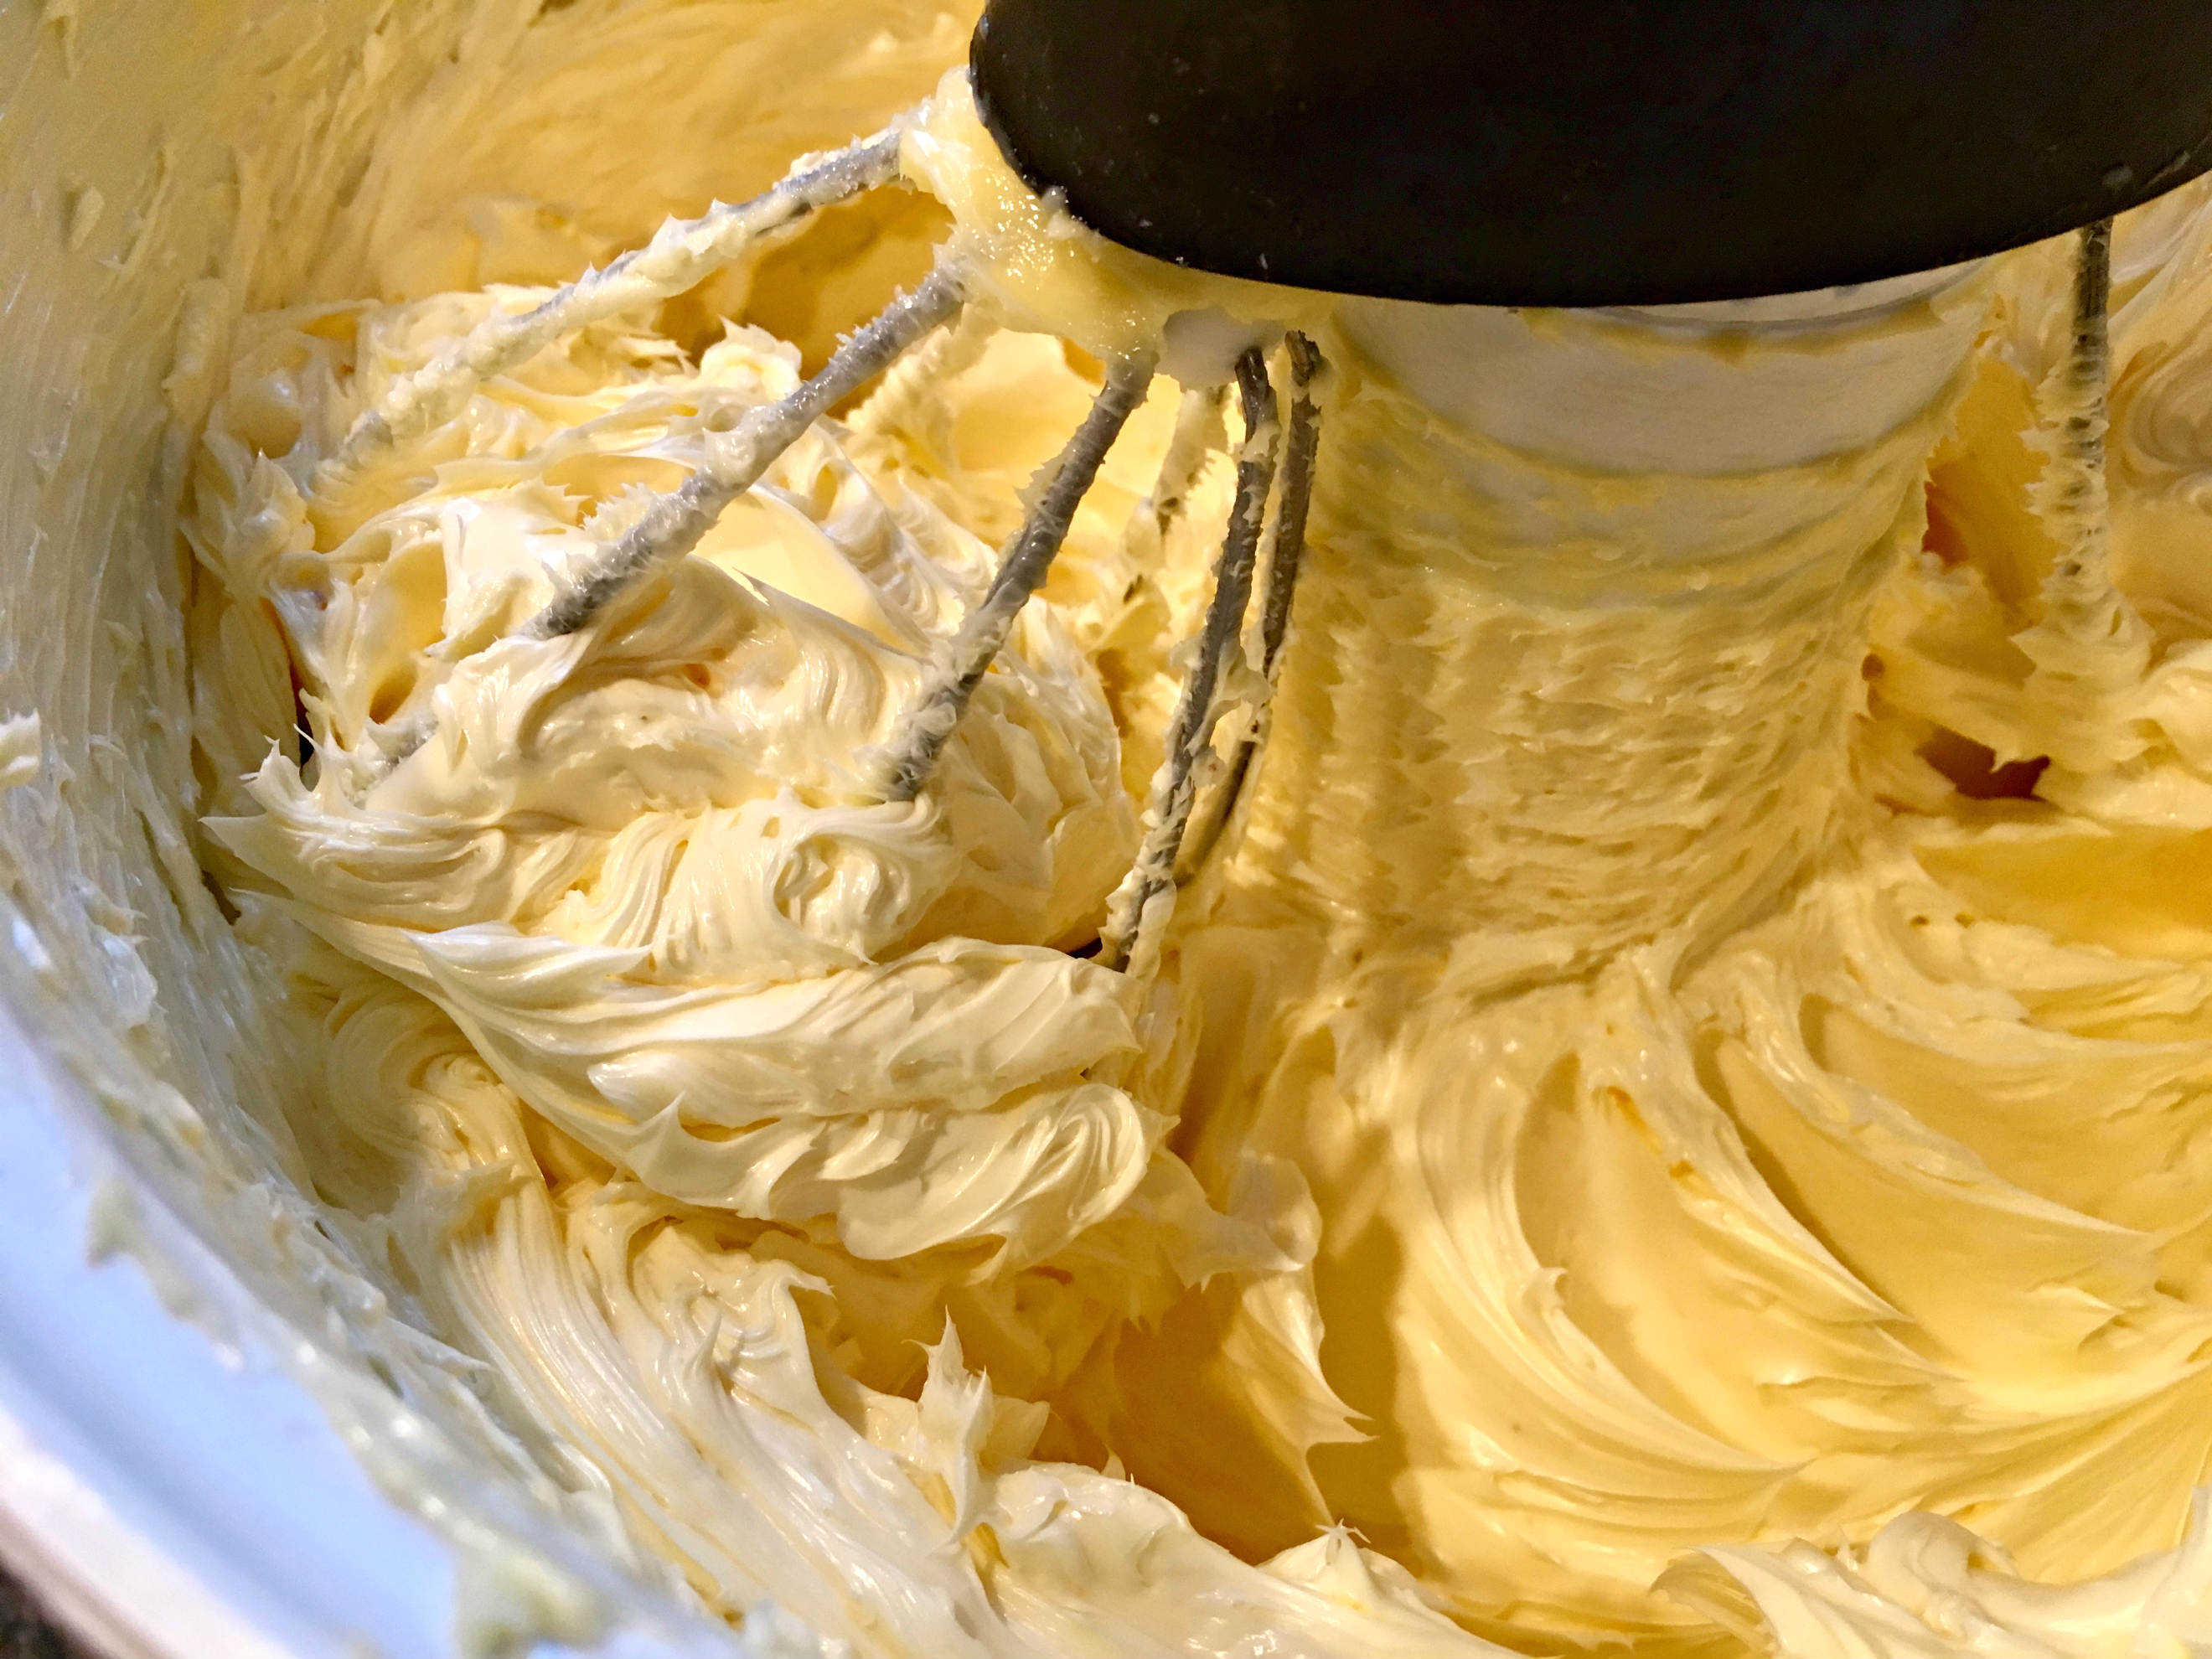
Whip it so the salt is evenly distributed & the butter is ready for storage.
STORE THE BUTTER
I wanted sticks. I wanted to be able to grab 2 sticks of butter. Unfortunately, I could not find butter molds for sale anywhere that would give me sticks. I could get cow shaped butter, flower shaped butter, pig-shaped butter, rectangular shaped butter. There were dozens of butter molds, but no sticks.
I had to be creative.
If you want to have your butter stored in 1 cup portions (the equivalent of 2 sticks) you have options:
- Use a kitchen scale. Weigh 8 oz of butter & wrap it up in a ball.
- Cover the scale with plastic wrap
- Add 8 oz butter to the scale (in the center of the plastic)
- Wrap it into a ball
- Use a measuring cup.

- Line the cup with plastic wrap
- Fill the cup with butter
- Wrap it in a ball
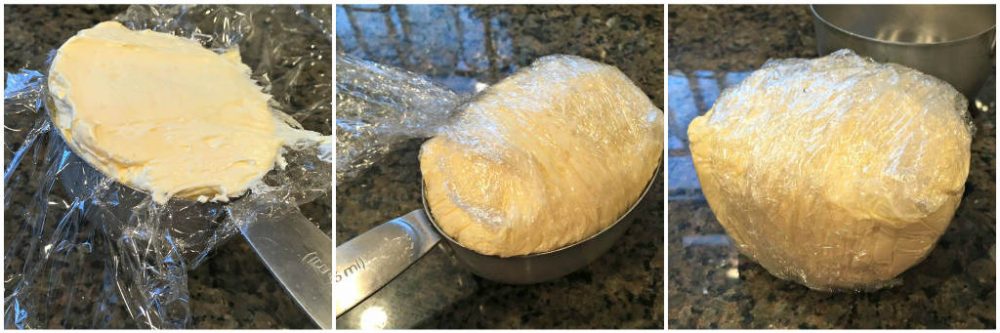
Either method will net you a whole bunch of 1 cup balls of butter.
This is the perfect measurement for almost every recipe I own. If I need 1 cup (2 sticks) of butter I toss in 1 ball of butter. If I need 1/2 cup (1 stick) I just cut the butter ball in 1/2.
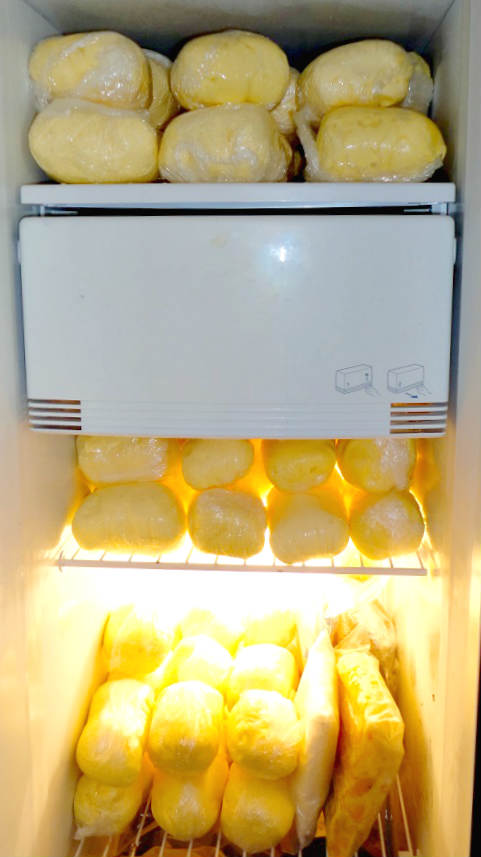
Last, move the butter to the refrigerator & use within a few weeks or freeze for up to 6 months.
Be sure to join the email list (for free) here.
Learn more about becoming a member here.
What’s with the Memberships?
For those who want it all!
- Want to clean up your diet & get healthy?
- Renegade real food meals, groceries from your yard, bread-making like your great-grandma, videos, insider tips and more.
Joining is cheap & your pants will thank you. – Learn more here.
XO,
CJ

Use a churn, food processor or mixer (with whips) to make butter. To use a mixer, insert the whips & pour in as much cream as your model will comfortably hold. Keep in mind that this will expand. The Busch Universal can hold 3/4 a gallon of cream.
Put the lid on your mixer & wrap it in a towel. Turn the mixer on high and wait for the butter to come. This takes about 5 minutes with my mixer. You will notice bright yellow butter clumps swimming in the thin creamy liquid. The yellow clumps are the butter. The thin liquid is buttermilk.
Put a bowl under a colander to catch the buttermilk. Now line the colander with a lint-free towel. Pour the butter and buttermilk into a colander lined with the towel. When the buttermilk has stopped draining, move it to a sealed container and put it in the refrigerator for future use.
Grab a pitcher and fill it with ice, then cool water. Pour fresh, clean, cold water on the butter to get all the buttermilk rinsed away. Gently move the butter clumps around with a spoon or spatula. After the water drains through, continue pouring ice water over the butter until the liquid around the butter is clear. When the water stays clear – you know the butter is clean.
Next, we need to squeeze all the water out. Begin by twisting the towel or cheesecloth tightly around the hunk of butter and squish. When you think you can’t get another drop out, put it on the counter between 2 towels. Apply pressure to remove all moisture.
To salt butter (optional): Clean (and dry) the mixer used to make the butter. Add (room temperature) butter to the bowl. To make this easier on the mixer be sure your butter is room temperature and broken into smaller pieces. Add 1 teaspoon of salt for each pound of butter. Whip it so the salt is evenly distributed & the butter is ready for storage.
Divide butter into 1 cup portions and wrap tightly in plastic wrap.
How to measure butter:
- Use a kitchen scale. Weigh 8 oz of butter & wrap it up in a ball.
- Use a measuring cup.
Last, move the butter to the refrigerator & use within a few weeks or freeze for up to 6 months.


Christi
10/12/2016Great tutorial! Can I do the same with goats milk?
Candi
10/13/2016Yes and no. You should check with someone who has more experience in the goat world. I can tell you what I was told by my friend Sonia (she has 200 goats). When I was deciding between cow and goat she was my research department. My understanding is that if you want the cream from goats milk you will need a separator. Additionally, my friend told me that although she is able to get some cream from her goats, she advised me to get a cow if I wanted lots of cream.
Hope this helps!
Anne Miller
02/13/2017We love to render our butter into ghee. Can I take it straight from the colander to the pot?
Candi
02/13/2017Good question – I would rinse it the butter well & dry it & then throw it into the rendering pot. This will skip the salting step so you’ll need to salt it if you want your ghee salted.
Fun!
-Candi