
How to milk a cow with an electric milker.
I am not an expert on milking. I have made my share of mistakes and then some (sorry Faith). While I was making all those mistakes, I was searching the web for some information, pictures, details. I couldn’t find straightforward, step-by-step, instructions for the girl who has never even touched a cow before. I needed “milking for dummies” with pictures. I had never before heard the words: bucket milker, pulsator, vacuum pump, or claw. Claw? Are we talking about a cat or a cow?
So, if there happens to be anyone out there, like me, who wants to learn how to milk a cow, you have come to the right place!
I have milked by hand.
I have milked with a portable milk pump.
I have milked several cows and even some goats.
I currently have a vacuum-pump hard-wired in our barn.
Whether you are using a portable milk pump, bucket milker, or a big mamma-jamma that is installed permanently in a building, the parts are basically the same and the process is the same. This is a somewhat long post, however, this entire (milking) process only takes about 6 minutes.
Grab a beverage & settle in and I’ll show you how we milk our girl.
First, you need a location to milk your cow.
We are soooooo lucky to have this little barn that we use as our “milking parlor.” When you are hand milking – you can do it anywhere. We have hand milked in the run-in, in the field, in the paddock. To hand milk, you just need a bucket, hands & a cow.
To use an electric milking system you are going to need a bit more of a dedicated location. It will make things a bit easier if you have electricity and hot water available too.
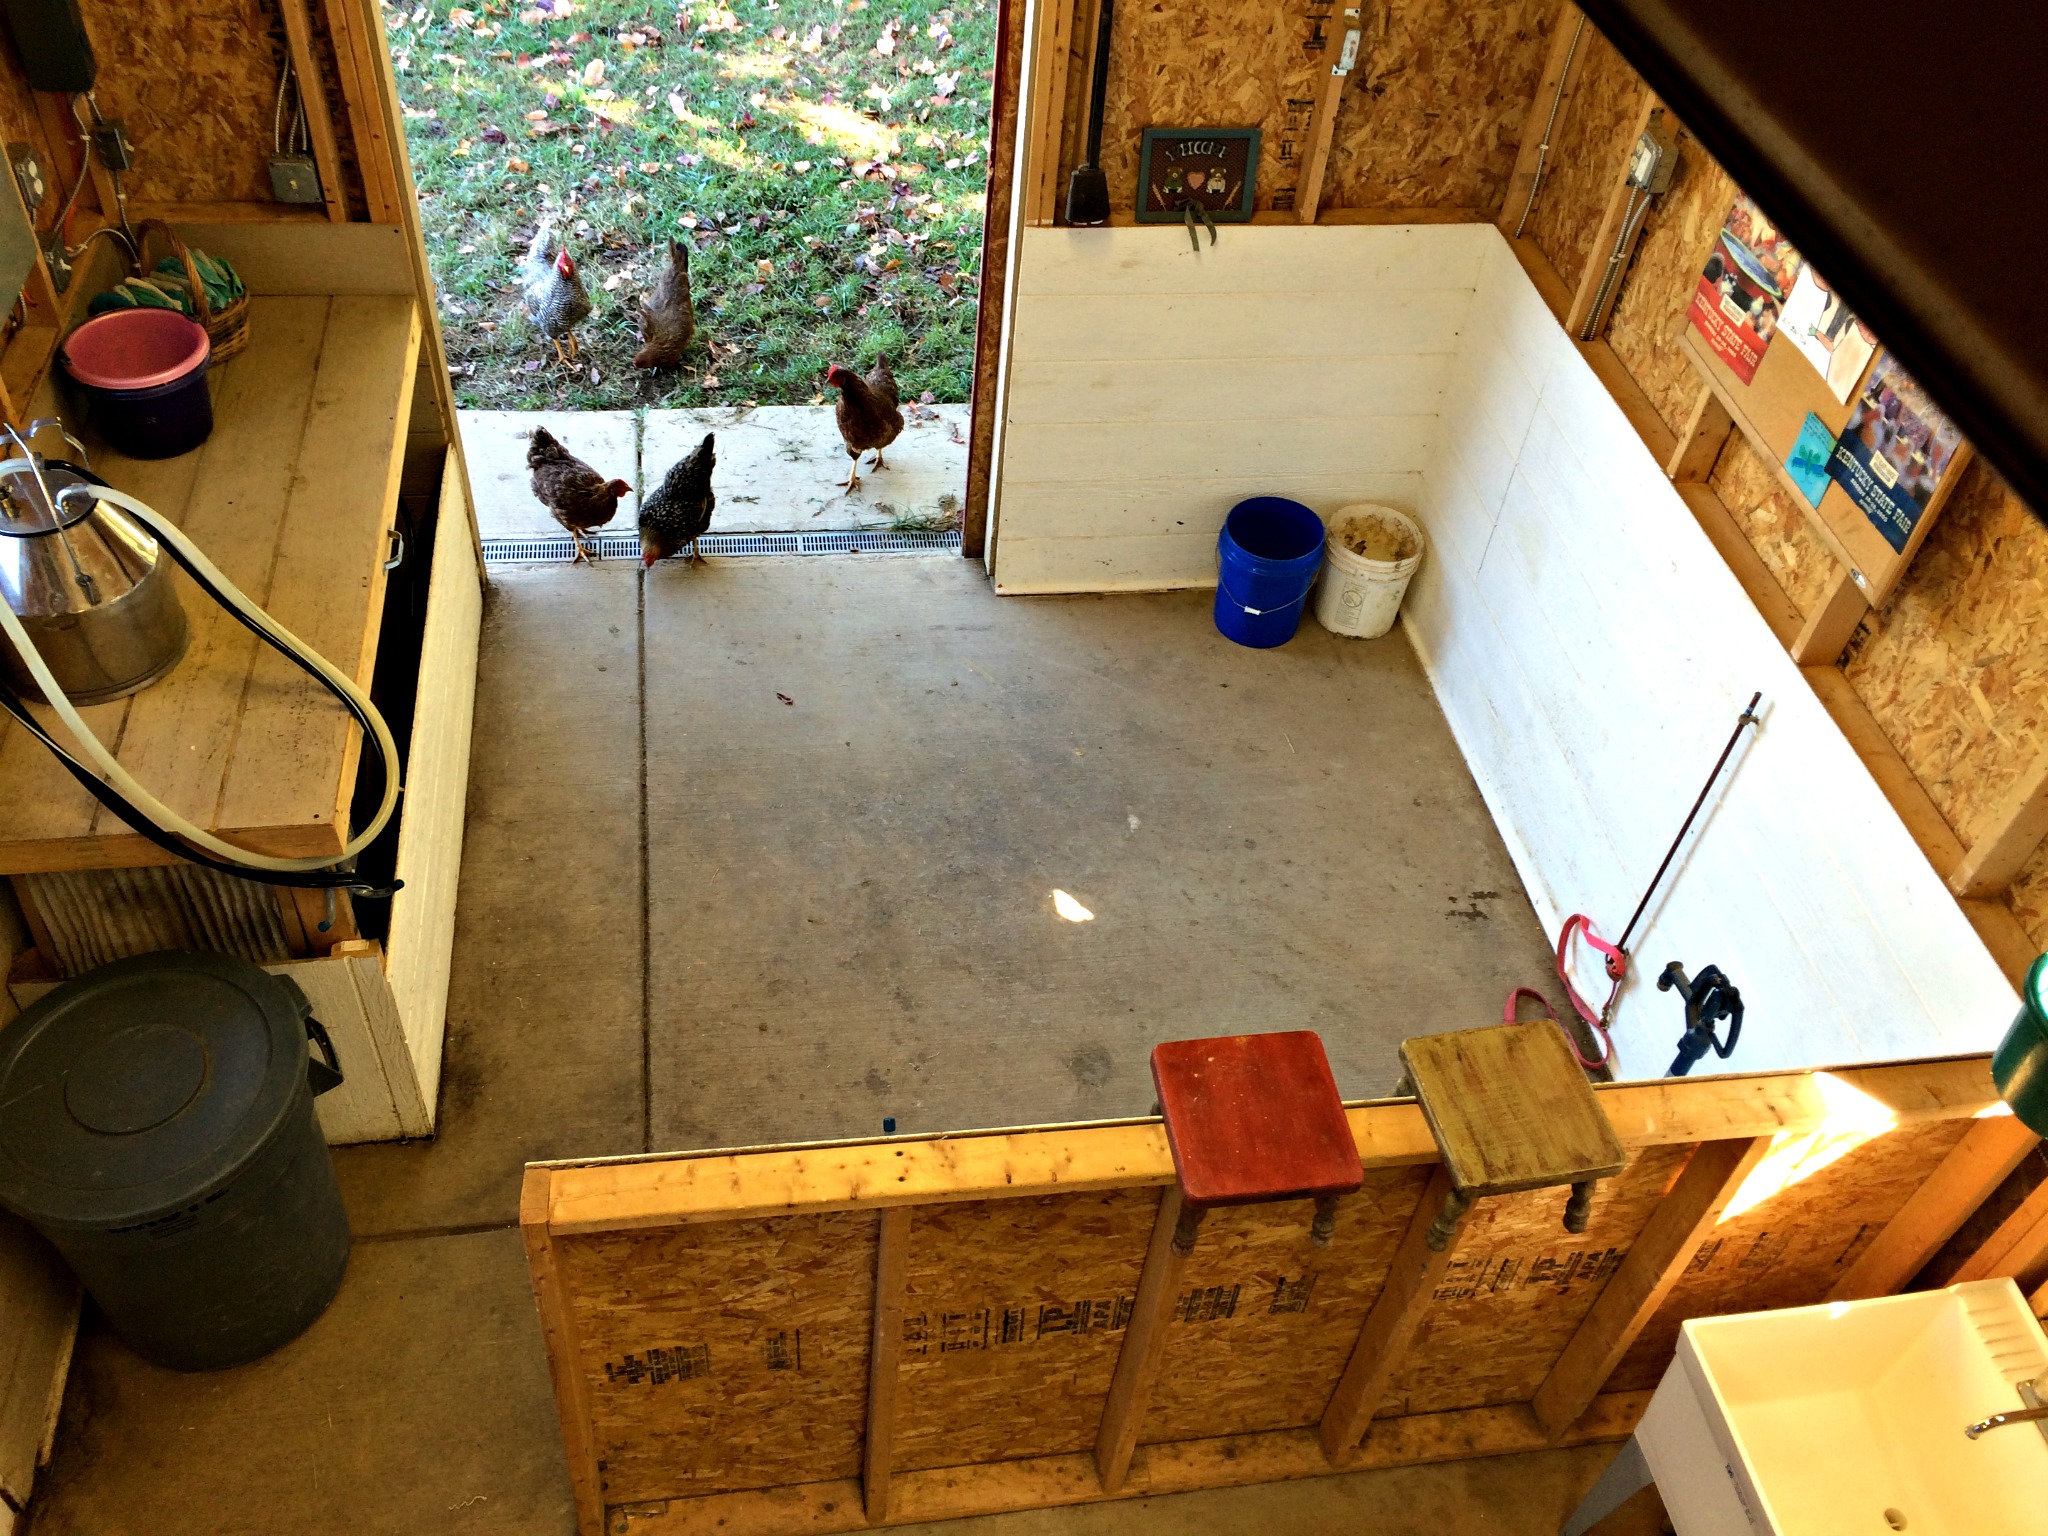
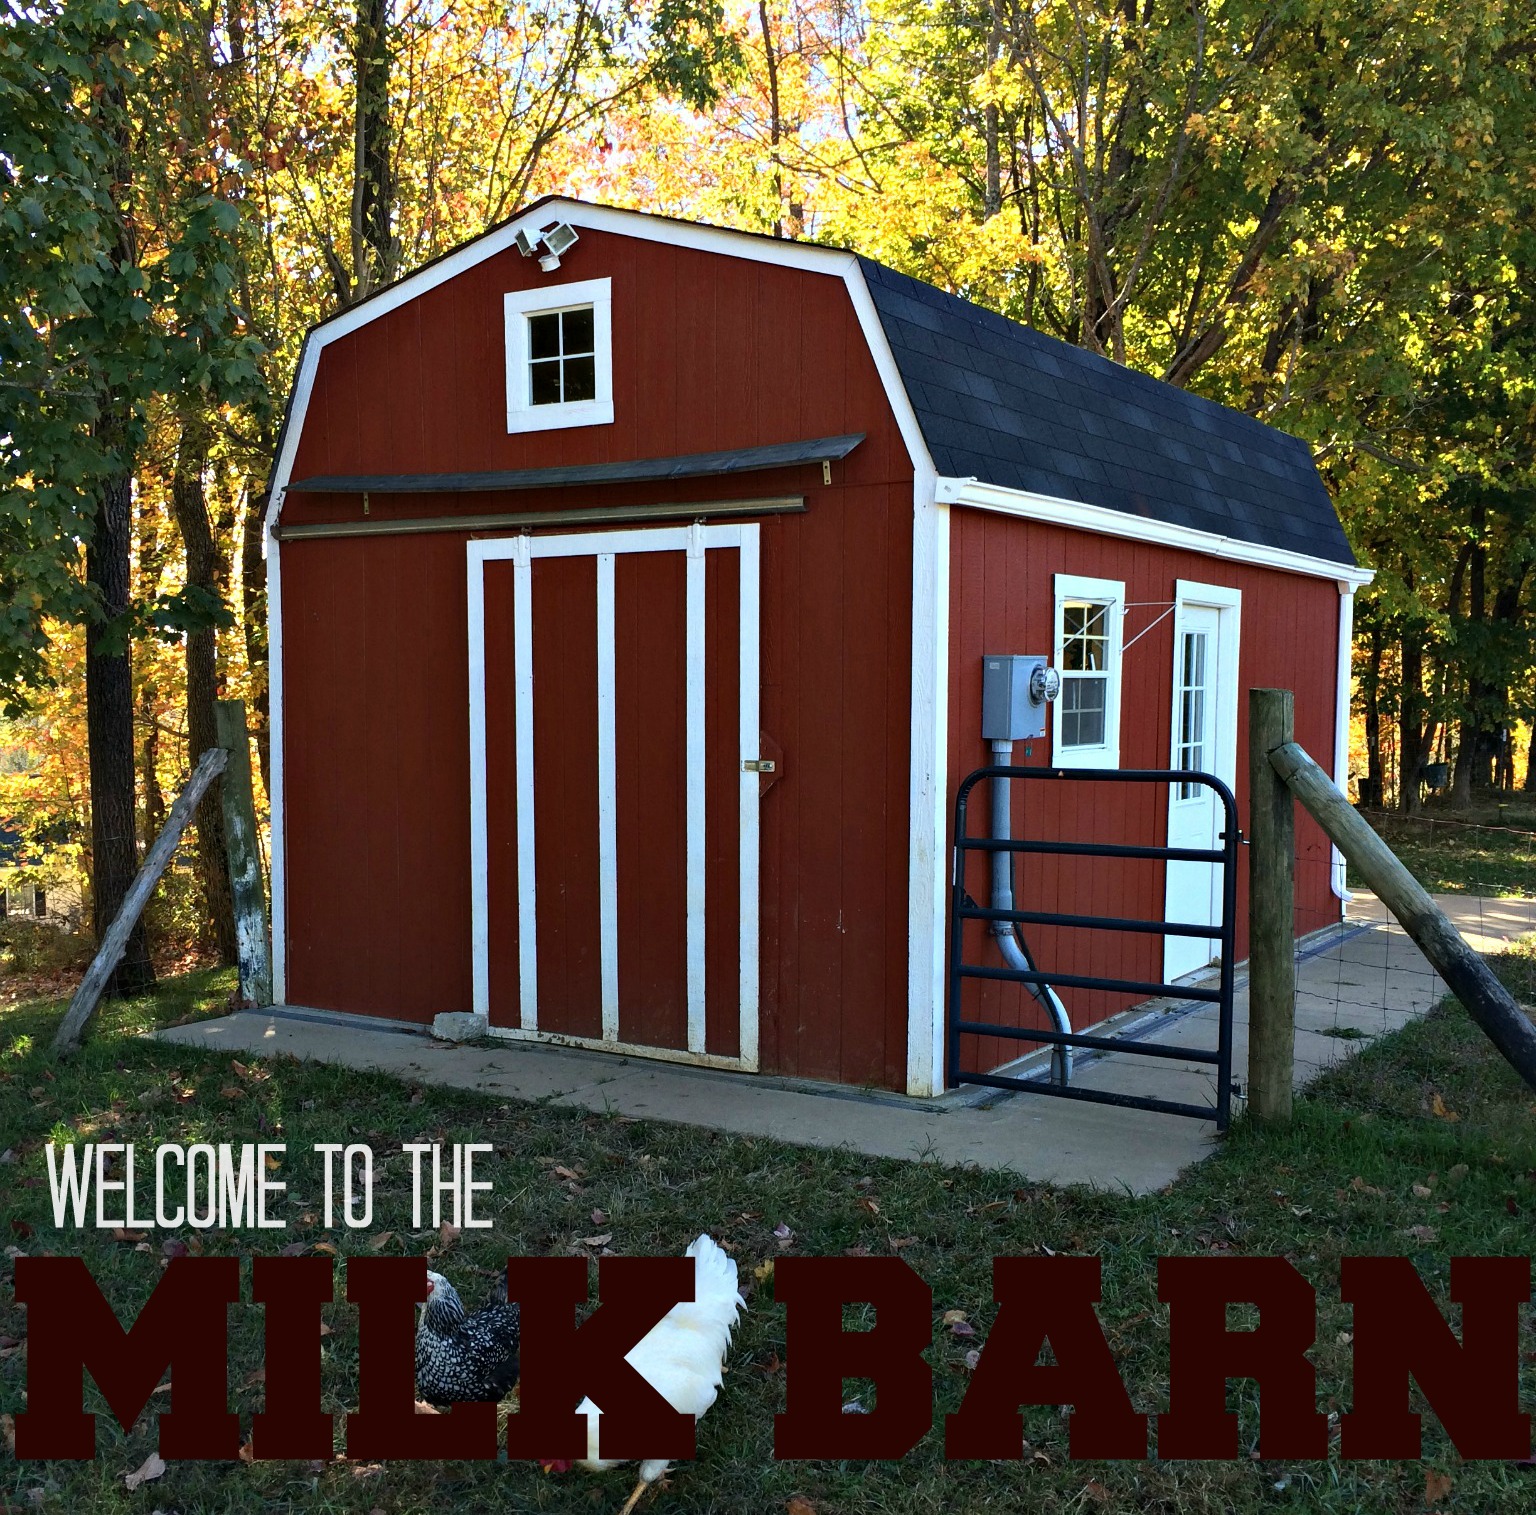
Welcome to the inside of our milk Barn.
We put a 1/2 wall up to divide the side of the barn where we milk the cow from the other side of the barn. This helps us keep the cow on her side and leaves the other half out of her sight.
We store hay, feed, and other supplies on the right side. If our cow manages to get her head into a bag of feed or finds a bale of alphafa it can be rather difficult (uh….. nearly impossible) to get her out of it.
So, we have 2 sides. One for the cow. One for the stuff.
Let’s take it one piece at a time.
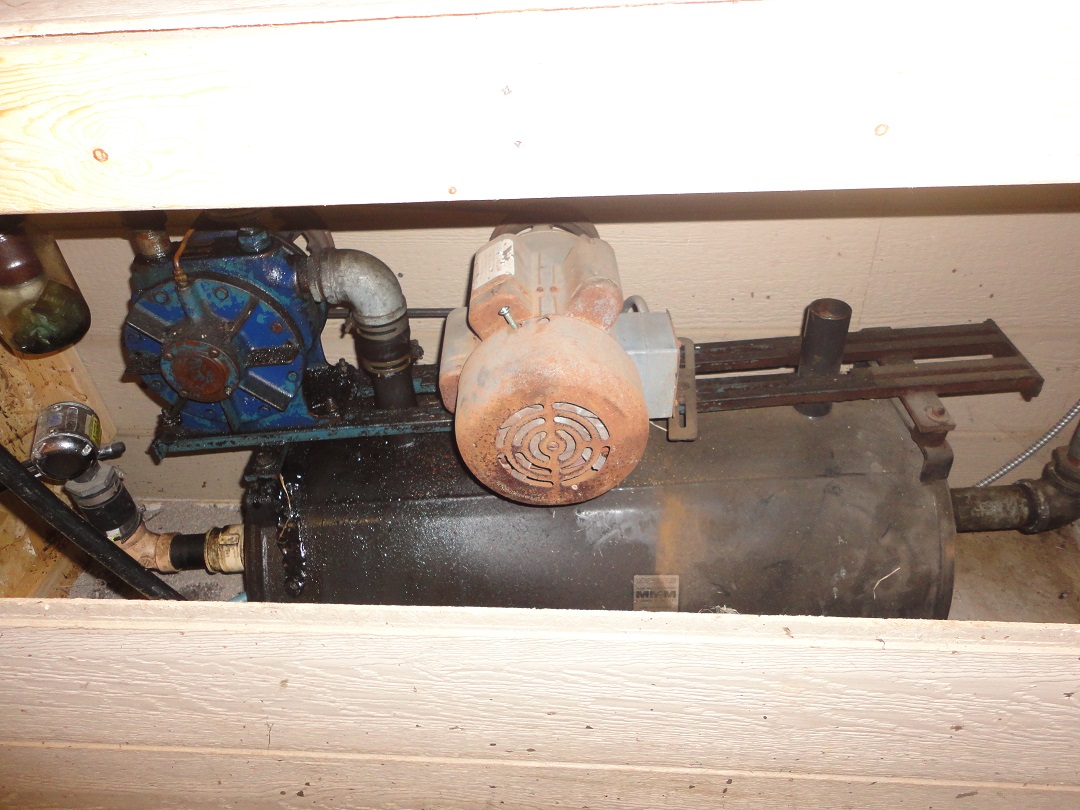
This big, scary looking thing is the vacuum pump. All the pump does is suck. You can get brand-new, shiny ones. You can get cute, tiny ones. You can even get them on wheels! Ours is none of those. Ours was on sale.
It is old. It is ugly. It does a great job. This beast is capable of milking 2 cows.
I like to do things the old-fashioned way. I like old things. I like my old vacuum pump. It is built out of steel. It runs like a top. It is easy to use. It is easy to work on.
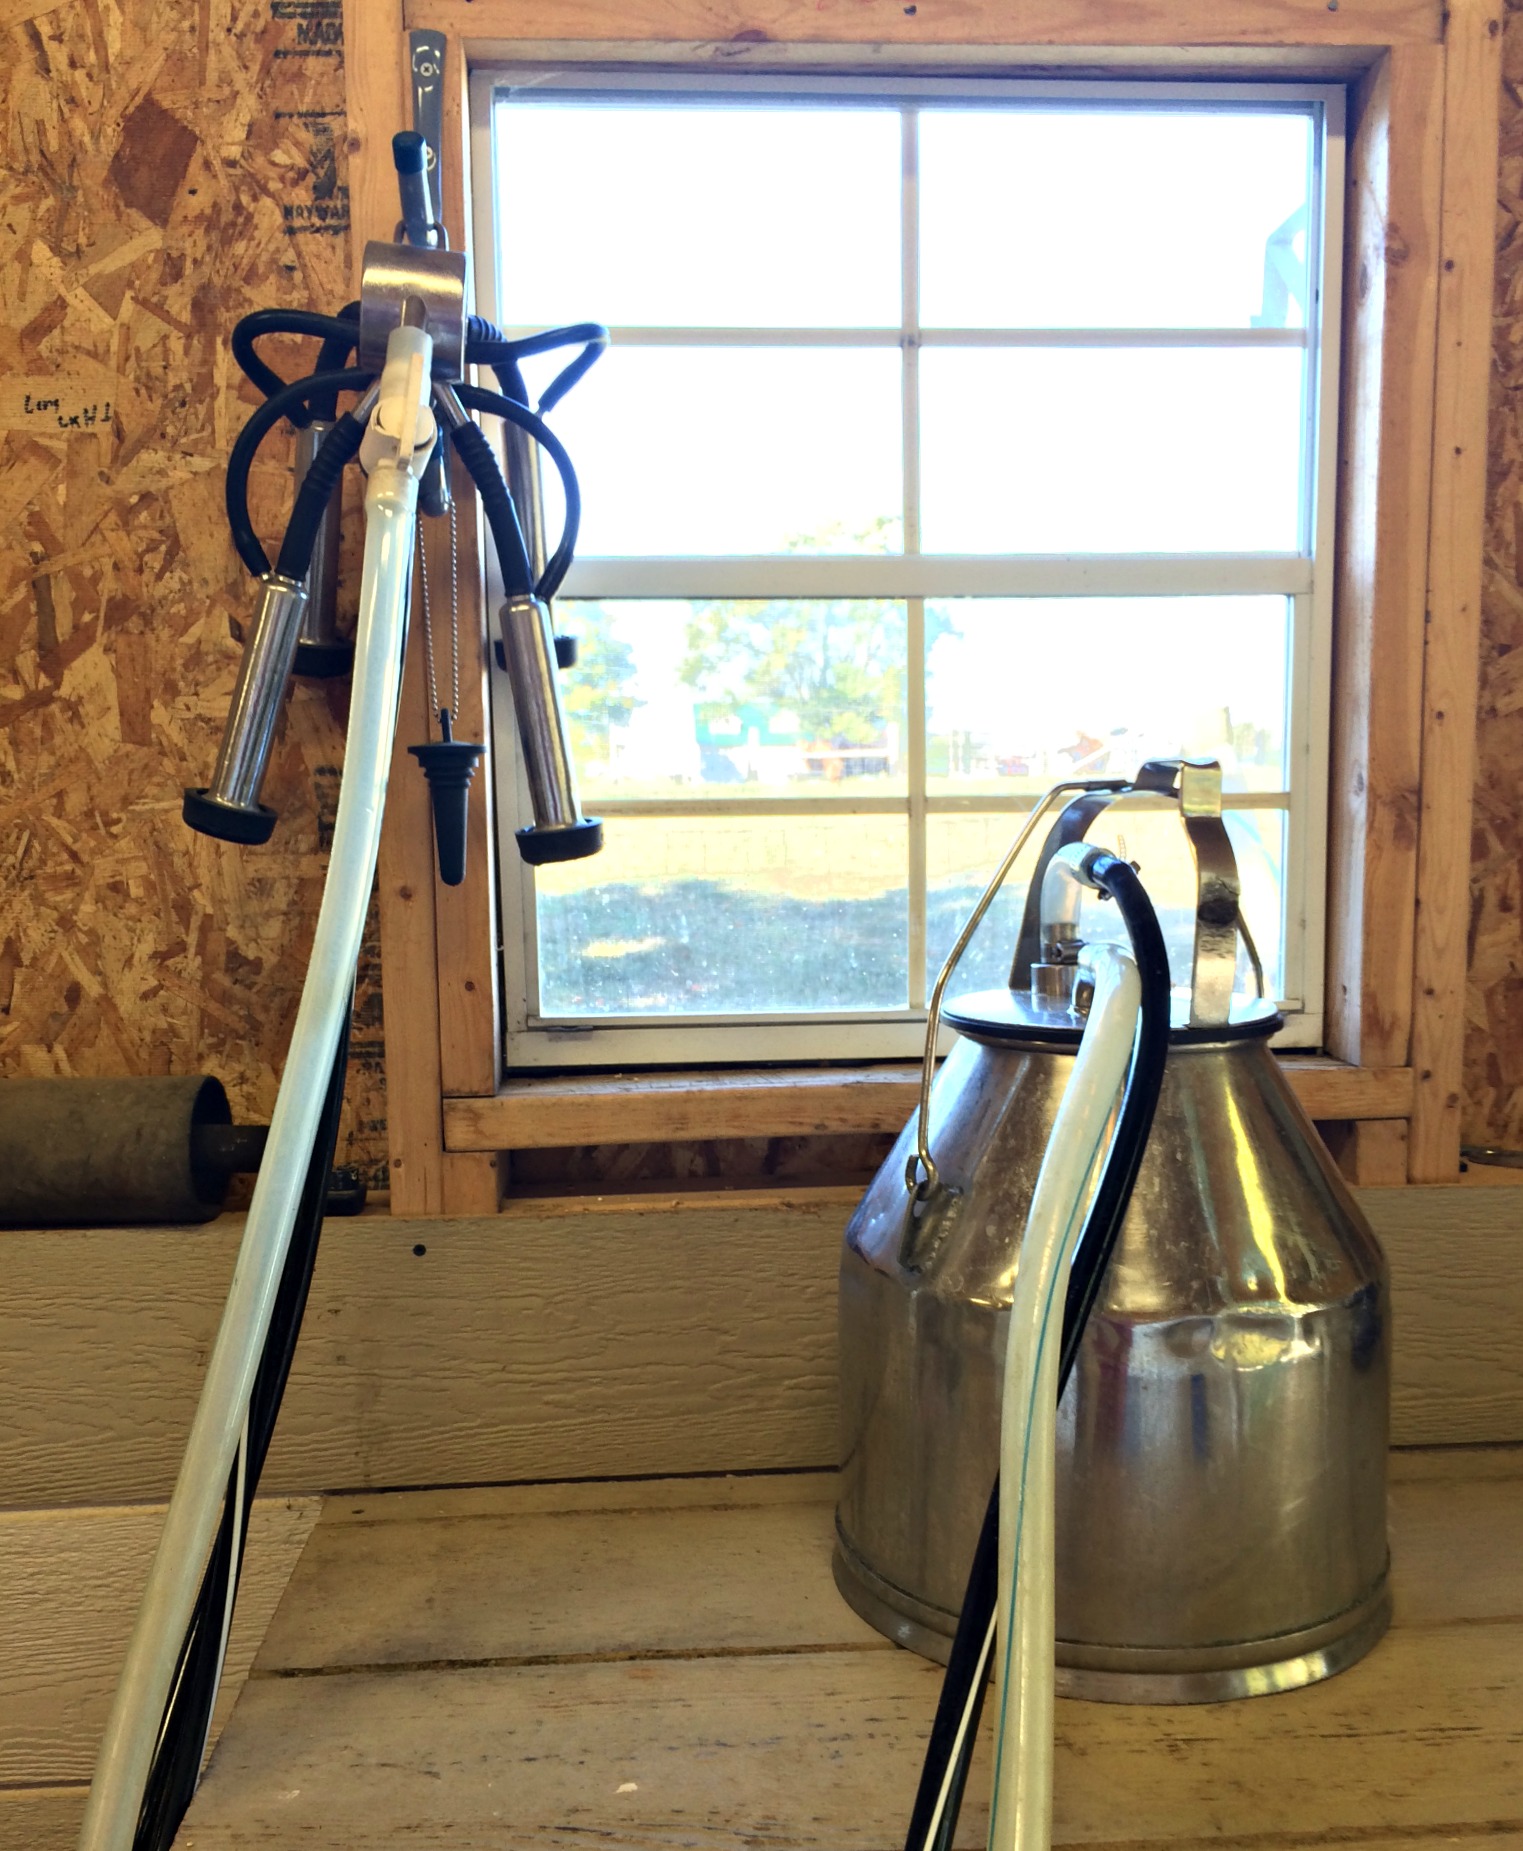
This big, 4 gallon, stainless steel can on the right is called a milk bucket. You will need a milk bucket to catch all the milk that comes from your cow. Ours is an old ChoreBoy. It has lots of dings, dents, and experience. I may have mentioned that I like old things. This guy will probably out-live me.
There are 2 tubes going into the top. The vacuum tube (the black one) goes to the vacuum to provide the suction. The milk tube (clear) carries the milk from the cow to this can.
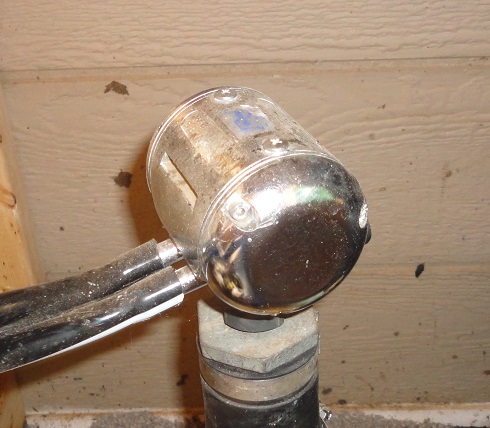
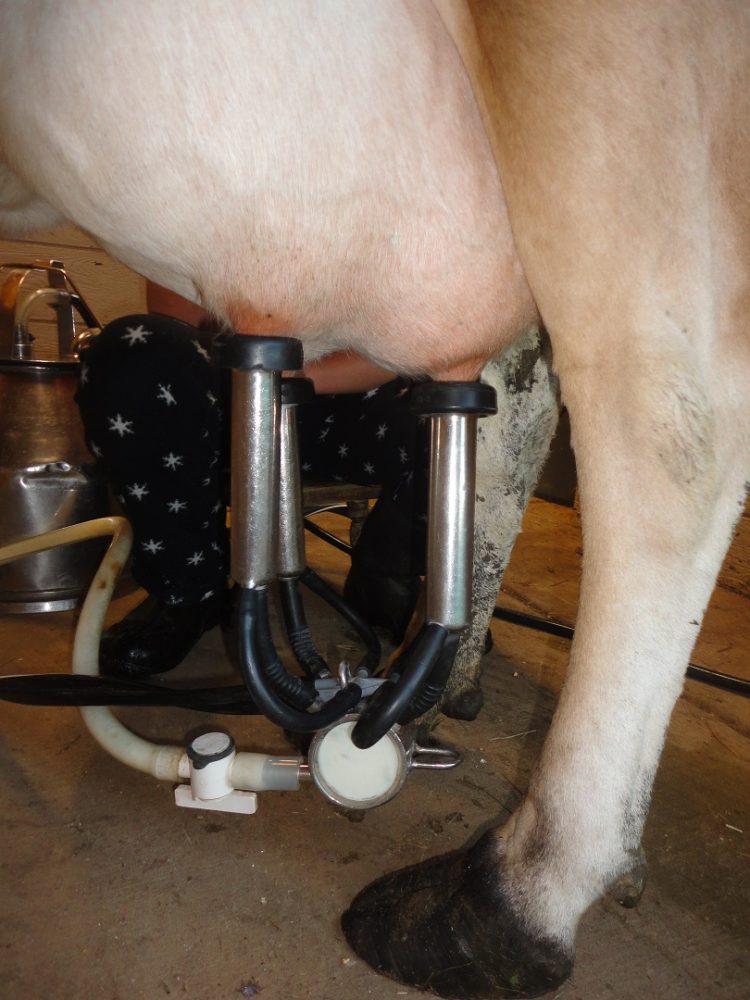
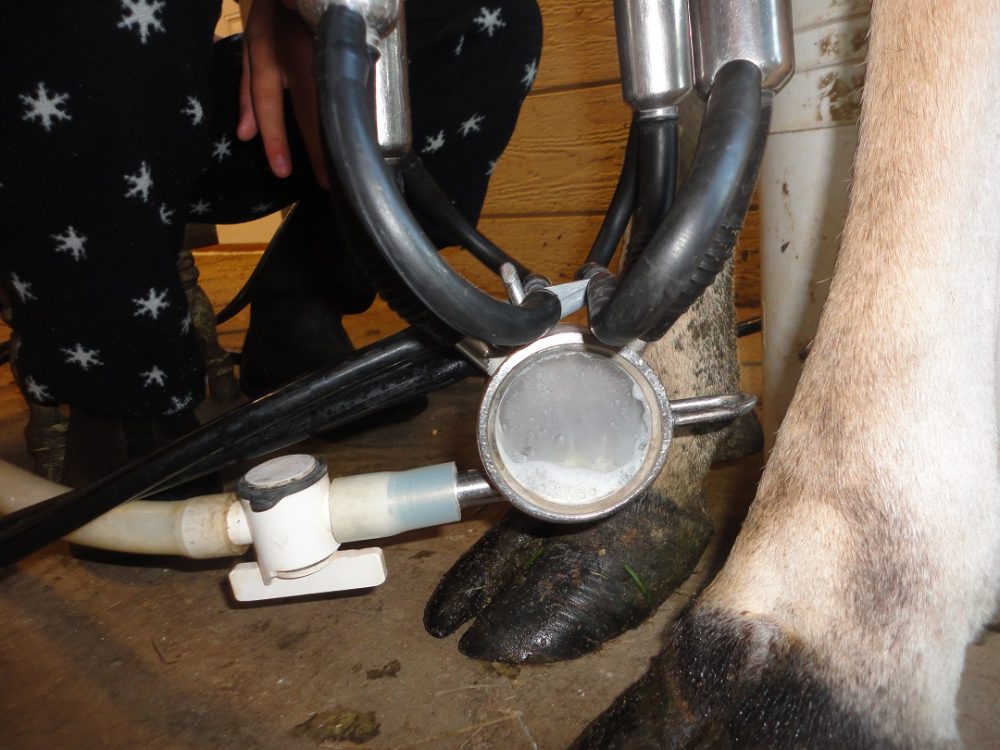
The doohicky hanging to the left of the milk bucket is the claw.

Here is the “Claw.” You can probably guess what we are going to do with this. It is what we attach to our cow’s teats to extract the milk. This is also made of stainless steel and virtually indestructible. The 4 stainless tubes are referred to as teat cups. The black parts you see are the “rubbers” also called “inflations.” The cow’s teats only come in contact with the rubbers.
This may not look like much, but it is mandatory. It is the pulsator. This little guy is what will alternate the suction so the whole system will work.
If you have ever used an electric breast pump or been around someone using one – you will know what I am talking about. The pump can’t just continually suck. It must have pauses. The pulsator makes the pauses. This mimics the sucking of a baby calf.
Vacuum pump = continuous suction
Pulsator = suck-pause-suck-pause
🙂
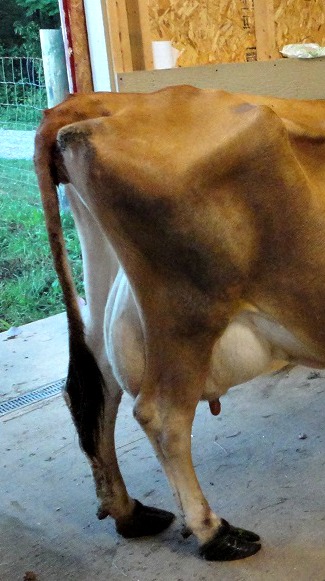
You will also need a cow that is “in milk” or “fresh.” Hi Faithy!

Here is a closer look at how we tie up our cow when we milk her. We have a long steel rod with a ring on it. The ring slides easily up and down on the rod. We tie her lead (the hot pink thing that looks like a dog leash on steroids) to the ring. Her lead (leash) is fastened to her harness.
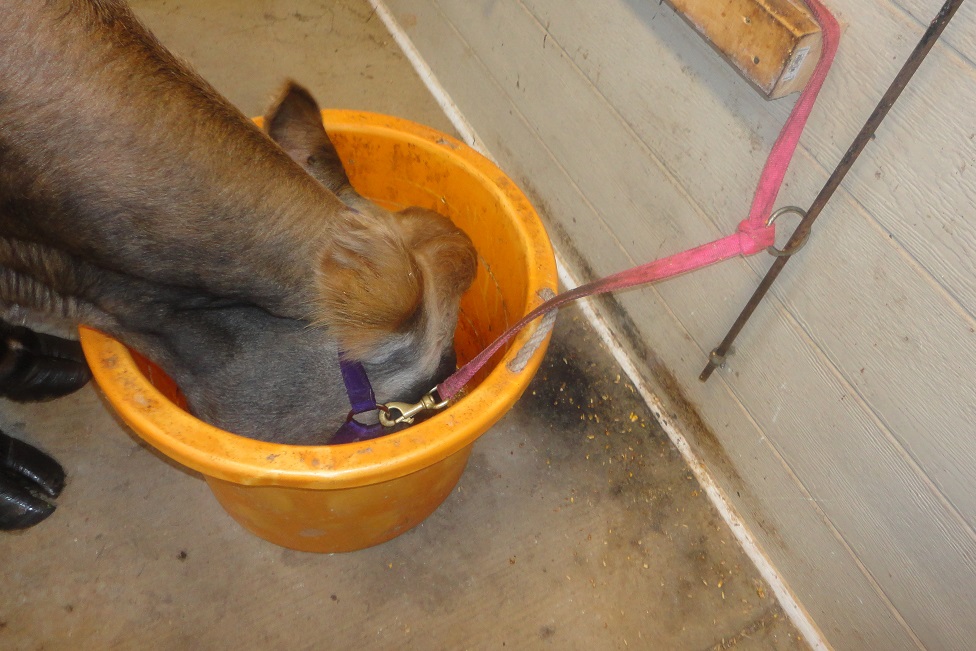
This allows her to move her head up and down, but she can’t get much side to side movement or back and forth movement. We tried several different fastening arrangements before settling on this one.
It works well for us because she can eat, she can move her head up and down, she can move, but she can’t move too much. If you know what I mean.
Many cow owners use a stanchion. A stanchion is great if you have a cow new to milking, or you are new to milking, or you have a cow who likes to shuffle around. It closes around the cow’s neck so her movement is very limited. Our cow is a sweetie who just stands still most of the time, so we haven’t needed a stanchion.
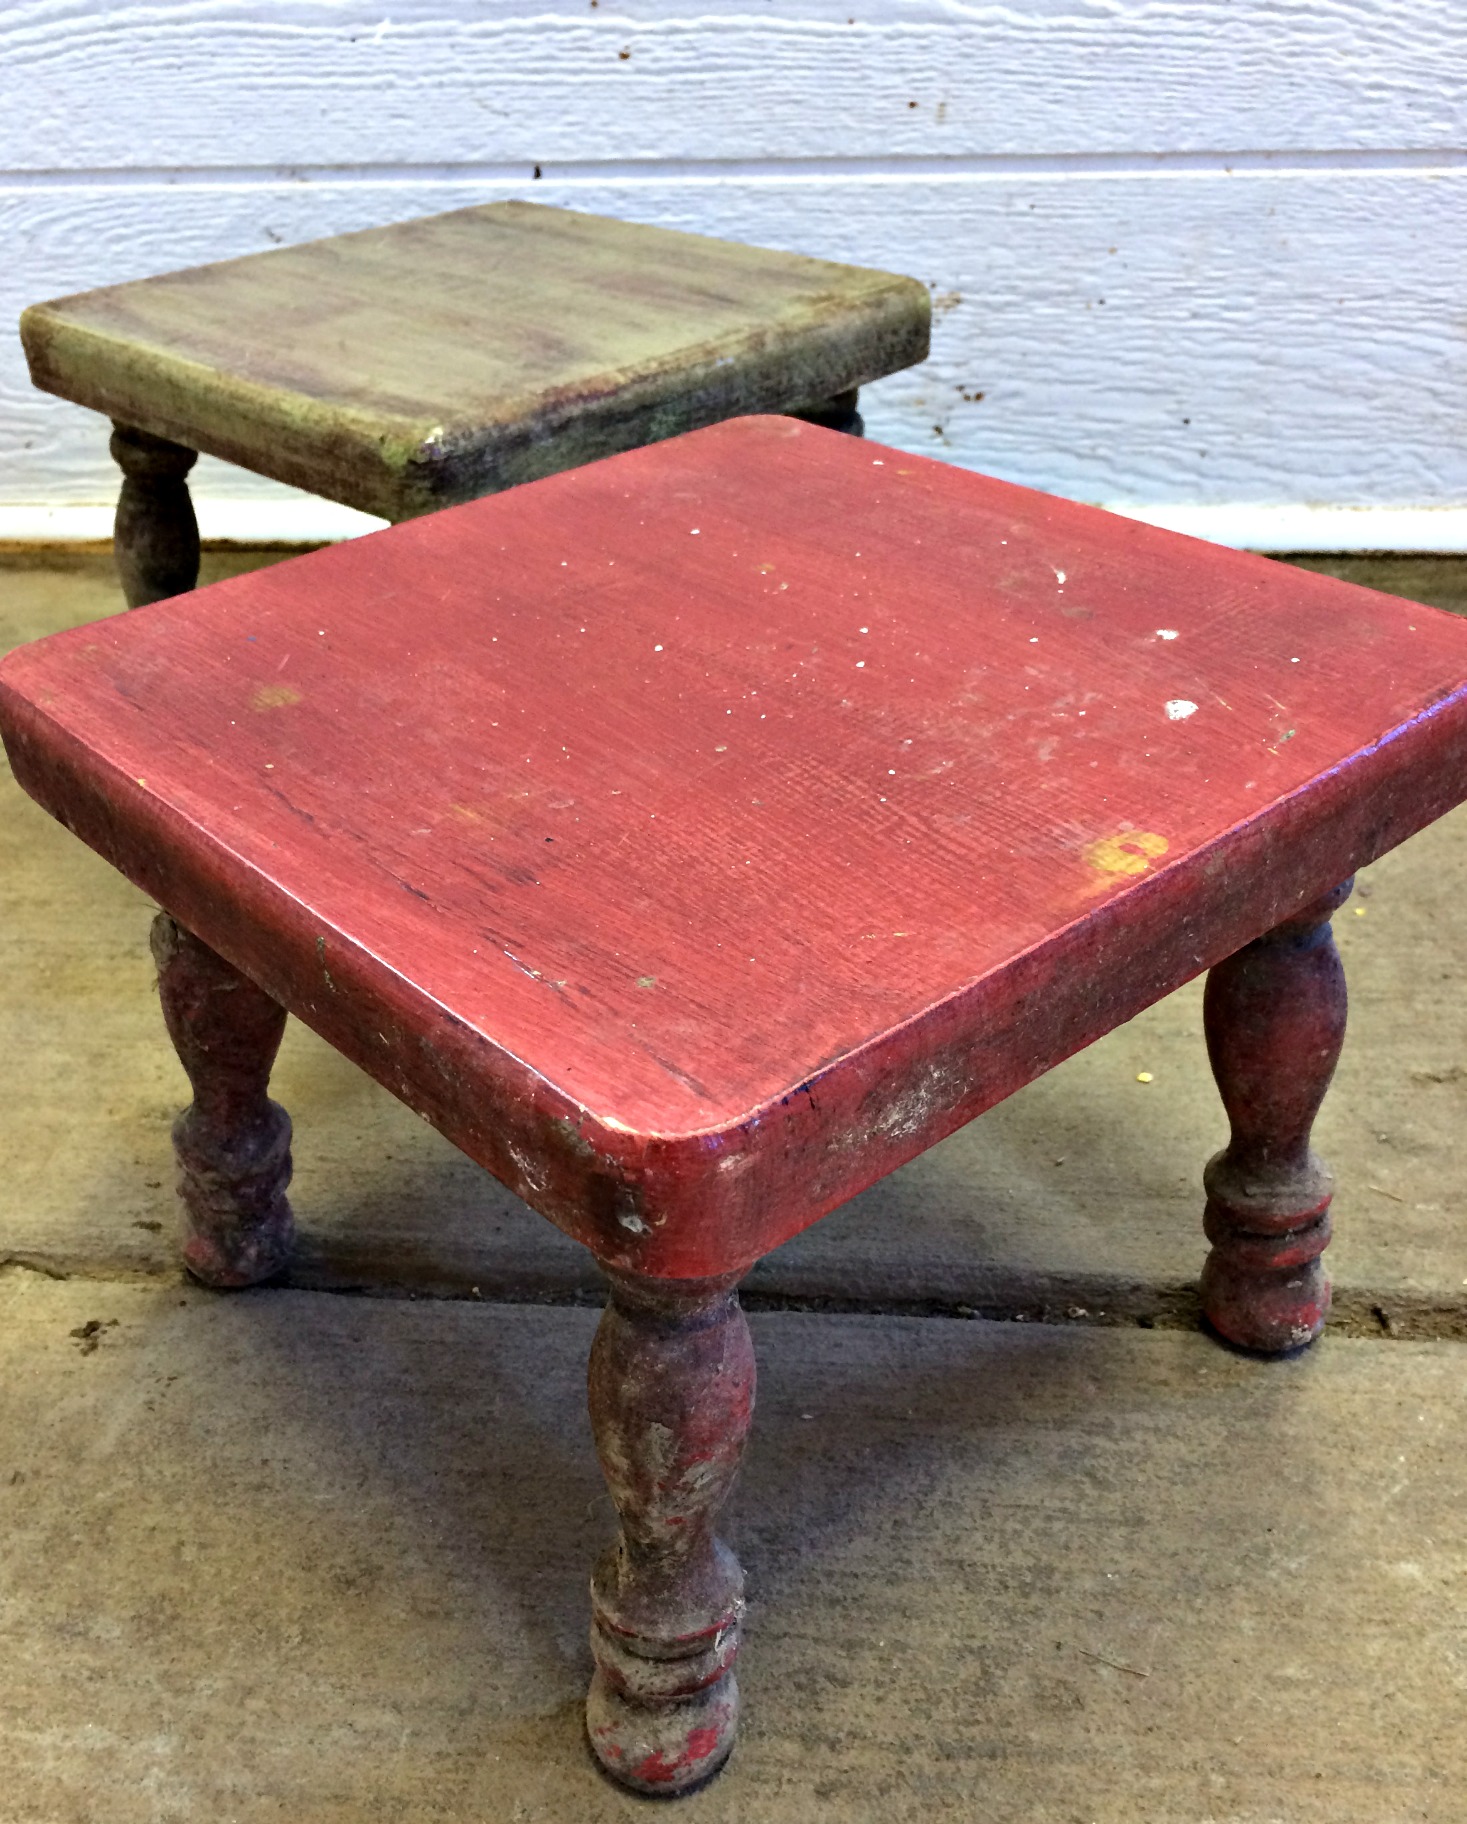
You’re gonna probably want something to sit on.
I guess you could squat, but that would get old and painful after a few minutes. We use these stools from Michaels Crafts. Any upside-down bucket would do nicely too.
Now that you have met all the equipment. Let’s milk!
First, we put on our star pajamas.
Did I mention that milking a cow usually happens very early in the morning? My daughter likes to wake up approximately 30 seconds before it is time to milk the cow, so she wears her PJ’s.
You can wear clothes if you want.
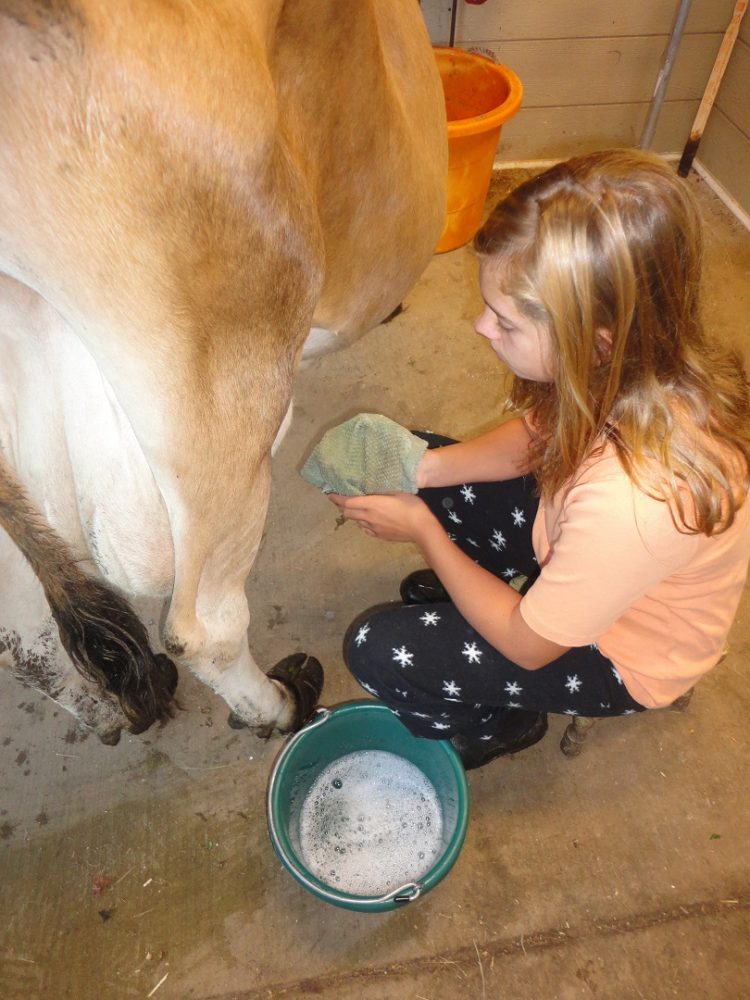
#1 Wash the Cow’s udder & teats
We use warm soapy water and a washcloth to wash Faith’s udder and teats.
After we get everything squeaky clean, we dry her off with a clean towel. We are very high-tech around here with our cleaning operation. 🙂
#2 Squirt out some milk
Once the cow is clean and dry, squirt a little milk from each teat (onto the floor is fine). This will clear out any bacteria or ick your cow may have been sleeping in last night.
#3 Turn on the pump & insert the teats
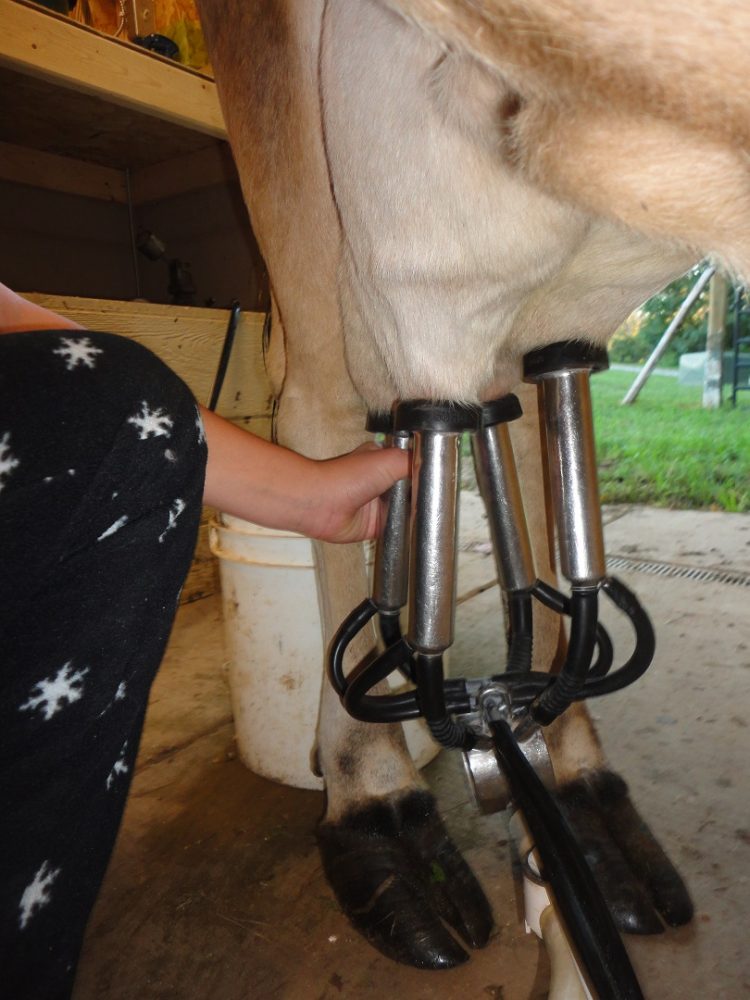
Now it’s time to turn on the pump. After we turn it on, plug it in, or flip the switch….. whichever gets the motor running…… we line the 4 teat cups (the claw) up with the tips of the 4 teats. The vacuum power will do the rest. Schluuuuuup! In go the teats. The vacuum does all the work. They will just slide right in.
If you don’t have 4 hands, it’s ok. Just line up the first 2 teat cups, let them suction into place, then grab the other 2 that are dangling & line them up. Wala! All 4 teats are being milked.
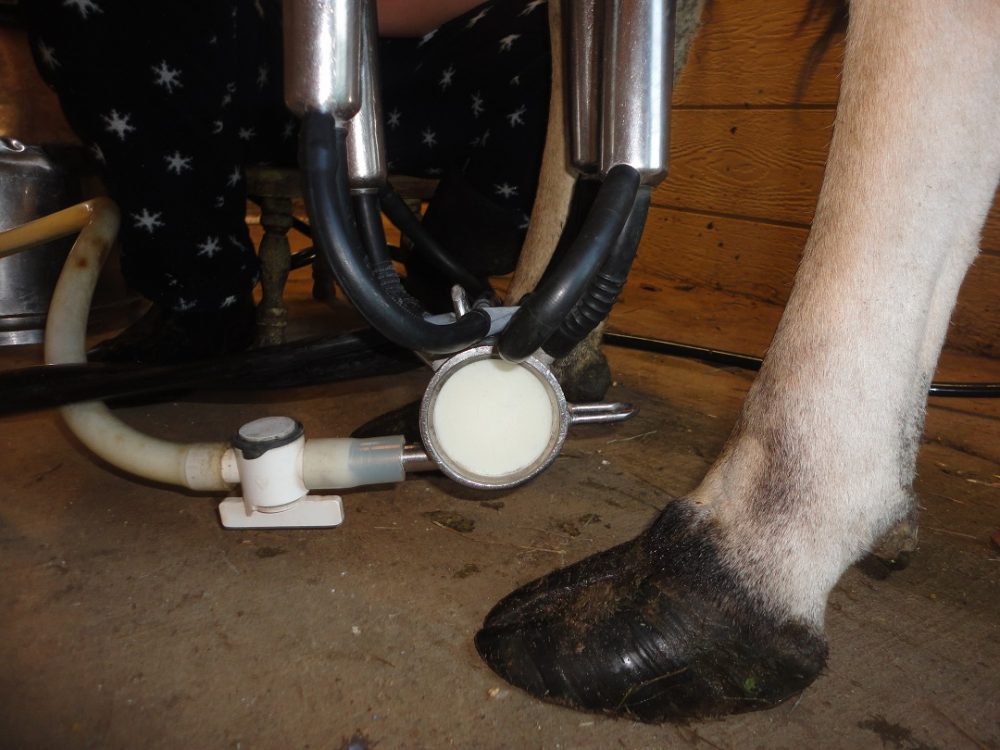
See that white circle under the claw? That is a clear window. It is white because it is full of milk. This is a great perk. Not all milkers have this feature & I love it. If you happen to get a milking system that doesn’t have the window, it’s OK, just look at the milk tube & you will see the flow.
#4 Milk Time!
Now, sit back & watch the milker do the work.
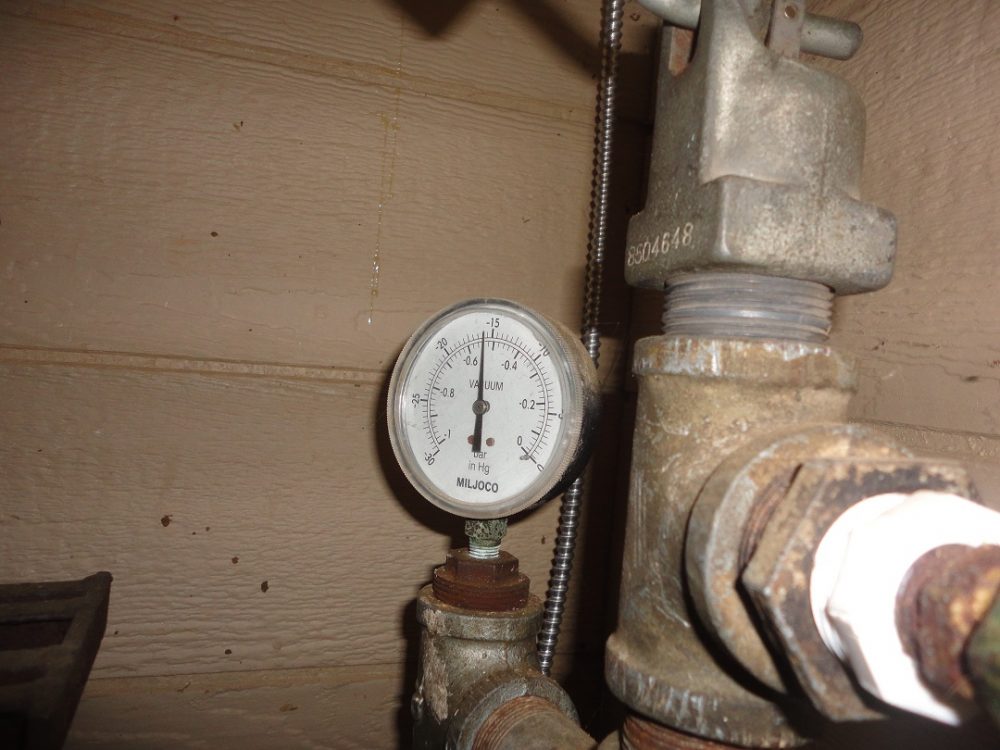
This is a good time to check the vacuum pump pressure. This gauge tells me our pressure is at 15 psi (pounds per square inch). I don’t know much about this. All I know is the guy I bought the pump from said it should be around 15. So, we look good!
#5 The Poop Bucket
I almost forgot to mention the poop bucket.

This is a very important part of your milking equipment. The first day you forget the poop bucket will probably be the last day you forget the poop bucket.
After about 3-5 minutes I see the milk flow is slowing down.
#6: Strip Her Out
It is time to “strip her out.”
It is imperative that you “strip your cow out.”
We use the machine to strip out our cow. This is referred to as “machine stripping.” To strip out a cow means that you are going to make sure you have gotten every bit of milk out of each quarter. An udder has 4 quarters, each quarter has it’s own teat.
Just to make sure we are on the same page…… Every cow has 1 udder, 4 quarters, and 4 teats. 1 teat coming out of each quarter. (unless your cow is the weird one I saw at the State Fair with 5 teats).
We must make sure there is no milk left hanging out inside any of those quarters. If we were to leave milk in there it is a breeding ground for mastitis. Mastitis has ruined my life. Trust me, you don’t want it. Go here for what causes mastitis. Go here for help if you suspect your cow may have mastitis.
It’s not hard. My daughter is stripping-out Faith in this picture. She is gently pulling on one teat cup at a time. When doing this we hold the “pull” for about 7-10 seconds. It takes some practice to get the pressure right. We pull hard enough so the remaining milk comes shooting out of the quarter. However, we don’t want to pull so hard that the whole claw comes flying off the cow onto the ground.
If we look into the little, circle window while pulling on the cup we see a burst of milk shoot out. It’s working!
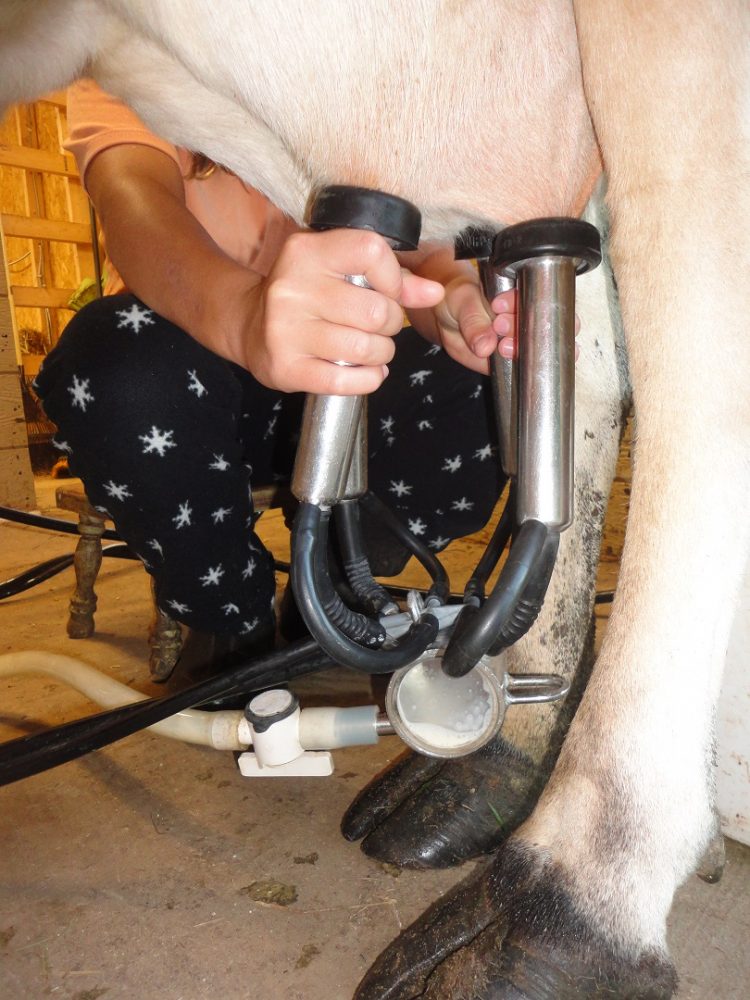
Keep moving your way around, gently pulling on each cup for about 7 seconds. Once we have pulled all 4, we go around again. The purpose here is to be sure, sure, sure we get all that milk out.
Once Faith (our cow) is stripped out we are done milking.
#7 Turn Off the Pump & Send to Cow out to Graze
Turn off the pump to release the pressure. Once the milk pump is turned off, the claw easily comes off the udder. We set our claw & milk can aside and lead our generous, wonderful, beautiful cow back out to pasture.
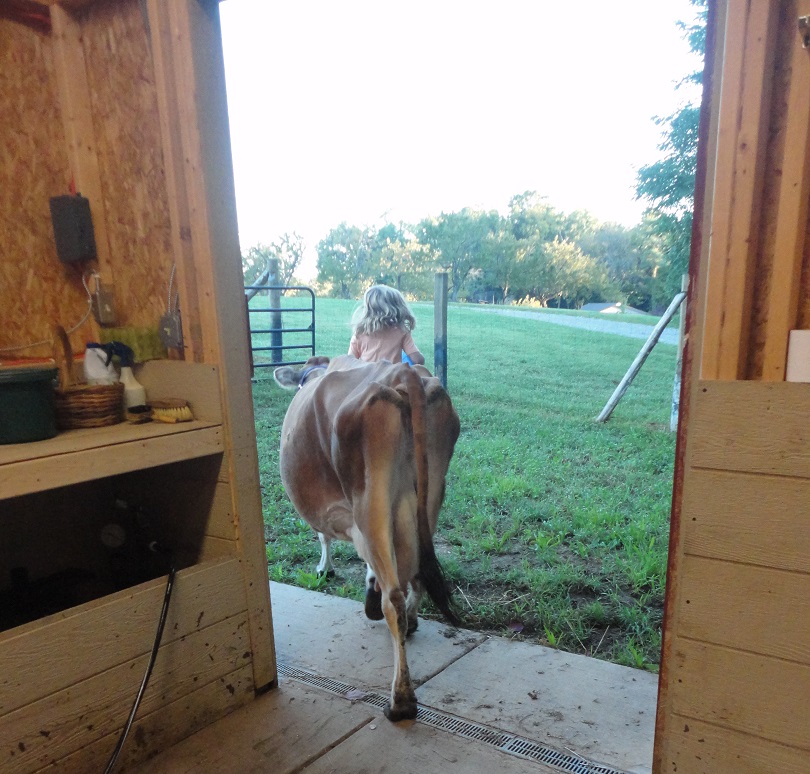
Goodbye Faithy! Thanks for the milk!
To see how we clean the electric milk-pump after milking go here.
Be sure to join the email list (for free) here.
Learn more about becoming a member here. Joining is cheap & your pants will thank you.
Happy Milking!
Candi


grassfood.
02/15/2016Thank you so much for showing your milking parlor! I have been dreaming of one for dh to build, and this really helps. I’m glad I found your blog. 🙂