
Basic Farmhouse Sandwich Loaf
Ameteur breadmakers unite!
With an abundance of time and nothing else to do, many of you are trying your hand at making bread, for the first time.
Others are getting back to a skill that you have once loved, but the busyness of life has squashed it.
Quarantine may have us cooped up, but it definitely has its upsides:
- I am spending more time reading.
- Lord have mercy, I have been cooking my way through the freezers (all four of them).
- I am spending hours just hanging with my children.
- Driving around country roads seems like a great use of time.
- DH and I spend time together every evening doing a whole bunch of nothing (which is lovely).
- I am caught up on my sleep.
- There is no football.
Sorry if you are a football fan. And, yes, I realize that this is not even football season, but somehow, DH manages to locate a football game somewhere in the universe to watch, no matter what month it is.
And a HUGE perk of quarantine has been the time we have to devote to fun things like making bread.
The Healthiest Homemade Bread
Many opinions exist on the healthiest bread – soaked grains, ancient grains, sourdough bread, etc. Each of these has health benefits, but I would argue that none of these create the healthiest loaf.
What is the healthiest bread?
THE ANSWER: bread made with freshly milled flour.
I am gonna challenge you to consider milling your own flour, before you make any sort of bread.
Whether you like ancient grains or sourdough, freshly milled flour can be used to make ALL styles of bread and will instantly boost the nutritional content of that loaf.
It is as easy as grinding coffee beans and has massive benefits-
- It’s healthier (freshly milled flour has over 40 vitamins and nutrients)
- It is full of natural fiber (unlike store-bought flour, fresh ground flour is the WHOLE wheat berry which is loaded with fiber)
- It tastes better
To learn more about fresh-milled flour:
- 4 Reasons to Grind (why you should get a food mill)
- How to Eat More Bread and be Healthier
- I am Sensitive to Gluten, Can I Eat Fresh-milled Flour?
- How to Start Grinding Your Flour
- How to Grind Flour on the Cheap
- A Christian Perspective on Grains
I have been grinding wheat berries (grains/ kernels) and making bread at home since 2004.
Enormous benefits of making bread the way I do:
- The mill does the grinding
- The mixer does the kneading
- I bake 6 LOAVES AT A TIME in a standard oven
- Cost is under 50 cents per loaf
How on earth do you beat that?
This bread is superior in every way, so nutritious, literally, it is a miracle food.
Slam dunk.
In order to begin making your own bread with fresh flour, you are going to need wheat berries and a mill.
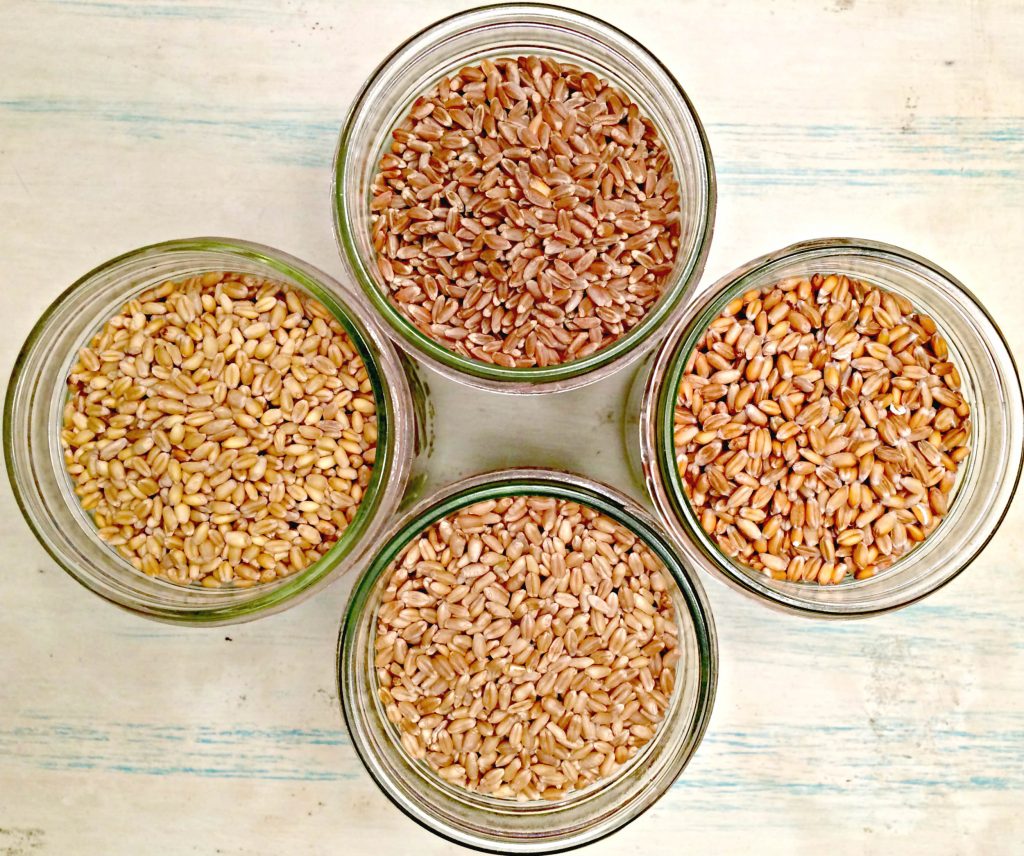
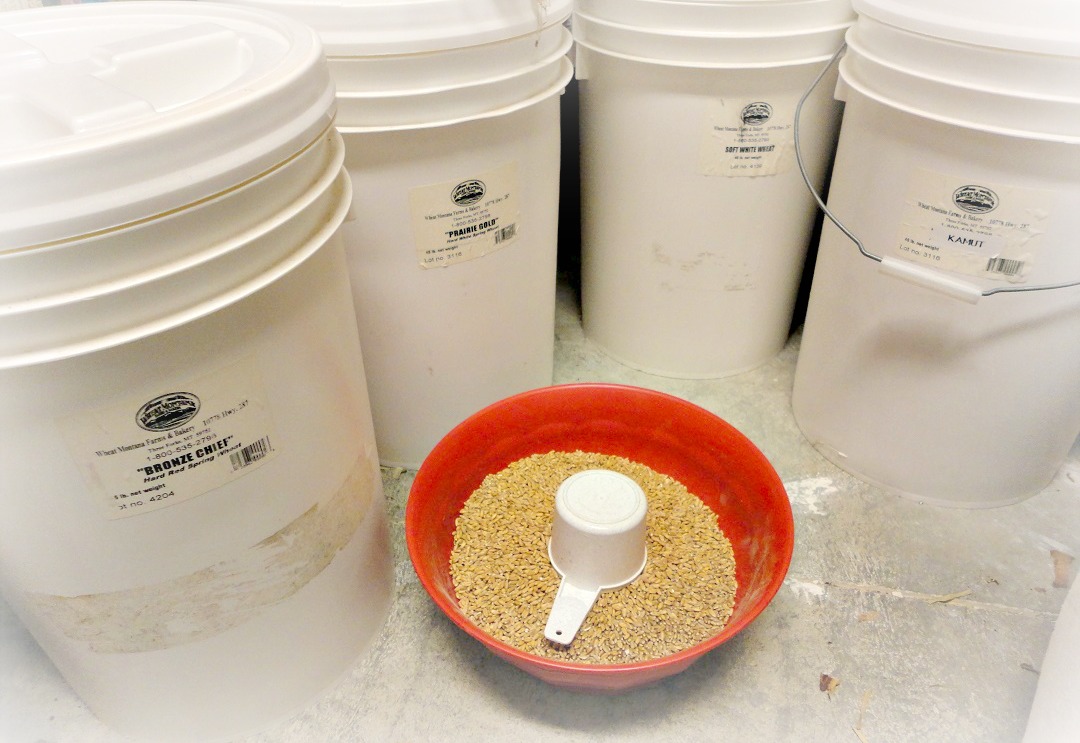
Wheat berries are the little oval grains that come from the wheat plant. I buy mine in 50lb bags from a co-op. 50Lbs of wheat berries costs me $25.00 from the co-op. Wheat berries can also be purchased at most whole food stores, however, they will be more expensive.
When you purchase wheat berries you literally have a choice to use ANY grain. There are dozens of varieties of wheat, but the typical grocer only sells a couple.
Additionally, when you grind your own wheat, you can combine different types of wheat, and use heritage, unchanged, or ancient grains (like einkorn).
Let me show you how I make bread!
BASIC FARMHOUSE SANDWICH LOAF
(Makes 5-6 loaves)
First, grab 11 cups of wheat berries (hard white) and dump them into the mill and grind them on the finest setting.
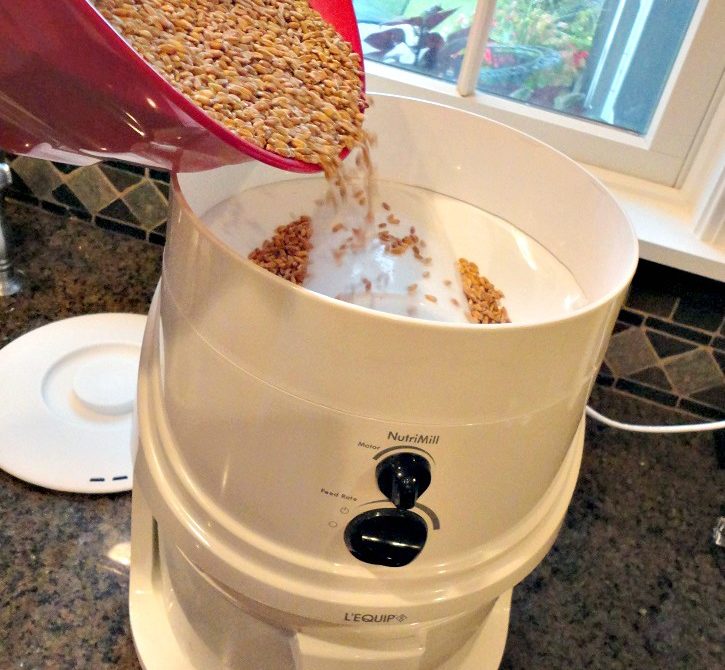
It only takes a couple of minutes for the Nutrimill to grind up the wheat.

This bread recipe is simple: flour, water, oil, honey, salt, and yeast.
I use a Bosch Universal Mixer to knead my dough for me.
Insert the dough hook and add the first 4 ingredients –
- 5 1/2 cups hot water
- 1 1/4 cups oil
- 1 cup honey
- 3 Tbsp yeast
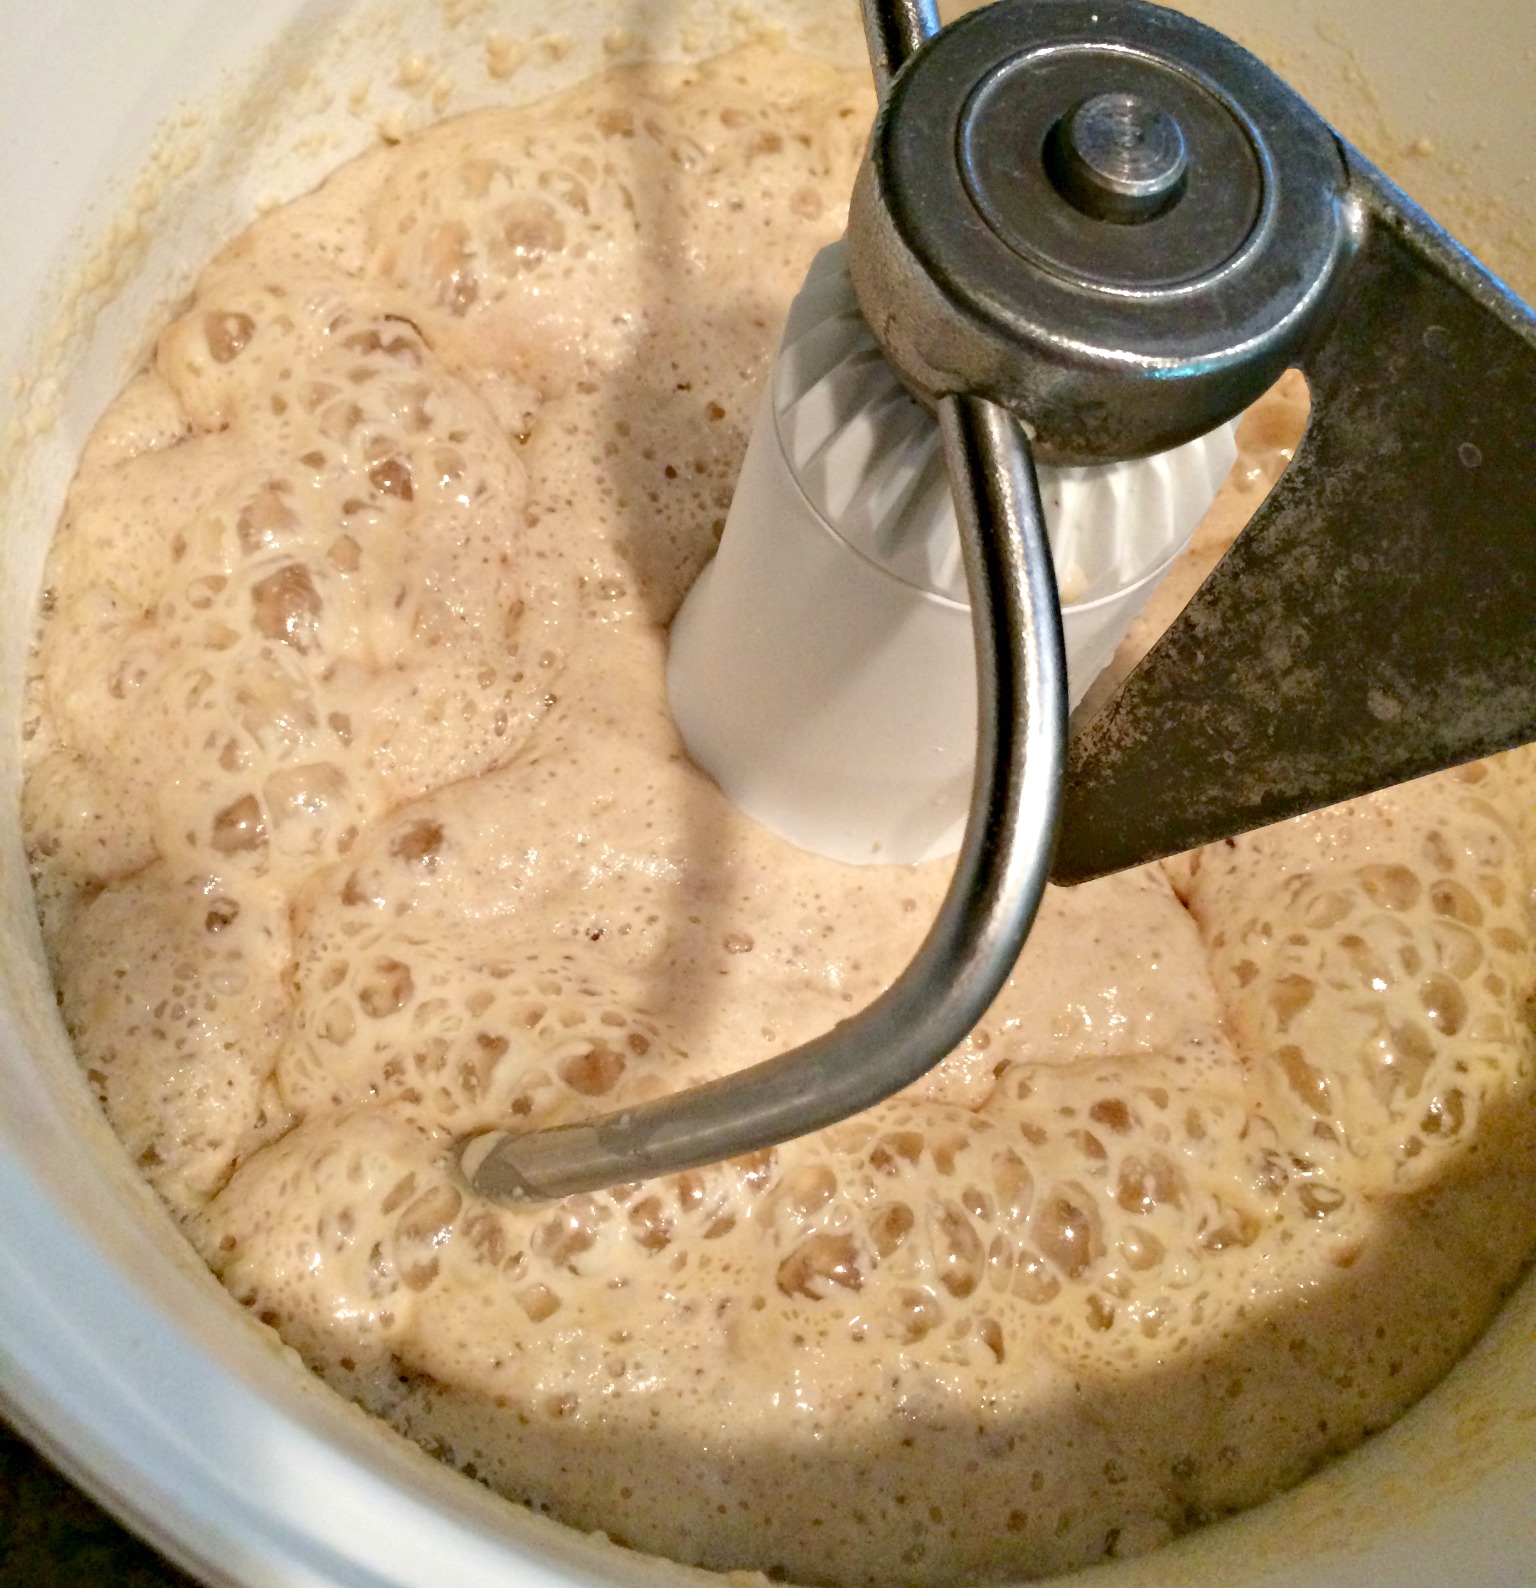
Let this sit in the mixer until the yeast begins to activate (it will get bubbly and foamy).
After the yeast is active, it is time to add some flour. Add 5 cups of the freshly milled flour one cup at a time then mix on low for 10 seconds to incorporate.

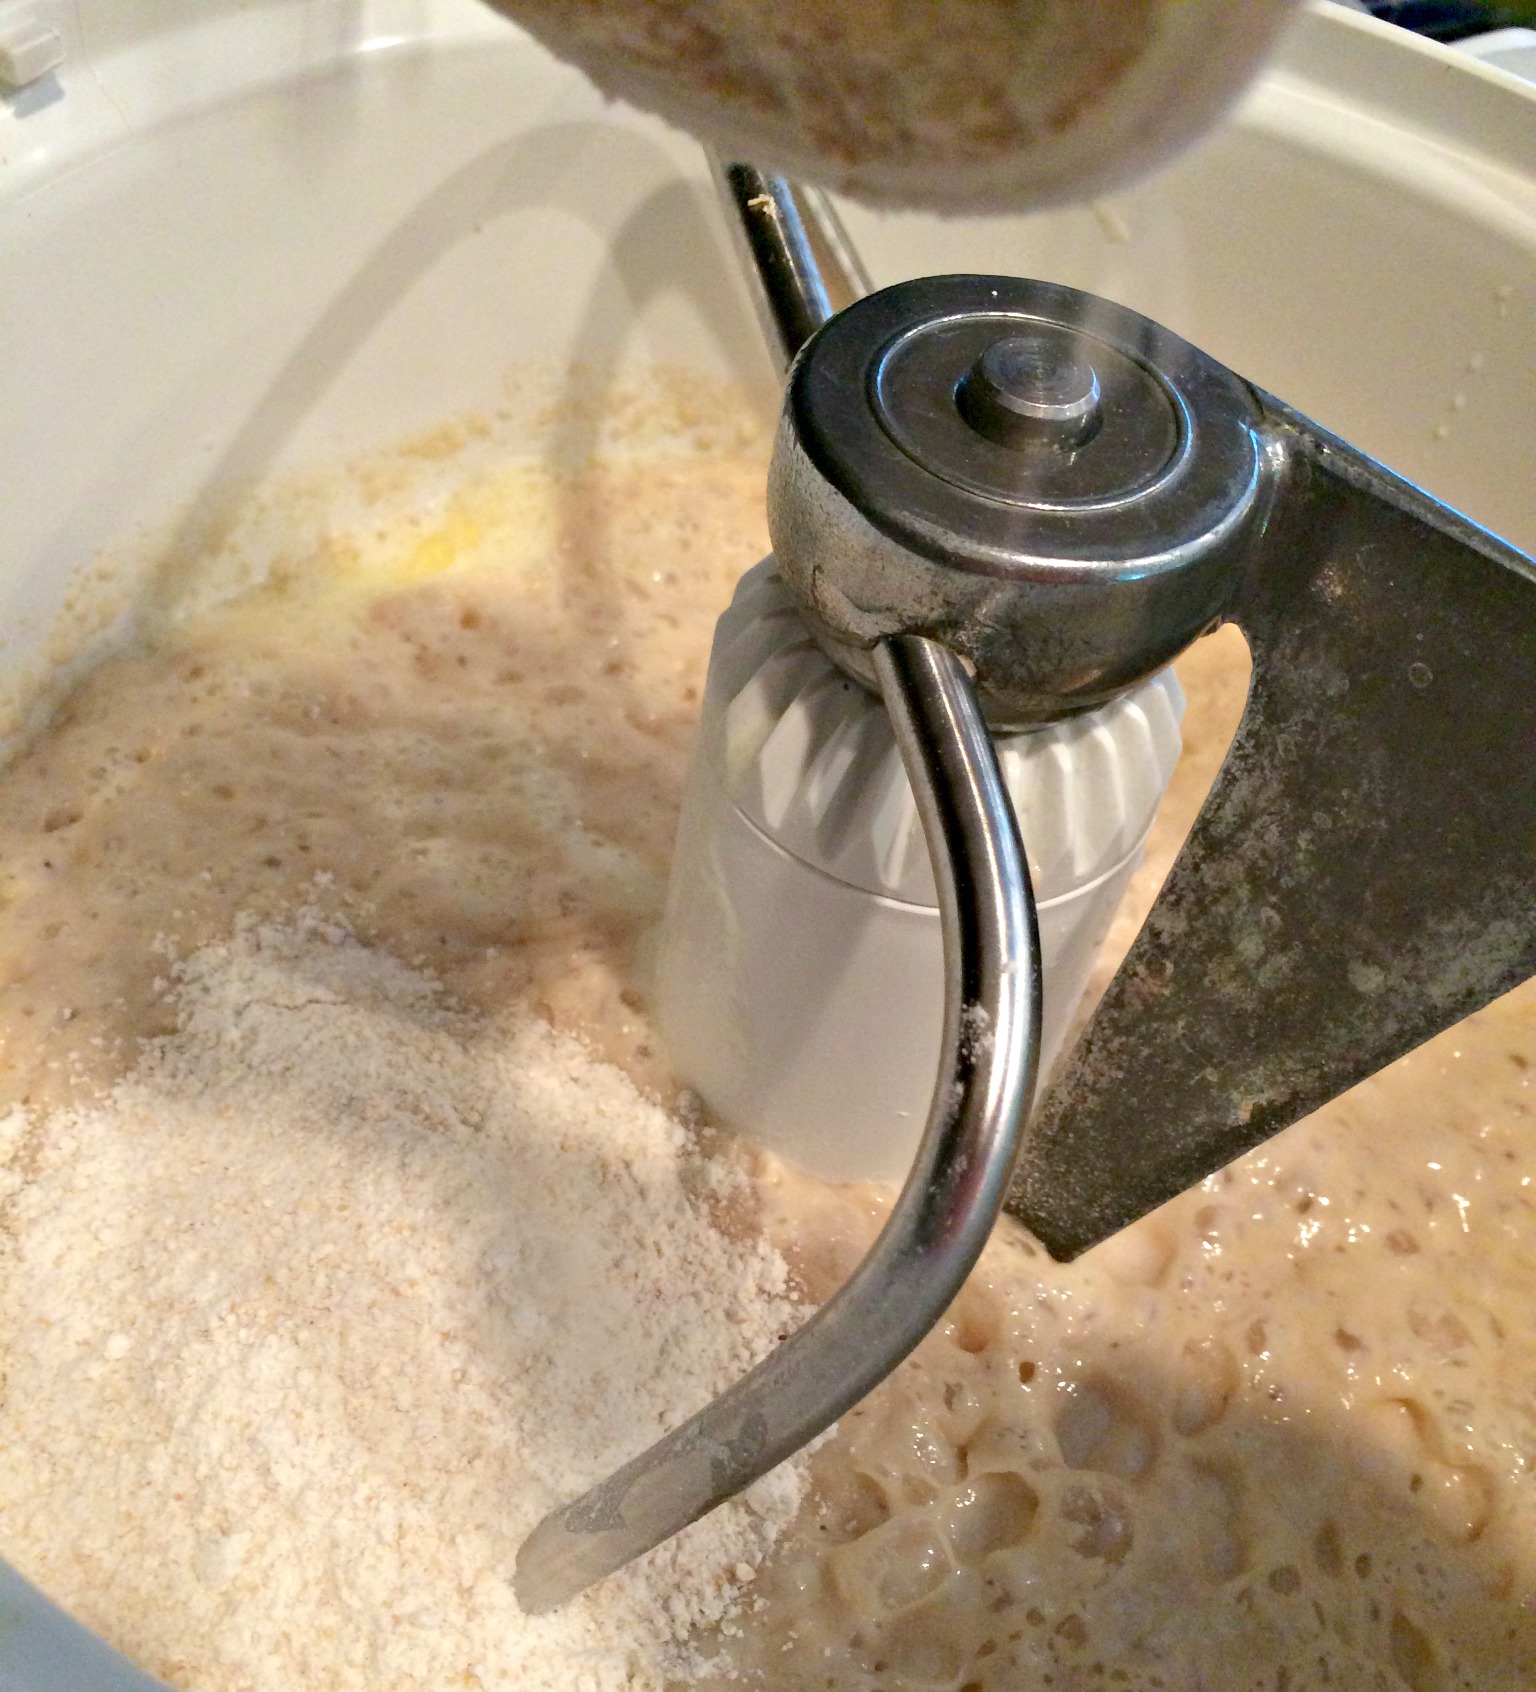
Once 5 cups of flour have been added to the bowl, it is time to add the salt. Salt adds flavor and is very important when making bread. Salt also kills yeast, which is why it is added after 5 cups of flour, When the salt is added after some flour it won’t kill the yeast.
Add 5 tsp salt, then continue to add your flour, 1 cup at a time, watching the sides of your mixing bowl.

When the dough thickens and sides of the mixing bowl begin to “clean” that means the correct amount of flour has been added. I ground up 11 cups of wheat berries. I did not use all of the flour. I have about 1 cup leftover. The amount of flour used for this recipe changes depending on the humidity level, temperature, and climate. In winter I use less flour. In summer the bread needs more.
Just watch for the sides of the mixer to begin to “clean” and you will know when to stop adding flour.
Put your lid in place and set your mixer on medium for 9 minutes. The stickier your dough is, the softer and lighter your bread will be after it is baked. The nice thing about using a mixer to knead for you is that it doesn’t care how sticky the dough is.
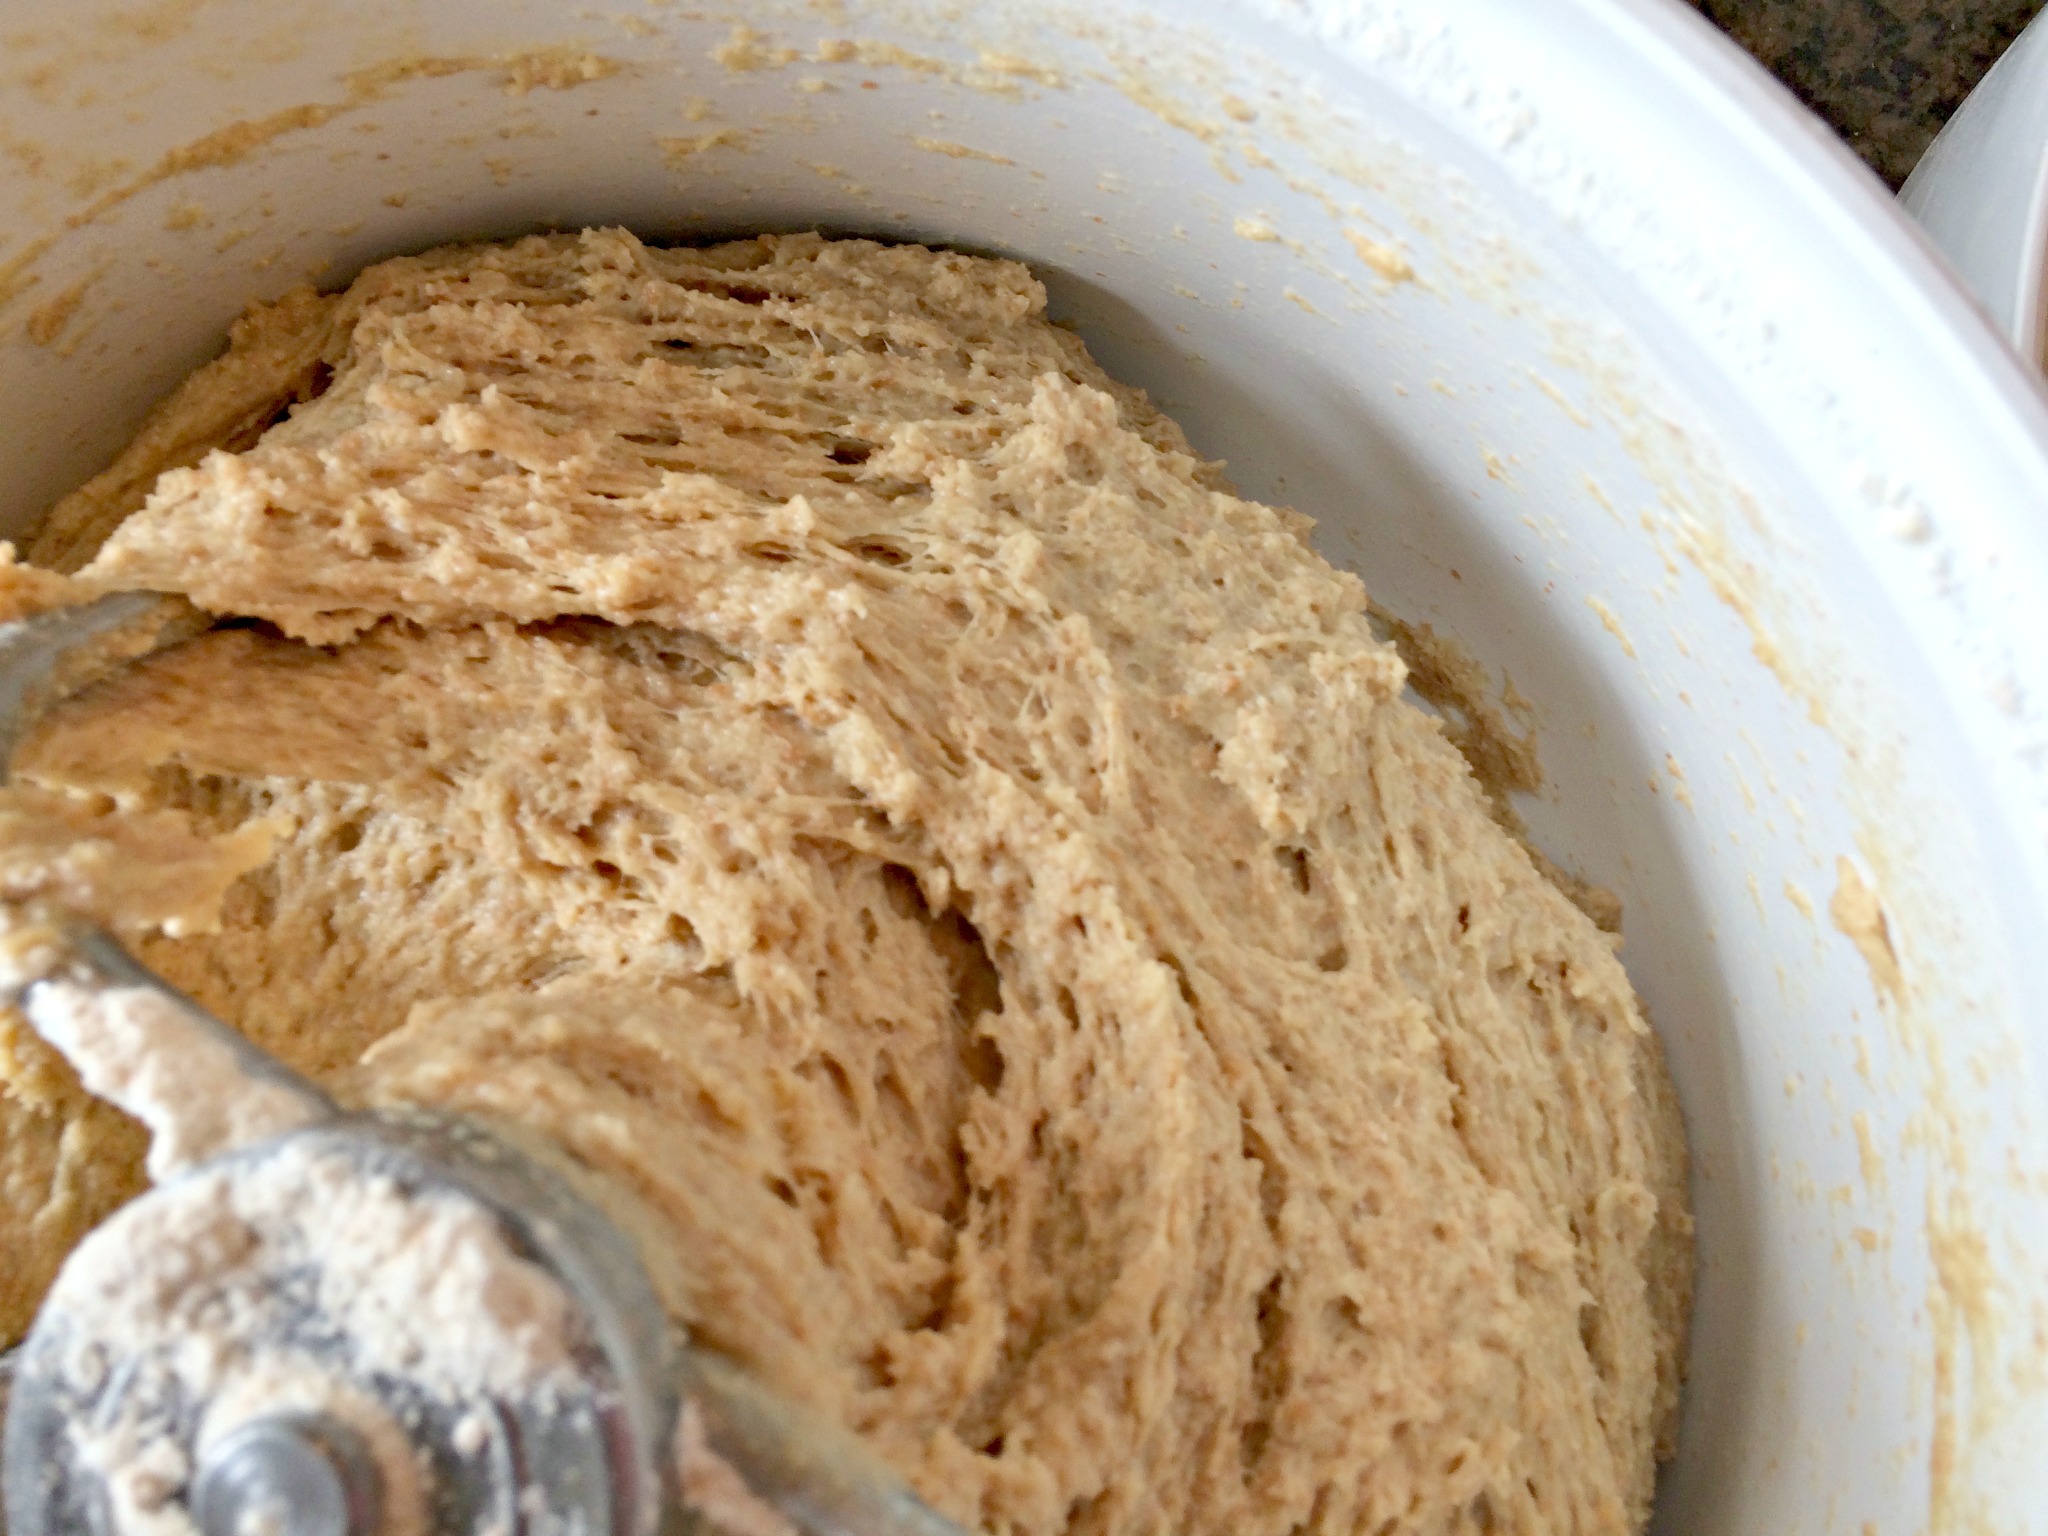
After 9 minutes, you will have perfectly kneaded dough. It will be smooth and elastic and no longer sticky.
Take out the dough hook. Put the cover back on and let it rest for 20 minutes.
After 20 minutes the dough will have risen quite a bit. This is the first rise.
Next, I “oil” the countertop and turn the dough out onto the oiled surface. Perfectly kneaded bread does not need to be turned onto a floured surface.
Just smear some oil on the counter & turn out the dough onto it. This will “punch-down” the dough after the first rise.
This recipe makes 5-6 loaves of bread.
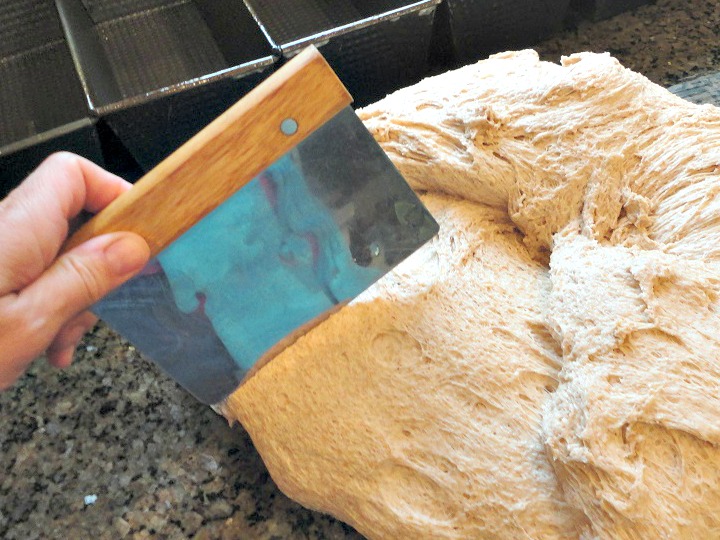
If you are new to breadmaking I suggest you make 5 loaves (in 10-inch pans). By making 5, you will net bigger loaves and they will rise quicker.
Divide the dough into 5 even parts.
First, spray the loaf pans with non-stick spray. Then shape the dough into ovals by pulling the dough around the sides and gathering it underneath. This creates a smooth top and an oblong loaf. Place the dough into the pan (smooth side up) and gently press the dough to extend from end to end.
Don’t get too worried about perfectly shaped loaves. Just get the top somewhat smooth & press them into the bottom of the pans. They will rise and fill out the pans beautifully.
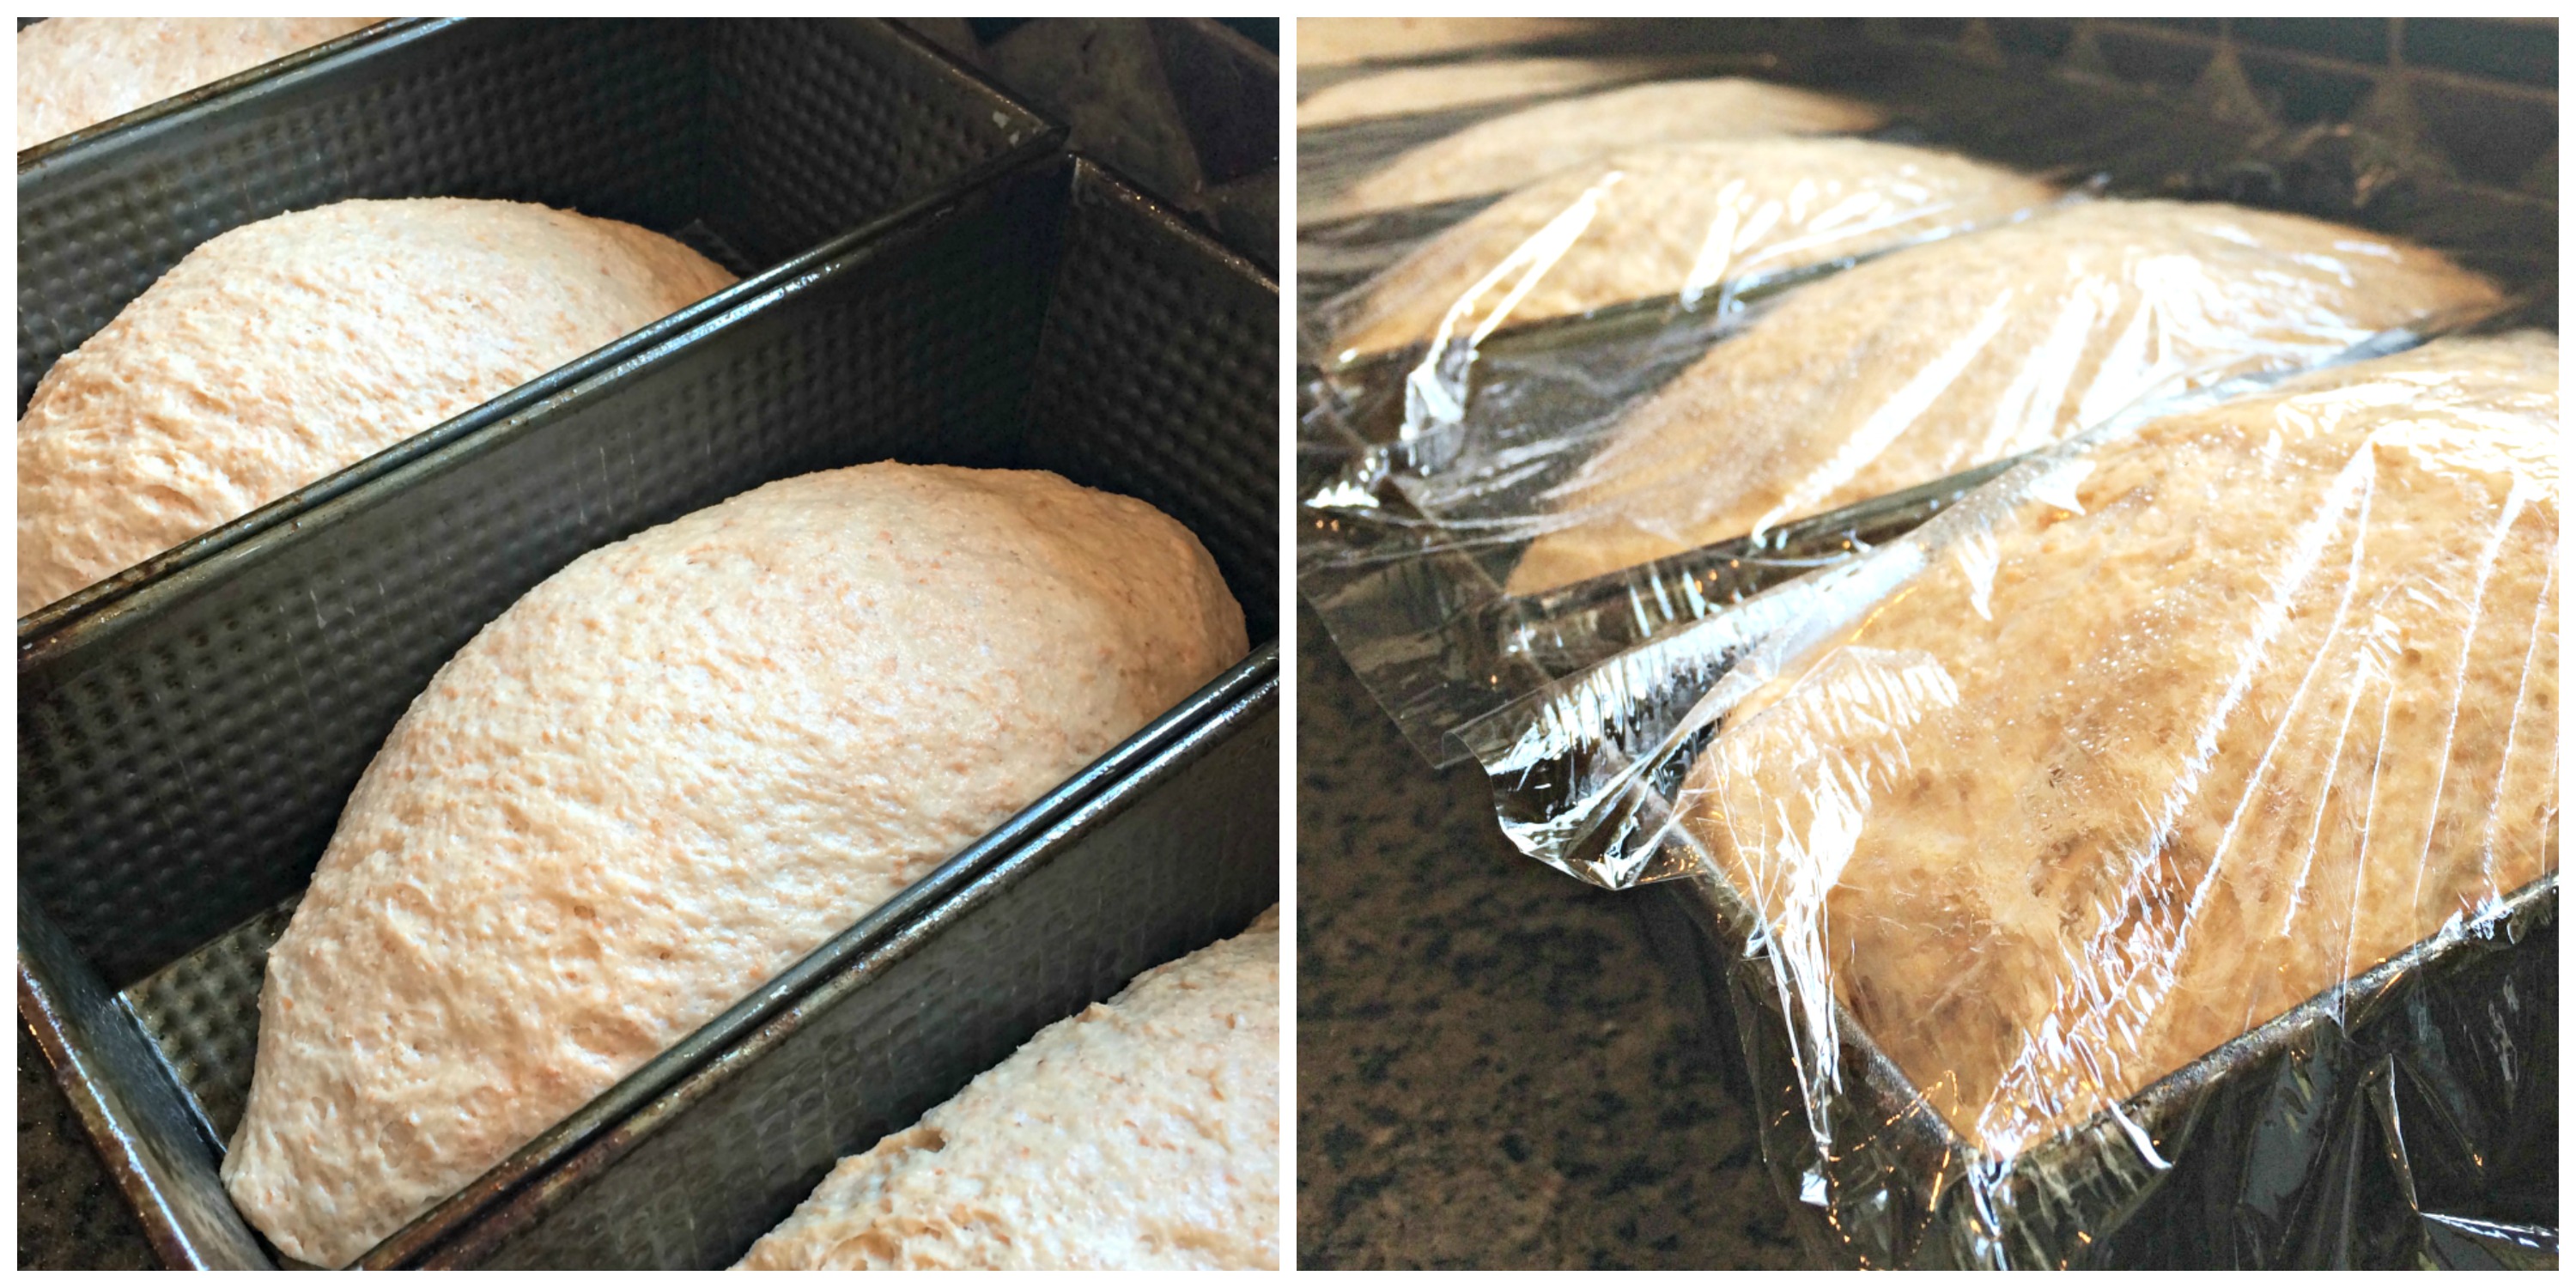
I love Norpro 10-inch bread pans. The waffling on these pans helps the baked loaves fall right out.
Cover the loaves and let them rise for 30 minutes (or until they crest the pan 1 inch). This is the second rise.
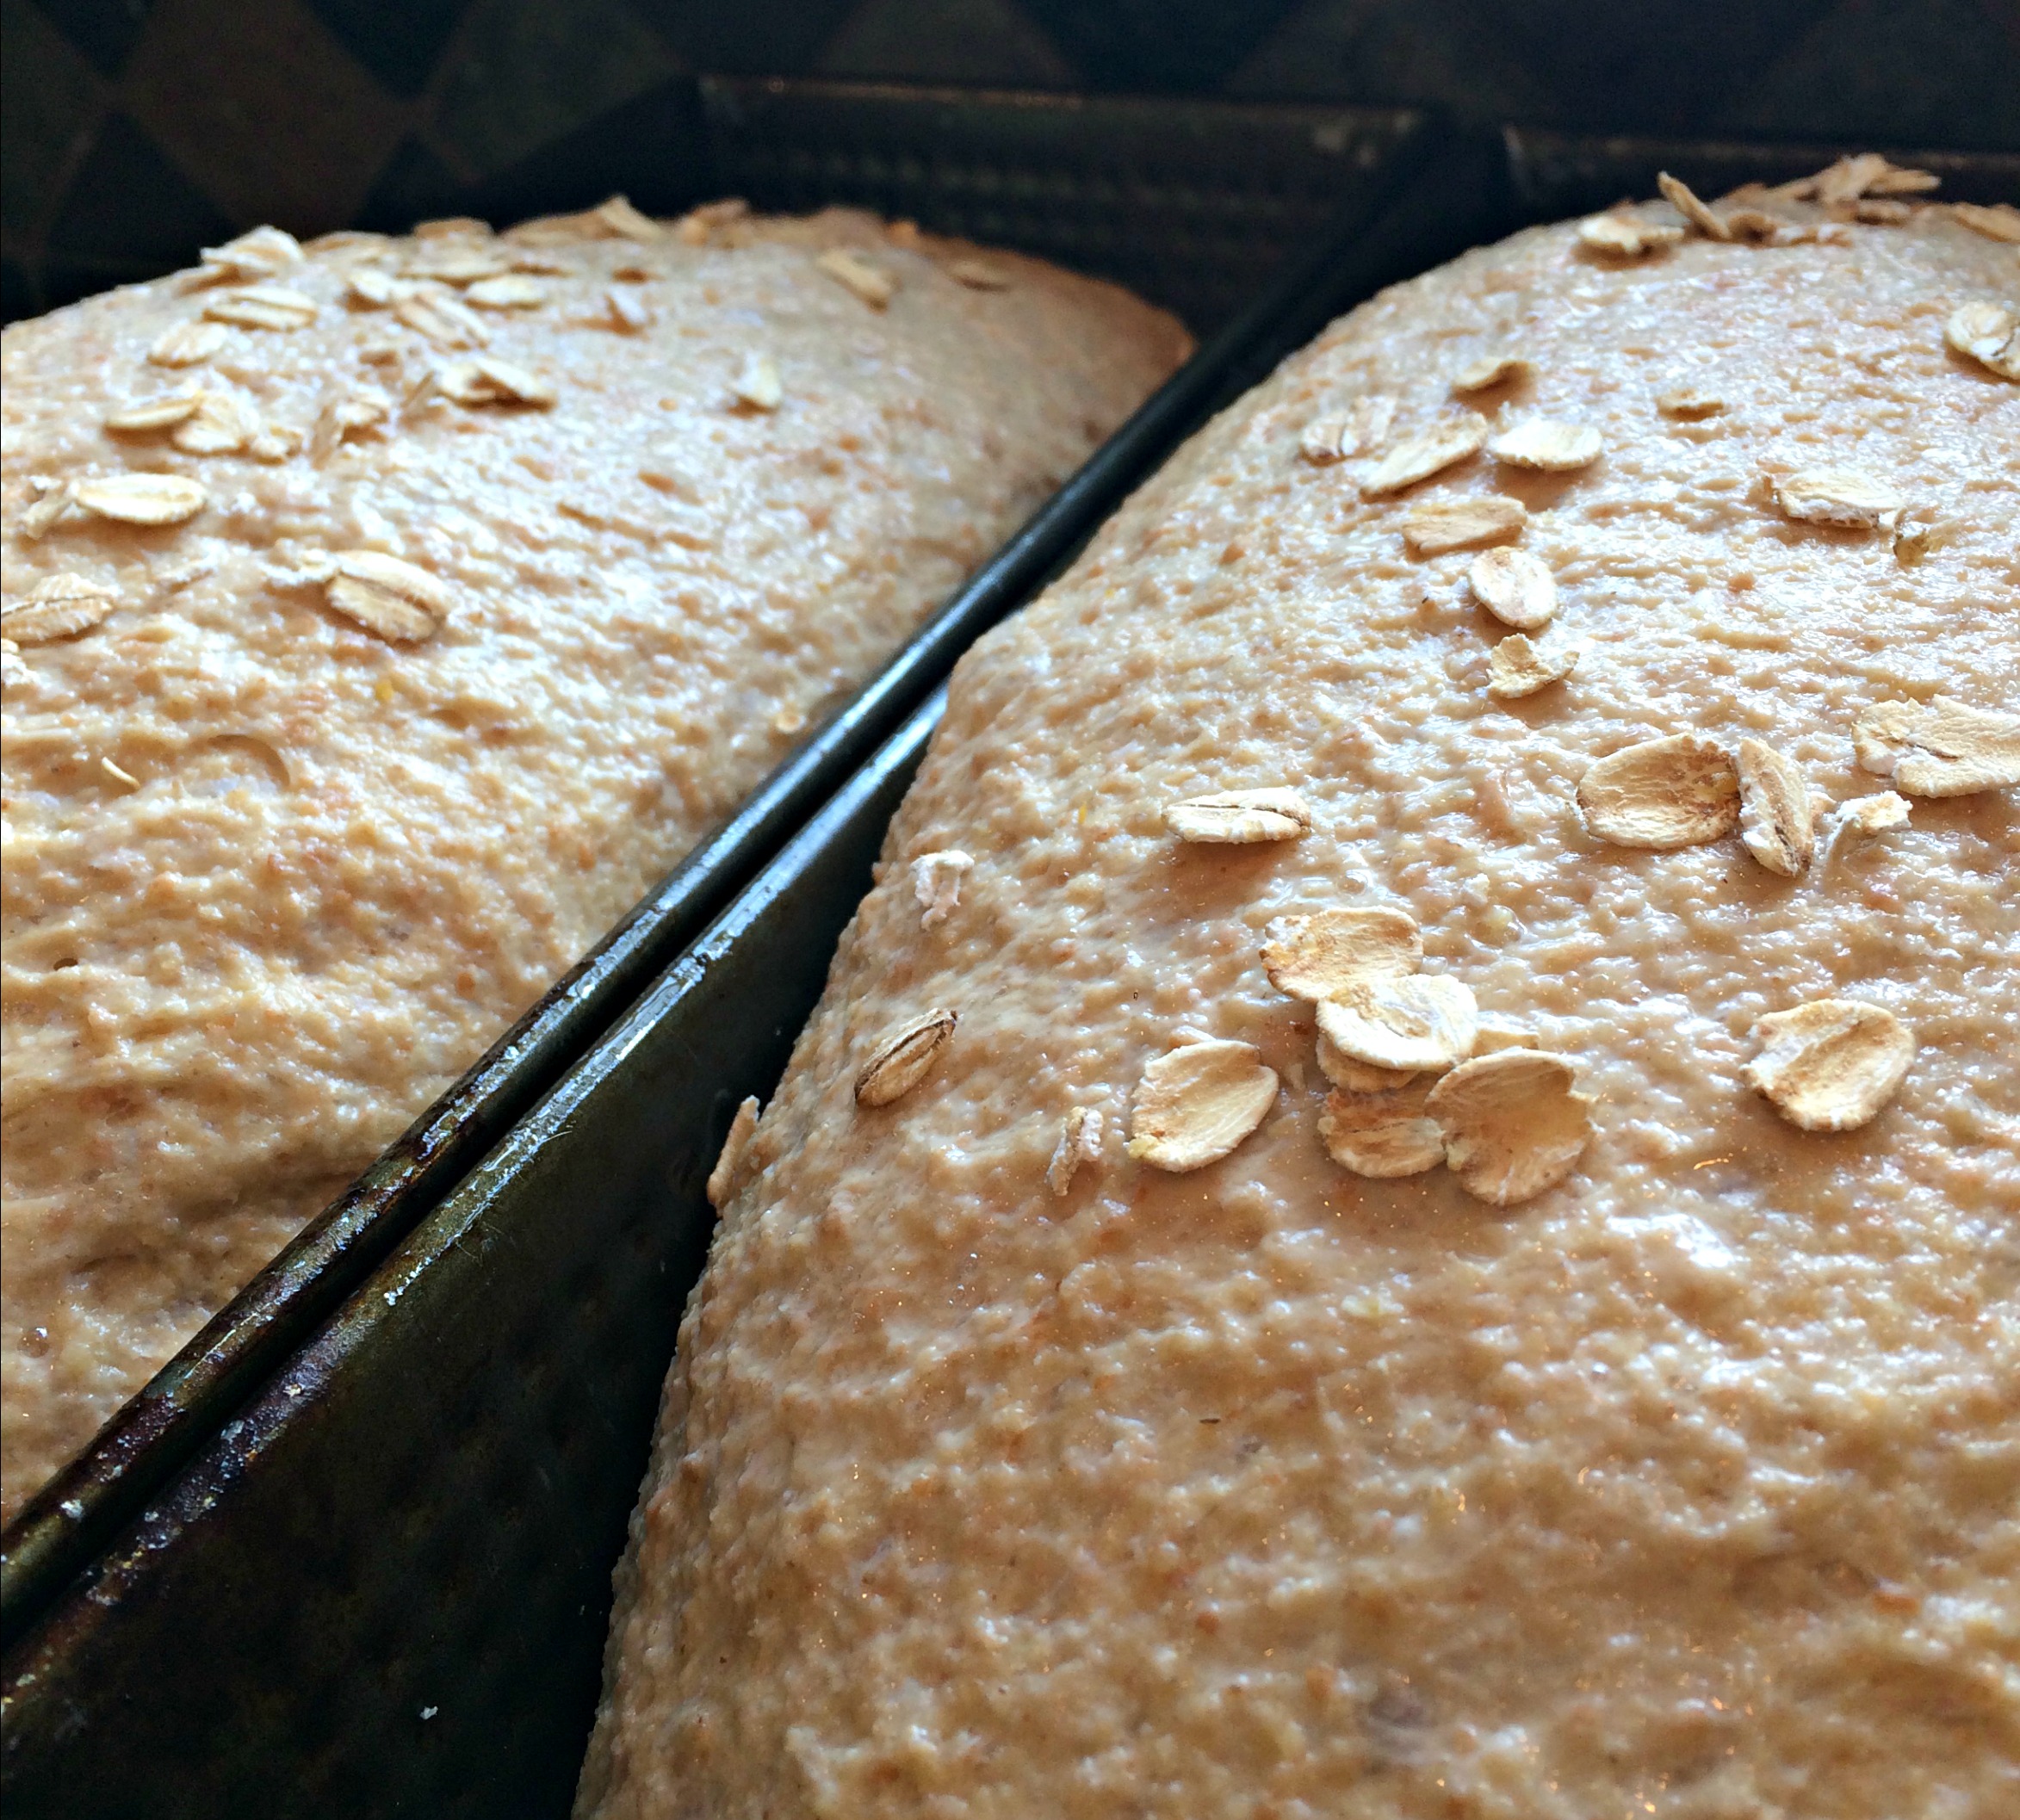
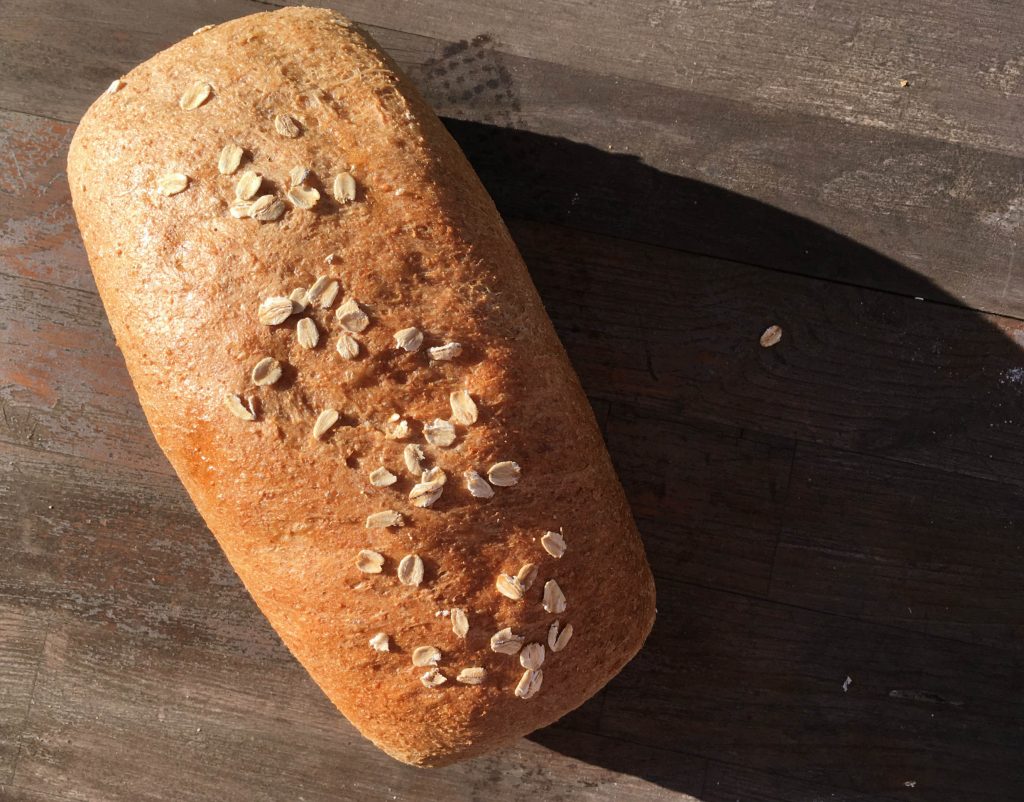
Once the dough has risen, they are ready to bake. You can place them into the oven as is, or make them fancy with a little egg wash and topping (like rolled oats, flaxseeds or sesame seeds).
Bake them for 30 minutes at 340 degrees.
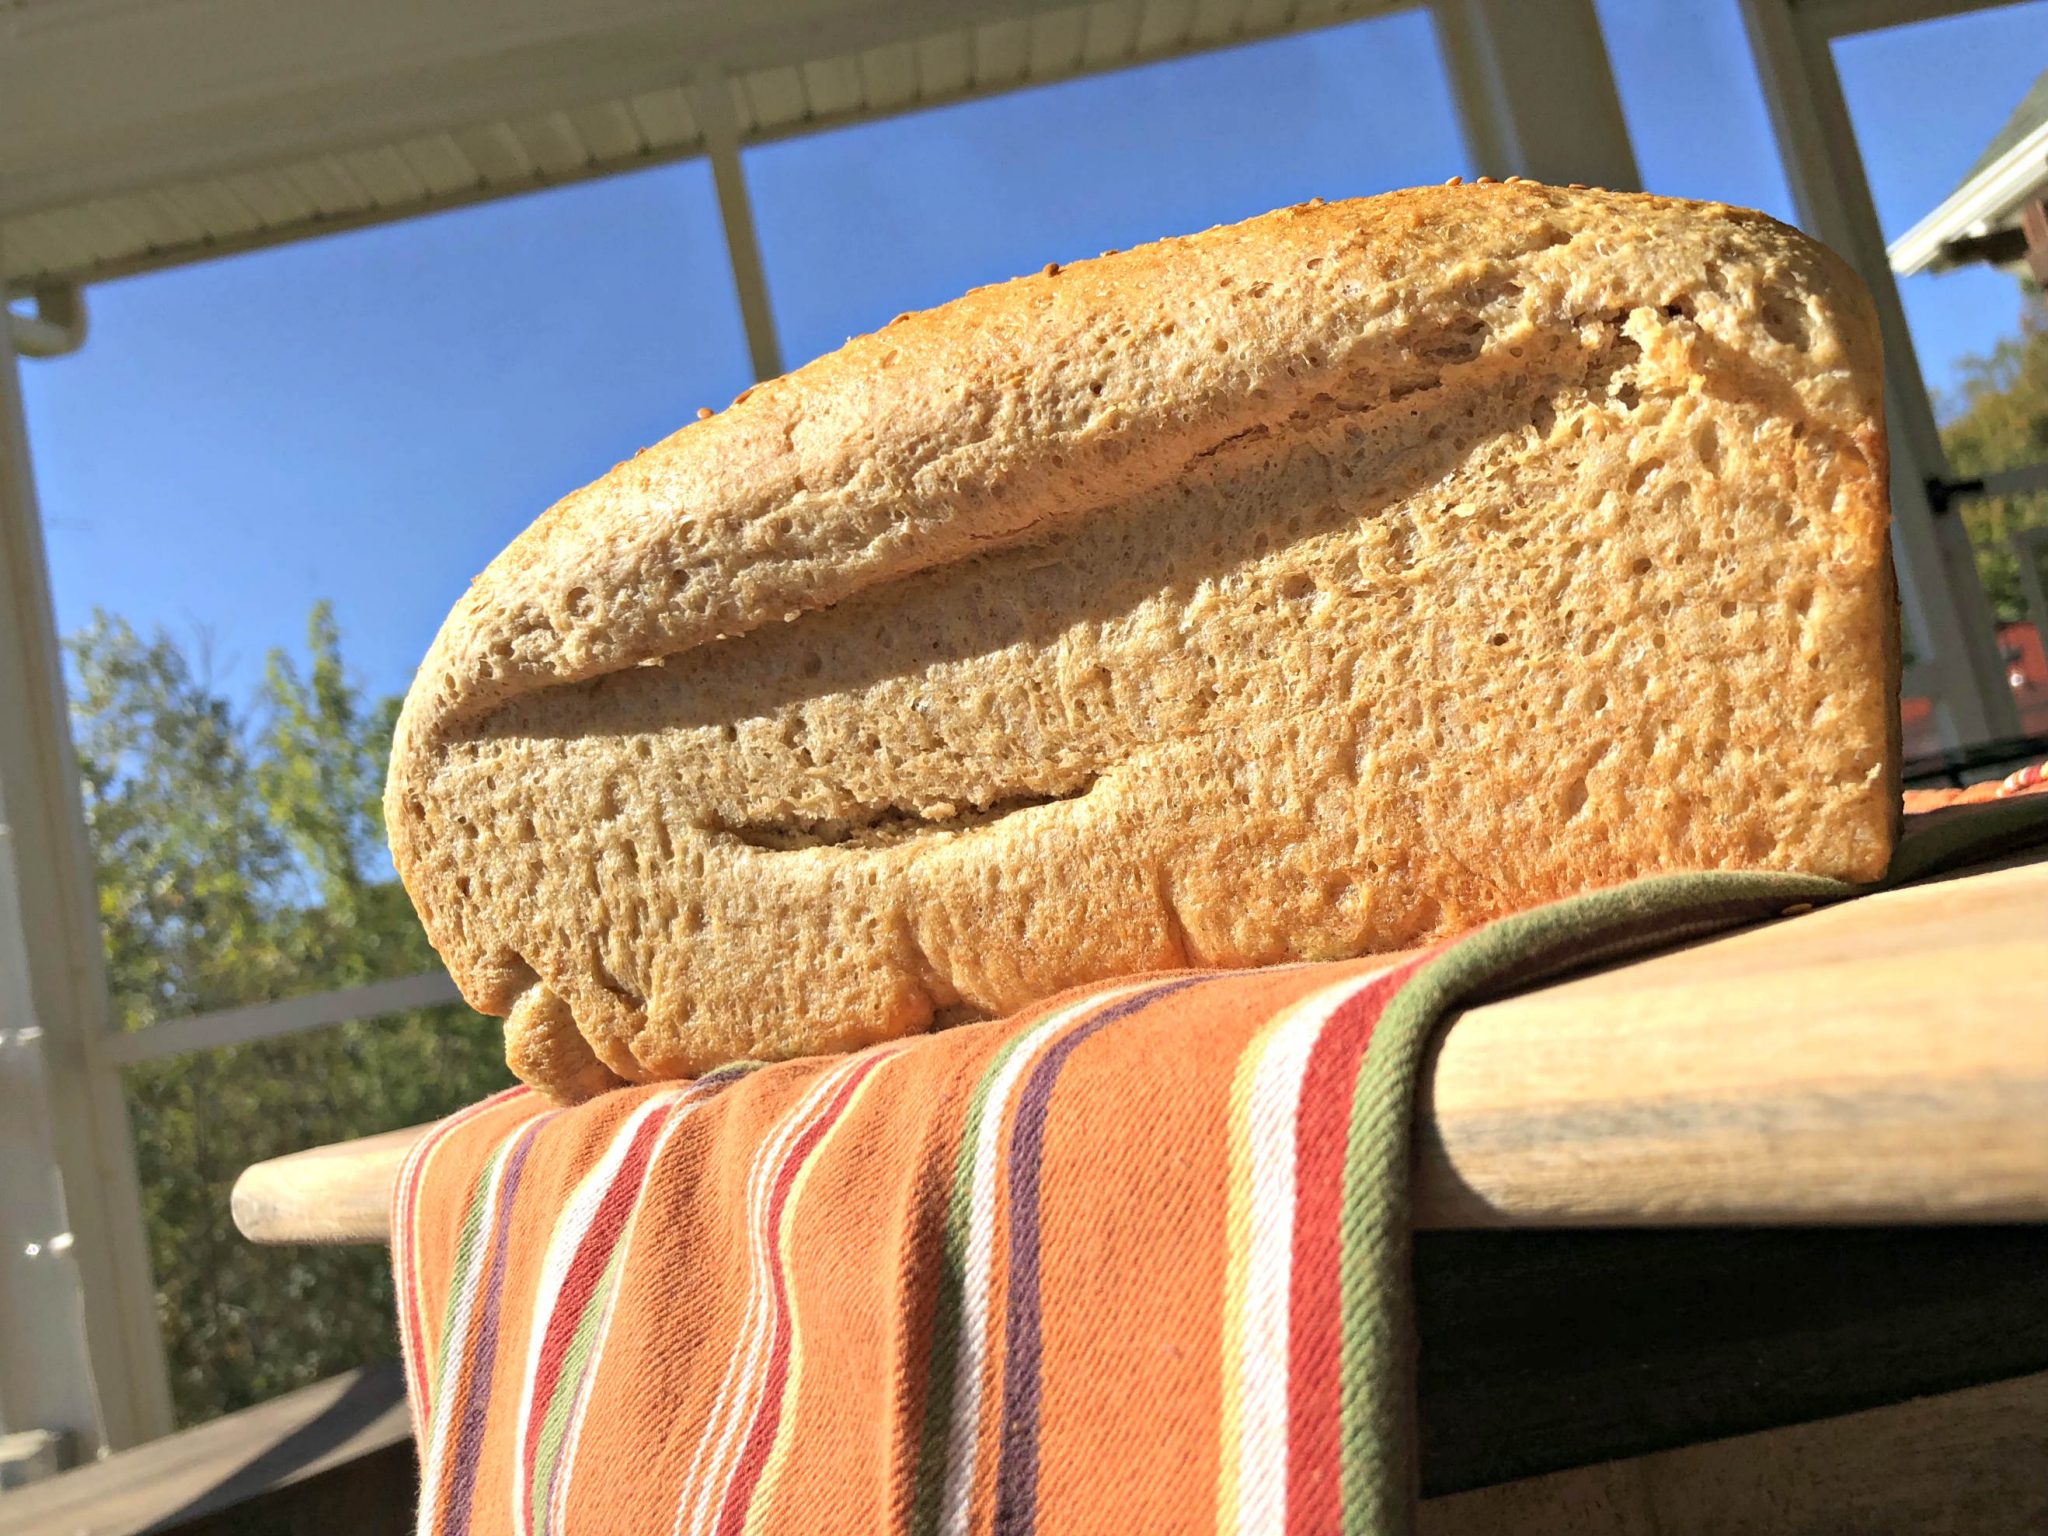
To prevent loaves from falling in the center, lay bread on its side while cooling.
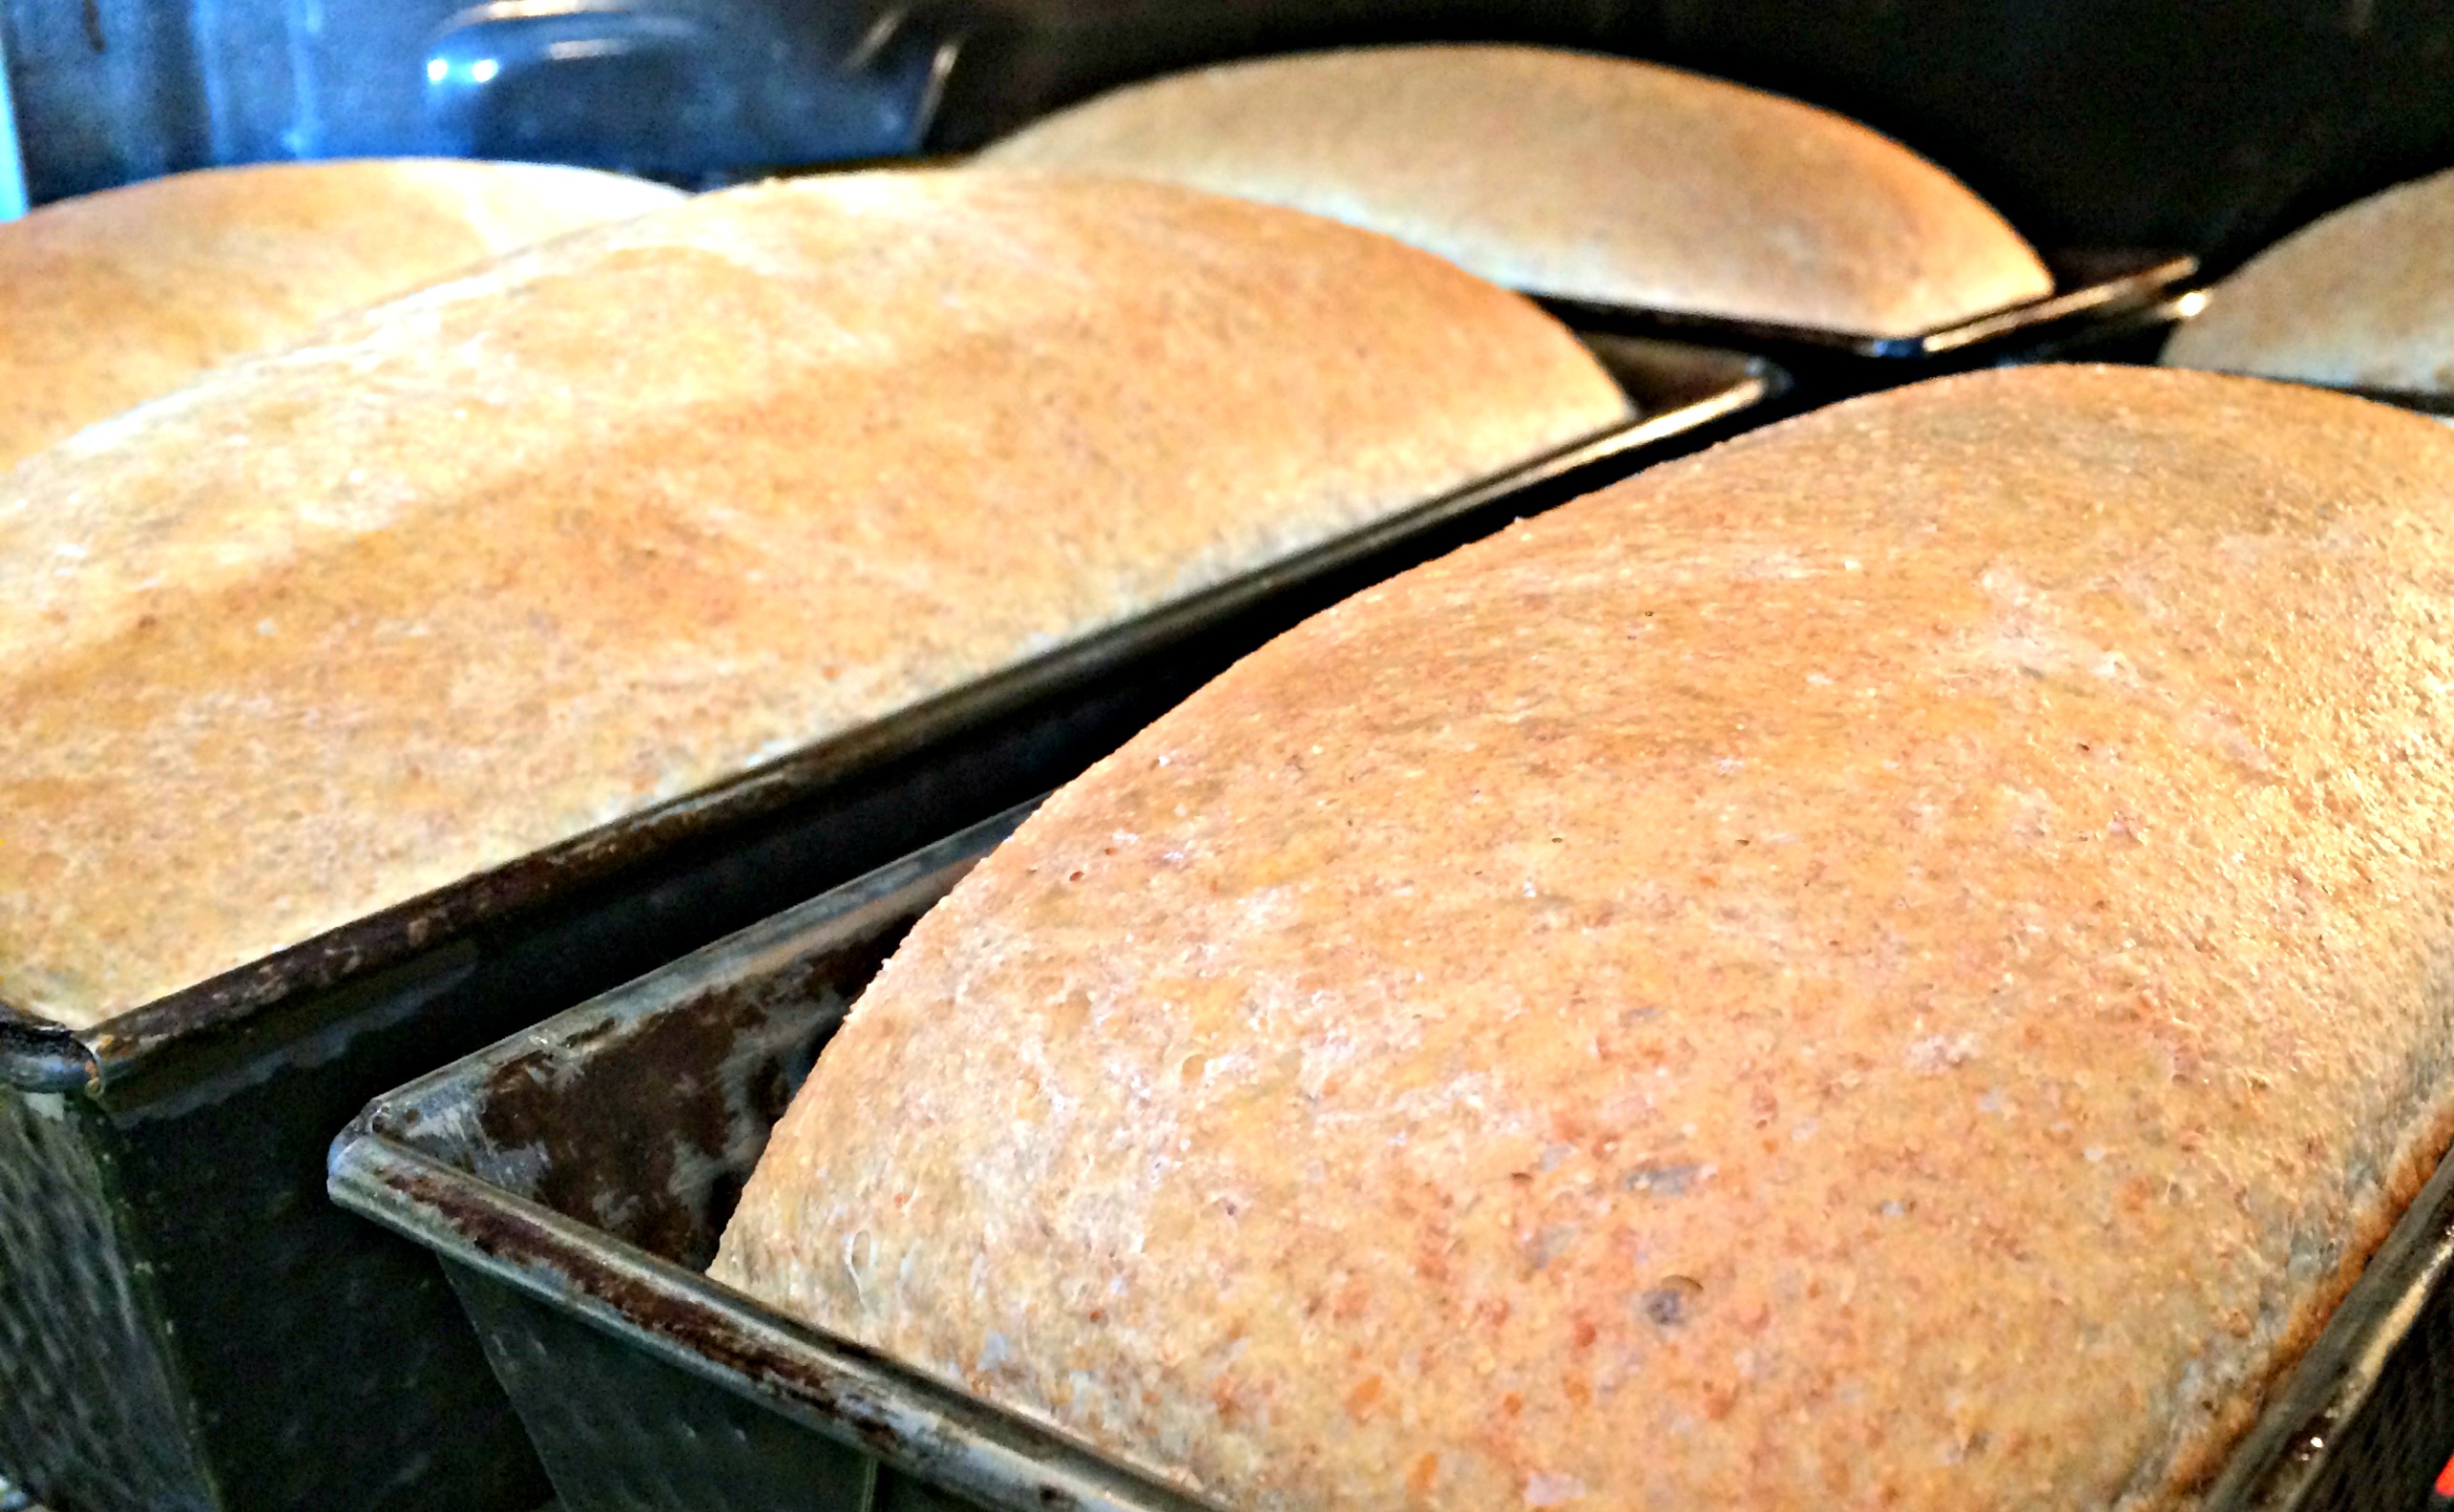
Once they have cooled enough to touch, use a spatula to detach the bread from all the sides of the pan.
The bread will easily fall out of the pans.
When I make bread, I usually clear my calendar for the morning & spend the day baking. I’ll put over 20 loaves in the freezer and serve bread and soup for dinner.
The cleanup time is the same whether I baked 6 loaves of bread or 24 loaves of bread. So, I make a ton.
After the bread is out of the pans I stick the loaves in ziplock bags & freeze them.
BASIC FARMHOUSE SANDWICH LOAF
(Makes 5-6 loaves)
Here’s the recipe:
- 11 Cups Wheat berries
- 5 1/2 Cups Hot water
- 1 1/4 Cup oil (I use grapeseed)
- 1 Cup honey
- 3 Tbsp Yeast
- 1/4 Cup gluten (optional)
- 5 Tsp salt
Recipe Instructions:
Put water, oil, honey, and yeast in the mixer. After yeast activates add gluten (if using) and 5 cups of flour, mix on low. Add salt. Continue adding flour until the sides of mixer begin to clean, mixing on low. Place top on mixer & mix on medium 9 minutes.
After 9 minutes, remove the dough hook and let rest 20 minutes. Turn dough out onto an oiled surface. Divide & shape into 5 loaves. Shape loaves and put in pans. Cover & let rise.
Bake 30 minutes @ 340 degrees.
Be sure to join the email list (for free) here. You’ll get updates & the latest homesteading fun delivered straight to your inbox.
If you want to dive into the world of making bread (which you should) I’d encourage you to think about becoming a Member. It’s cheap and you’ll learn everything you need to know so you can make homemade bread like your great-grandma did. Learn more about becoming a member here.
Happy Baking!
-Candi


