
In winter I don’t seem to have as many ‘homesteading’ activities to do. The garden is sleeping. There’s nothing to can. The chickens aren’t hatching out chicks.
There’s always the normal everyday chores: milk the cow, feed the cows, let the chickens out, feed them, make sure everyone has plenty of water, muck out the run-in, try not to freeze; but other than that, things are slow.
For me, winter is a quiet time of planning and dreaming by the fireplace (after I milk the cow). Winter chores around here usually include: lots of homeschooling (might as well hit the books when there’s not much else to do) chopping wood, stretching fence, clearing brush, spreading seed and Maple Sugar’in!
Maple Sugar’in is by far more fun than homeschooling, chopping wood, stretching fence, clearing brush and spreading grass seed. It is also a nice get-away from hiding indoors.
If you want more on Maple Sugar’in:
- 6 Reasons to drink Maple Sap
- 10 Things About Making Maple Syrup
- Why Maple Syrup is not the same as Sugar
The best part about the maple syrup adventures here at our little homestead is that it was all DH’s idea. He ordered the supplies. He tapped the trees. He collected the sap. He boiled it.
If this had been my idea it may have turned out very differently. I can just imagine the look I would have received as I explained that I needed to boil the sap over a fire for…… all day.
Luckily, it was his idea. He was excited. He is very proud of his little pint of homemade, maple syrup. As he placed the tiny bounty from his hard work in the refrigerator he looked at me and said, “This will be good in your coffee in the morning, won’t it?”
“You betcha! It’s gonna be the best maple latte’ I’ve ever had in my life, Babe!” XOXO
I have to tell you how incredibly EASY it is to make syrup. You won’t believe it. Here’s the overview:
- Collect sap & filter it.
- Boil the daylights out of it.
- Keep boiling it.
- Take it in the house and boil it some more.
- Strain into mason jar & make pancakes.
Really this can be boiled down (ha ha) into 3 steps:
- Collect sap
- Boil sap
- Put sap in jar
That’s it! There is nothing complicated or technical about this. So EASY.
It takes 40 gallons of maple sap to make 1 gallon of maple syrup. The sap comes out of the tree as 98% water, 2% sugar. We are just going to remove a bunch of that water by boiling it a bit. Ahem.
Keep scrolling down to see the detailed step-by-step process with lots of pictures.
It all began in the fall. Actually, it began a couple of years ago in the dead of winter.
My husband and I wandered around the woods for hours, trying to decide which leafless trees were Maple trees. In the middle of winter all trees look the same. No leaves, no nuts, no flowers, nothing but trunks and branches. All brown, all bald, all the same… at least to us. I am sure there are tree-wizards out there who can identify any tree, any time of year, but we are not them. Without life on the tree, we could not tell an oak from a maple. Our wandering and investigating resulted in us tapping the wrong trees. Which of course resulted in no sap.
After our tree tapping failure in 2014 we (husband) came up with a great idea. We (husband again) identified some maple trees in the fall, when the trees still had leaves, and people like us could tell which leaves went to which tree. Non-expert tip: identify the maple trees in fall – they are the ones with the bright red, beautiful, maple leaves.
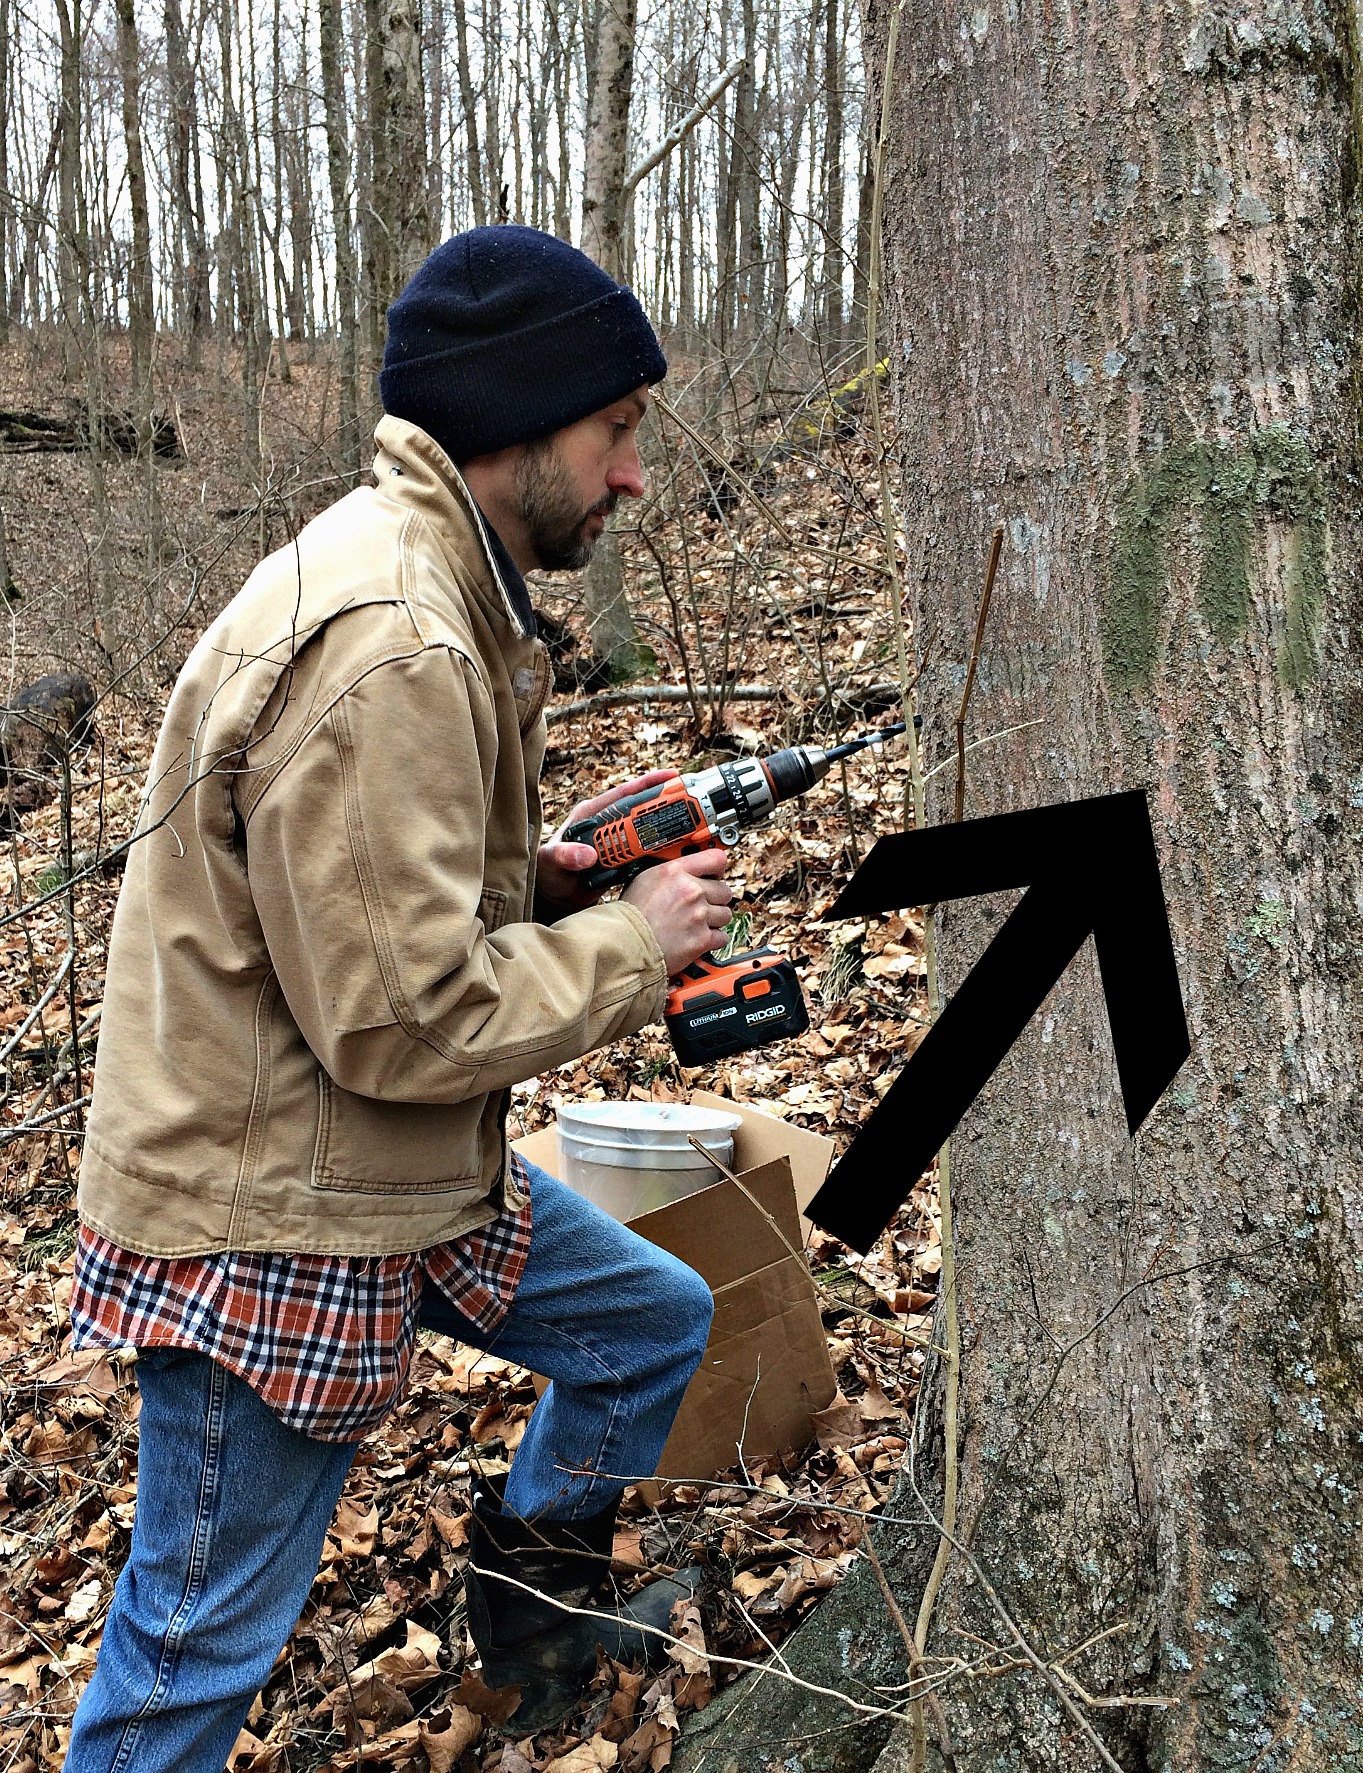
We (husband again) then spray painted ‘M’s on the maple trees. Aren’t we clever.
When the days begin to get warmer and the nights are still dropping below freezing, this is when the sap really begins to run. Here in Kentucky, this usually starts in February. The tree tapping season is about 3 weeks long.
Once the weather was right for collecting sap we went out to the woods to find the “M”‘s. See the green “M” on the tree? That’s the target.

Drill a hole in the tree 2 1/2 inches deep with whatever diameter needed for your spile. DH marked his drill bit with a tiny piece of tape at the 2 1/2 inch mark. When his bit was into the tree at the point of the tape – he knew he had a 2 1/2 inch hole. My man’s a genius. Be sure you put a slight angle on the hole so that the spile is angled down helping the sap run into the bucket.
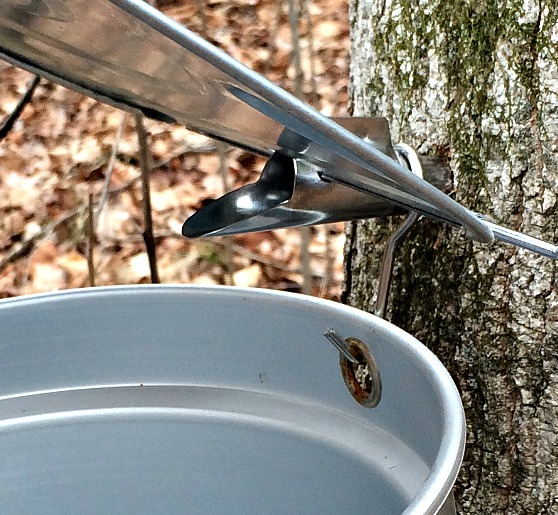
Next, shove the spile into the hole. We used a rubber mallet to bang it securely into place. Attach the hook over the spile and hang the bucket. This entire set-up came in a tree-tapping kit. Easy.
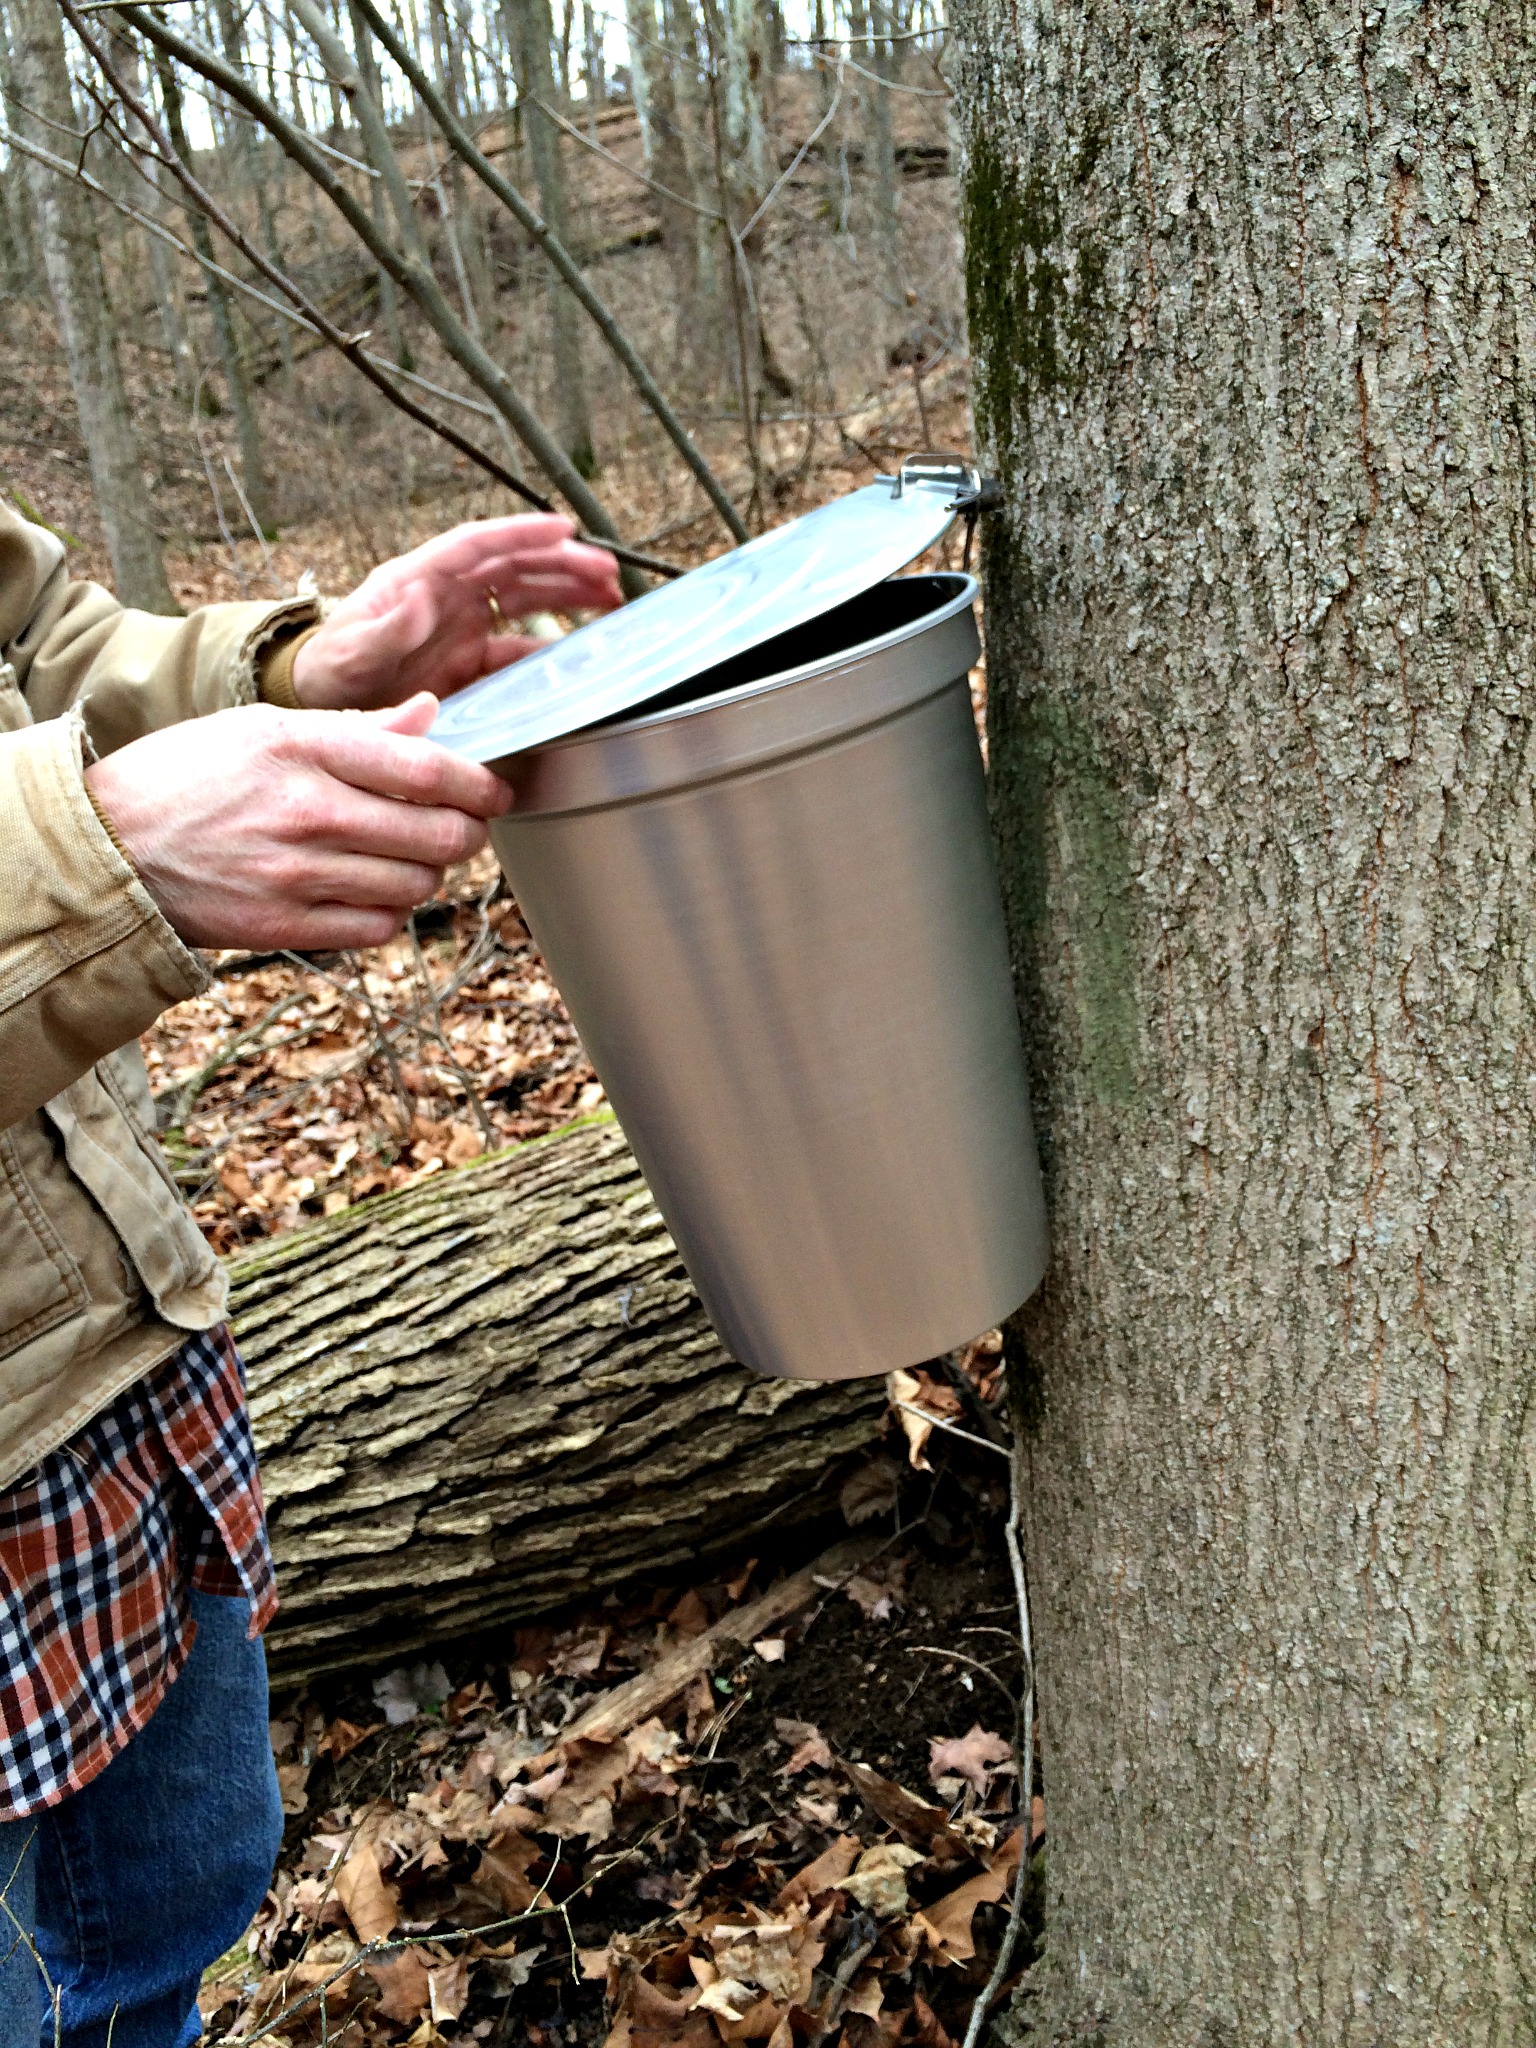
Last, put the lid on. Done. The lid will prevent rain, leaves, and other forest’y debris from ending up in your collection bucket.
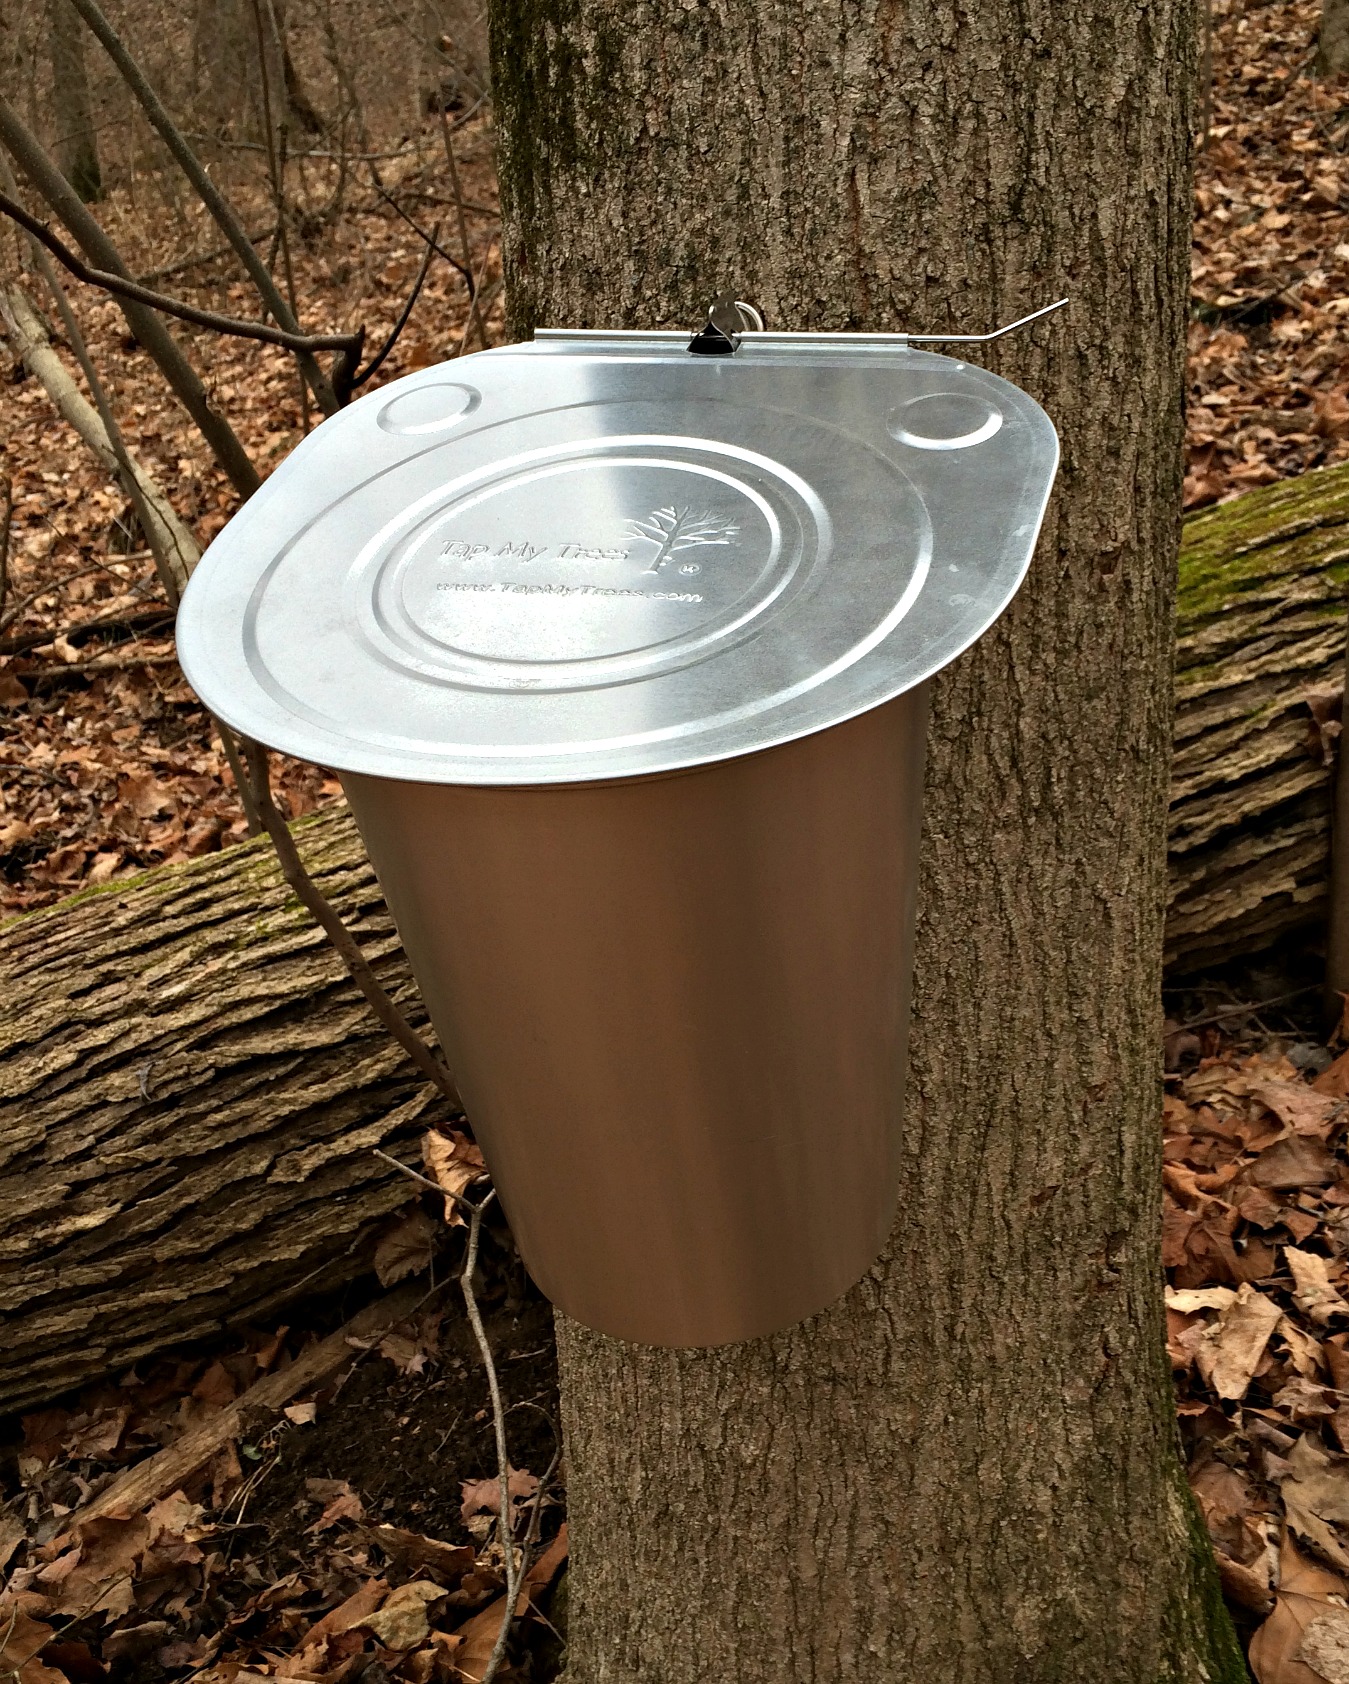
While you are in your house busy doing other wintery things, this little gizmo will be collecting sap for you.
It would be good to check your buckets every couple of days, every day if you happen to find the Mac-Daddy of all maple trees. Once your sap begins to run, your Mac-Daddy bucket will overflow in no time. When we visited our maple tapping buckets for the first time we found a maple sap lake under one of our buckets that had been overflowing. Bummer.
We stuck another spile on the other side of the Mac-Daddy tree.
If you tapped maple trees (not oaks), that were the right age (over 40 years old), at the correct time of year (late winter, early spring) you will do a happy dance when you peek inside. If you look close you can see it in there – it looks like water. Yay Sap!
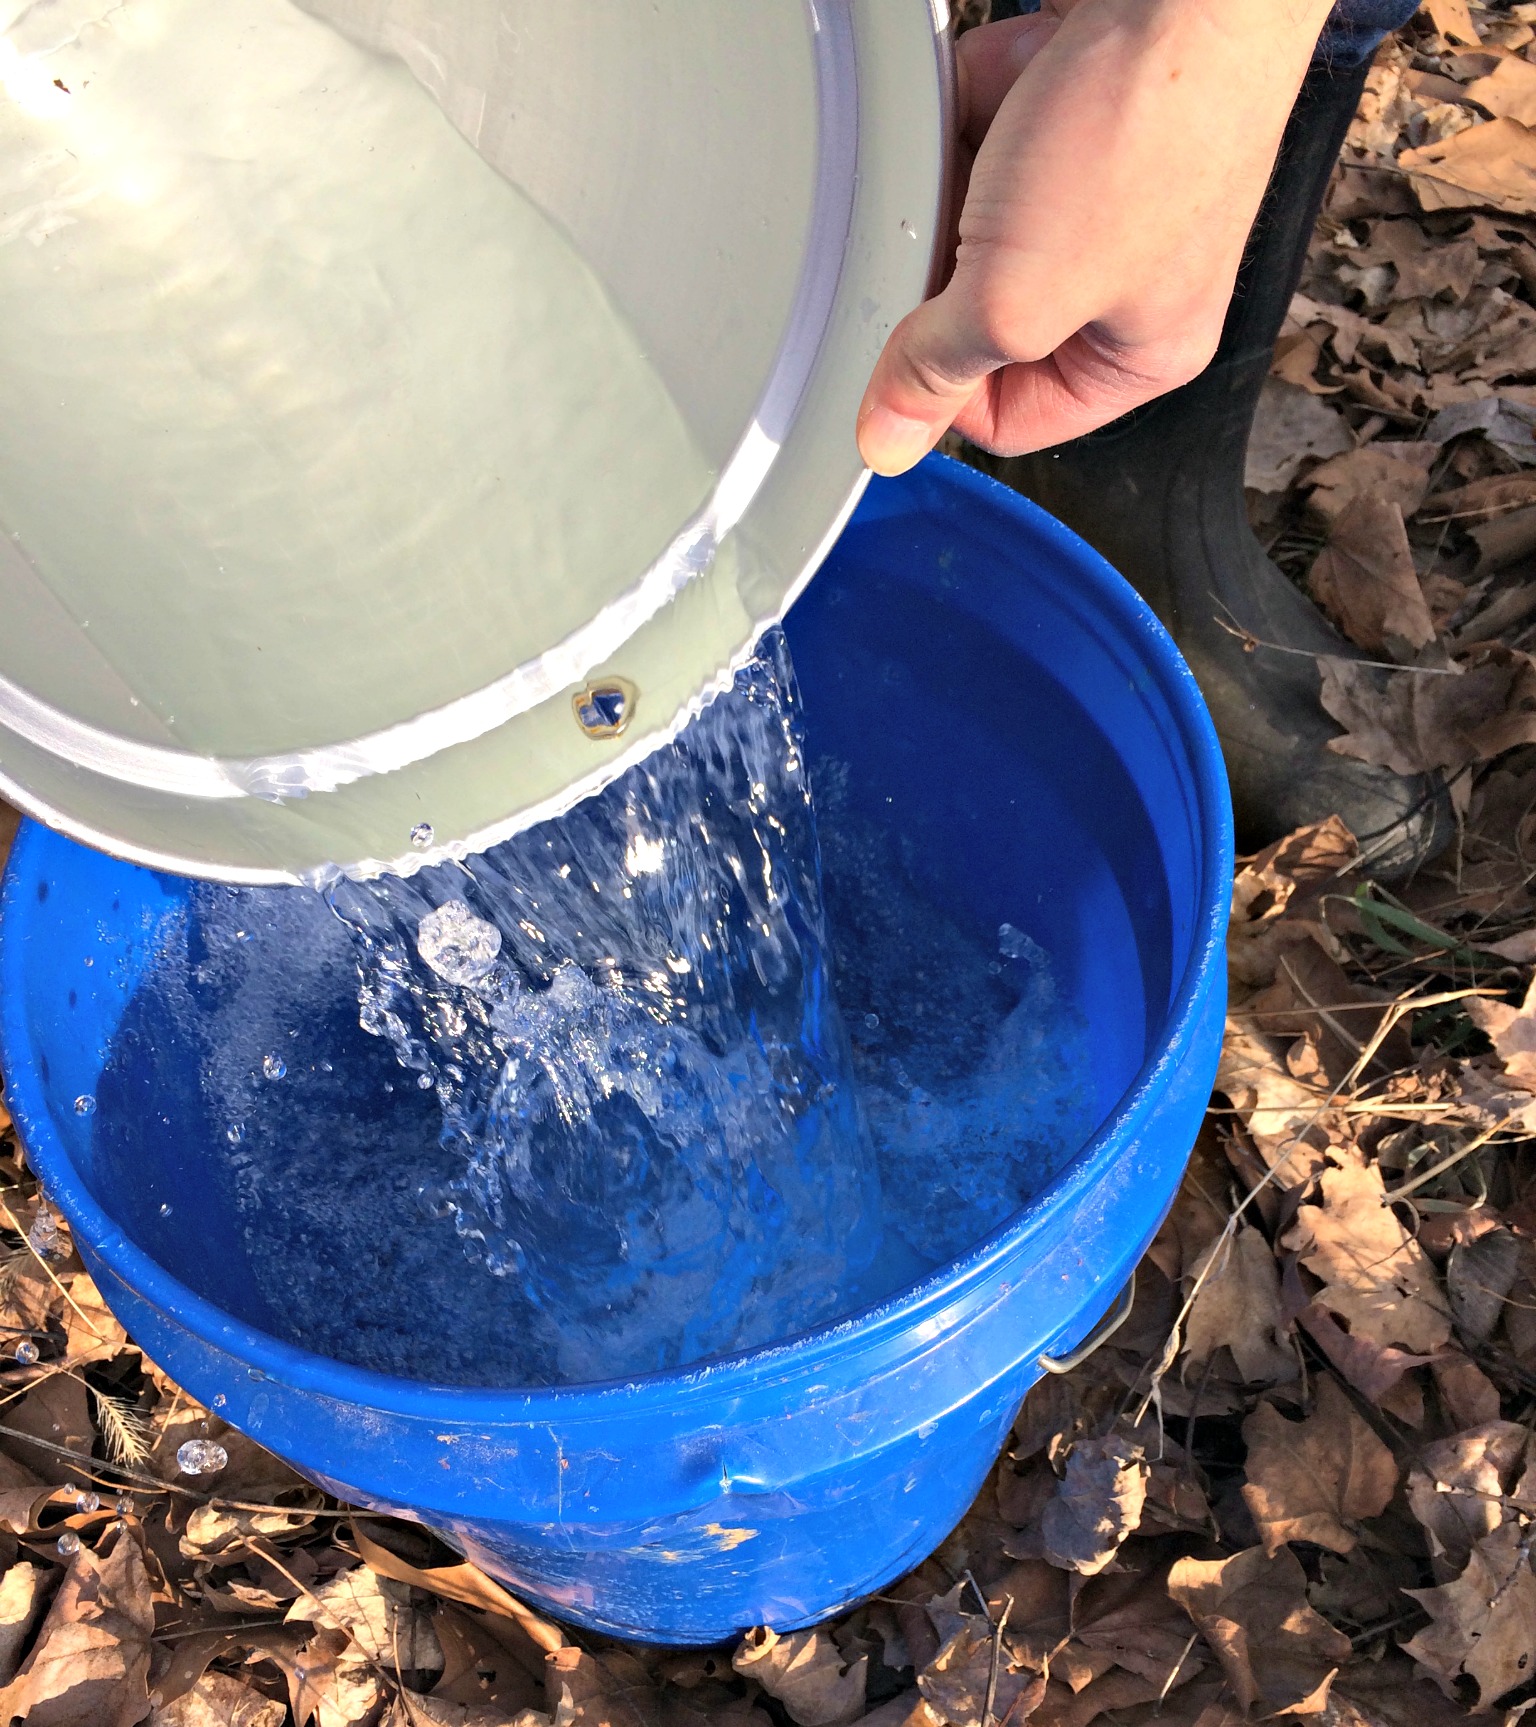
Pour the maple sap into a larger bucket for transporting back to the house for processing. We used a (food grade) 5 gallon bucket. After you collect all the maple sap, hang the collection buckets back on the trees so they can gather more sap for you.
Be sure to strain your maple sap. We do this as soon as we get back to the house. There will probably be a few flies and ants trying to get a free lunch from your sap. Unless you want to have maple-ant-syrup you’ll want to filter it.
You can use cheesecloth, a colander and a paper towel, or a milk filter for filtering. I have a few thousand milk filters so we used those.
I checked the trees for sap every day or two. When the buckets hanging on the trees were mostly full, I brought the sap to the house. There I strained the maple sap into storage containers and placed it in the refrigerator. If the temperatures at your place are cold enough, refrigeration isn’t necessary. I was being cautious so it wouldn’t spoil. At the end of the week I had gallons and gallons of maple sap.

Next comes the fun part. Time to build a fire!!
We got creative here with the sap making set-up. We went with the “use-whatever-you-got” system. The bucket holding the sap is a turkey fryer which has been used on our farm for random chores like de-feathering chickens and making syrup, but has never actually fried a turkey. The stand it is perched upon is a cast-iron stand which normally holds a cast-iron kettle.
Typically this stand would be used in conjunction with it’s accompanying, cast-iron kettle for making stews over a fire, or frying fish. Also lots of fun, but for another day.
Today it is making syrup. I love my cast-iron stand.
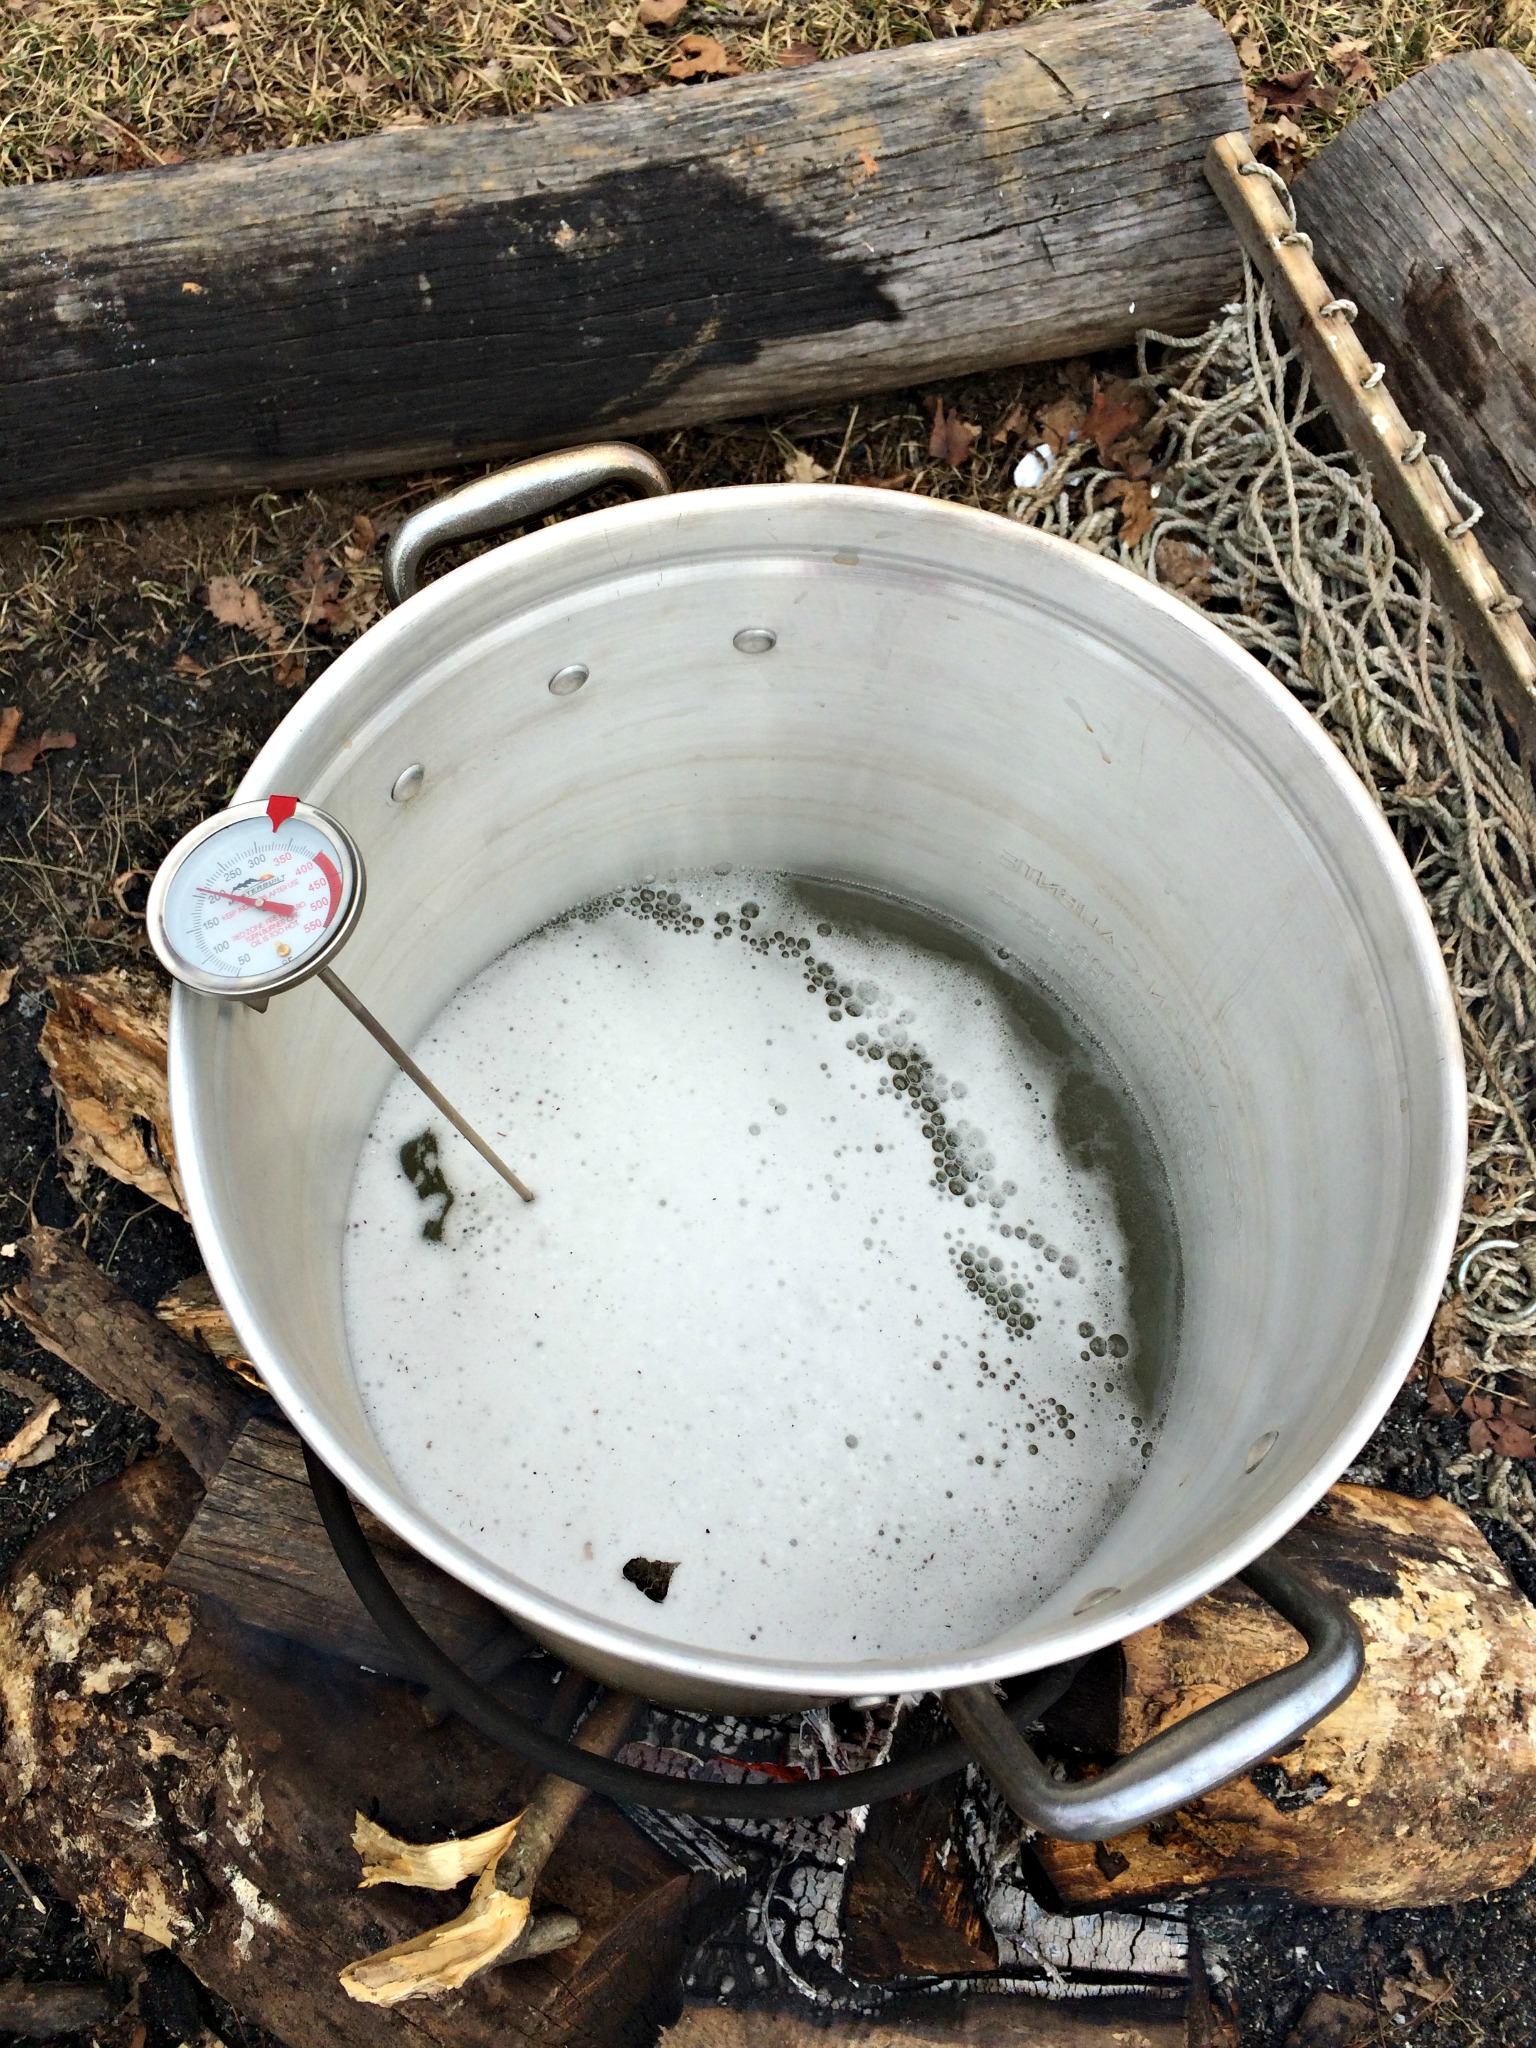
Keep piling on the wood until you get things boiling in the pot. We attached a thermometer to the side of the pot to monitor the temperature of the sap. The goal is boiling – or 212 degrees.
We were completely concerned with keeping the sap at the correct temperature. As newbies we were sure we would mess this up by getting the sap too hot or too cold.
Let me clear up any concerns you may be having – just get the fire hot. Get the sap boiling and it will stay at 212. Ours did. This was way easier than we anticipated. If the temperature dropped, we tossed a couple more logs on the fire. As long as it was hot enough it kept boiling steadily. This was not difficult at all.
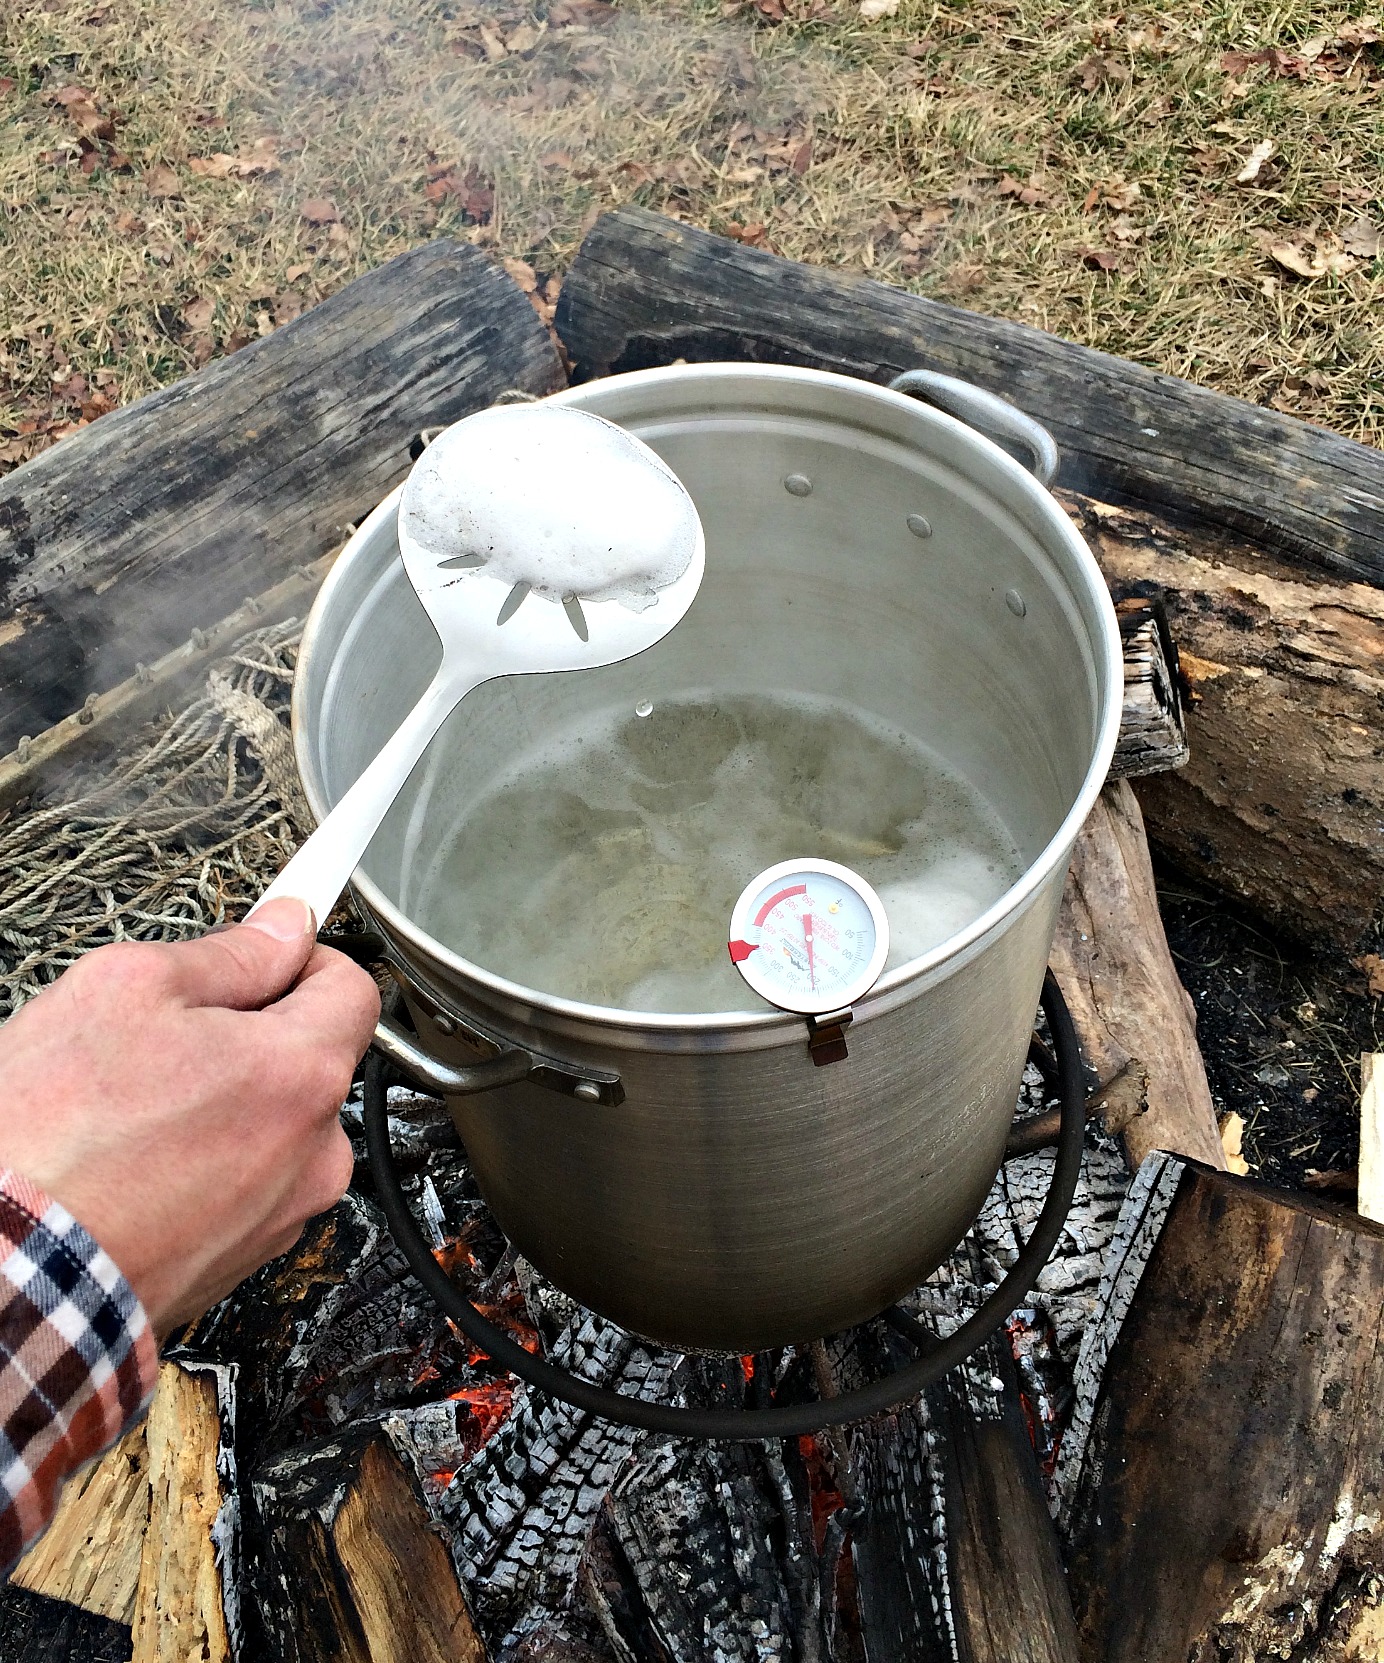
Skim off the scum as it rises to the top.
As the sap boils down continue to add more sap to the pot until you have added all your sap.
It doesn’t matter if you are processing 5 gallons or 20 gallons of sap; the process is the same. You continue adding sap to the pot as it cooks until all of it is in the pot.
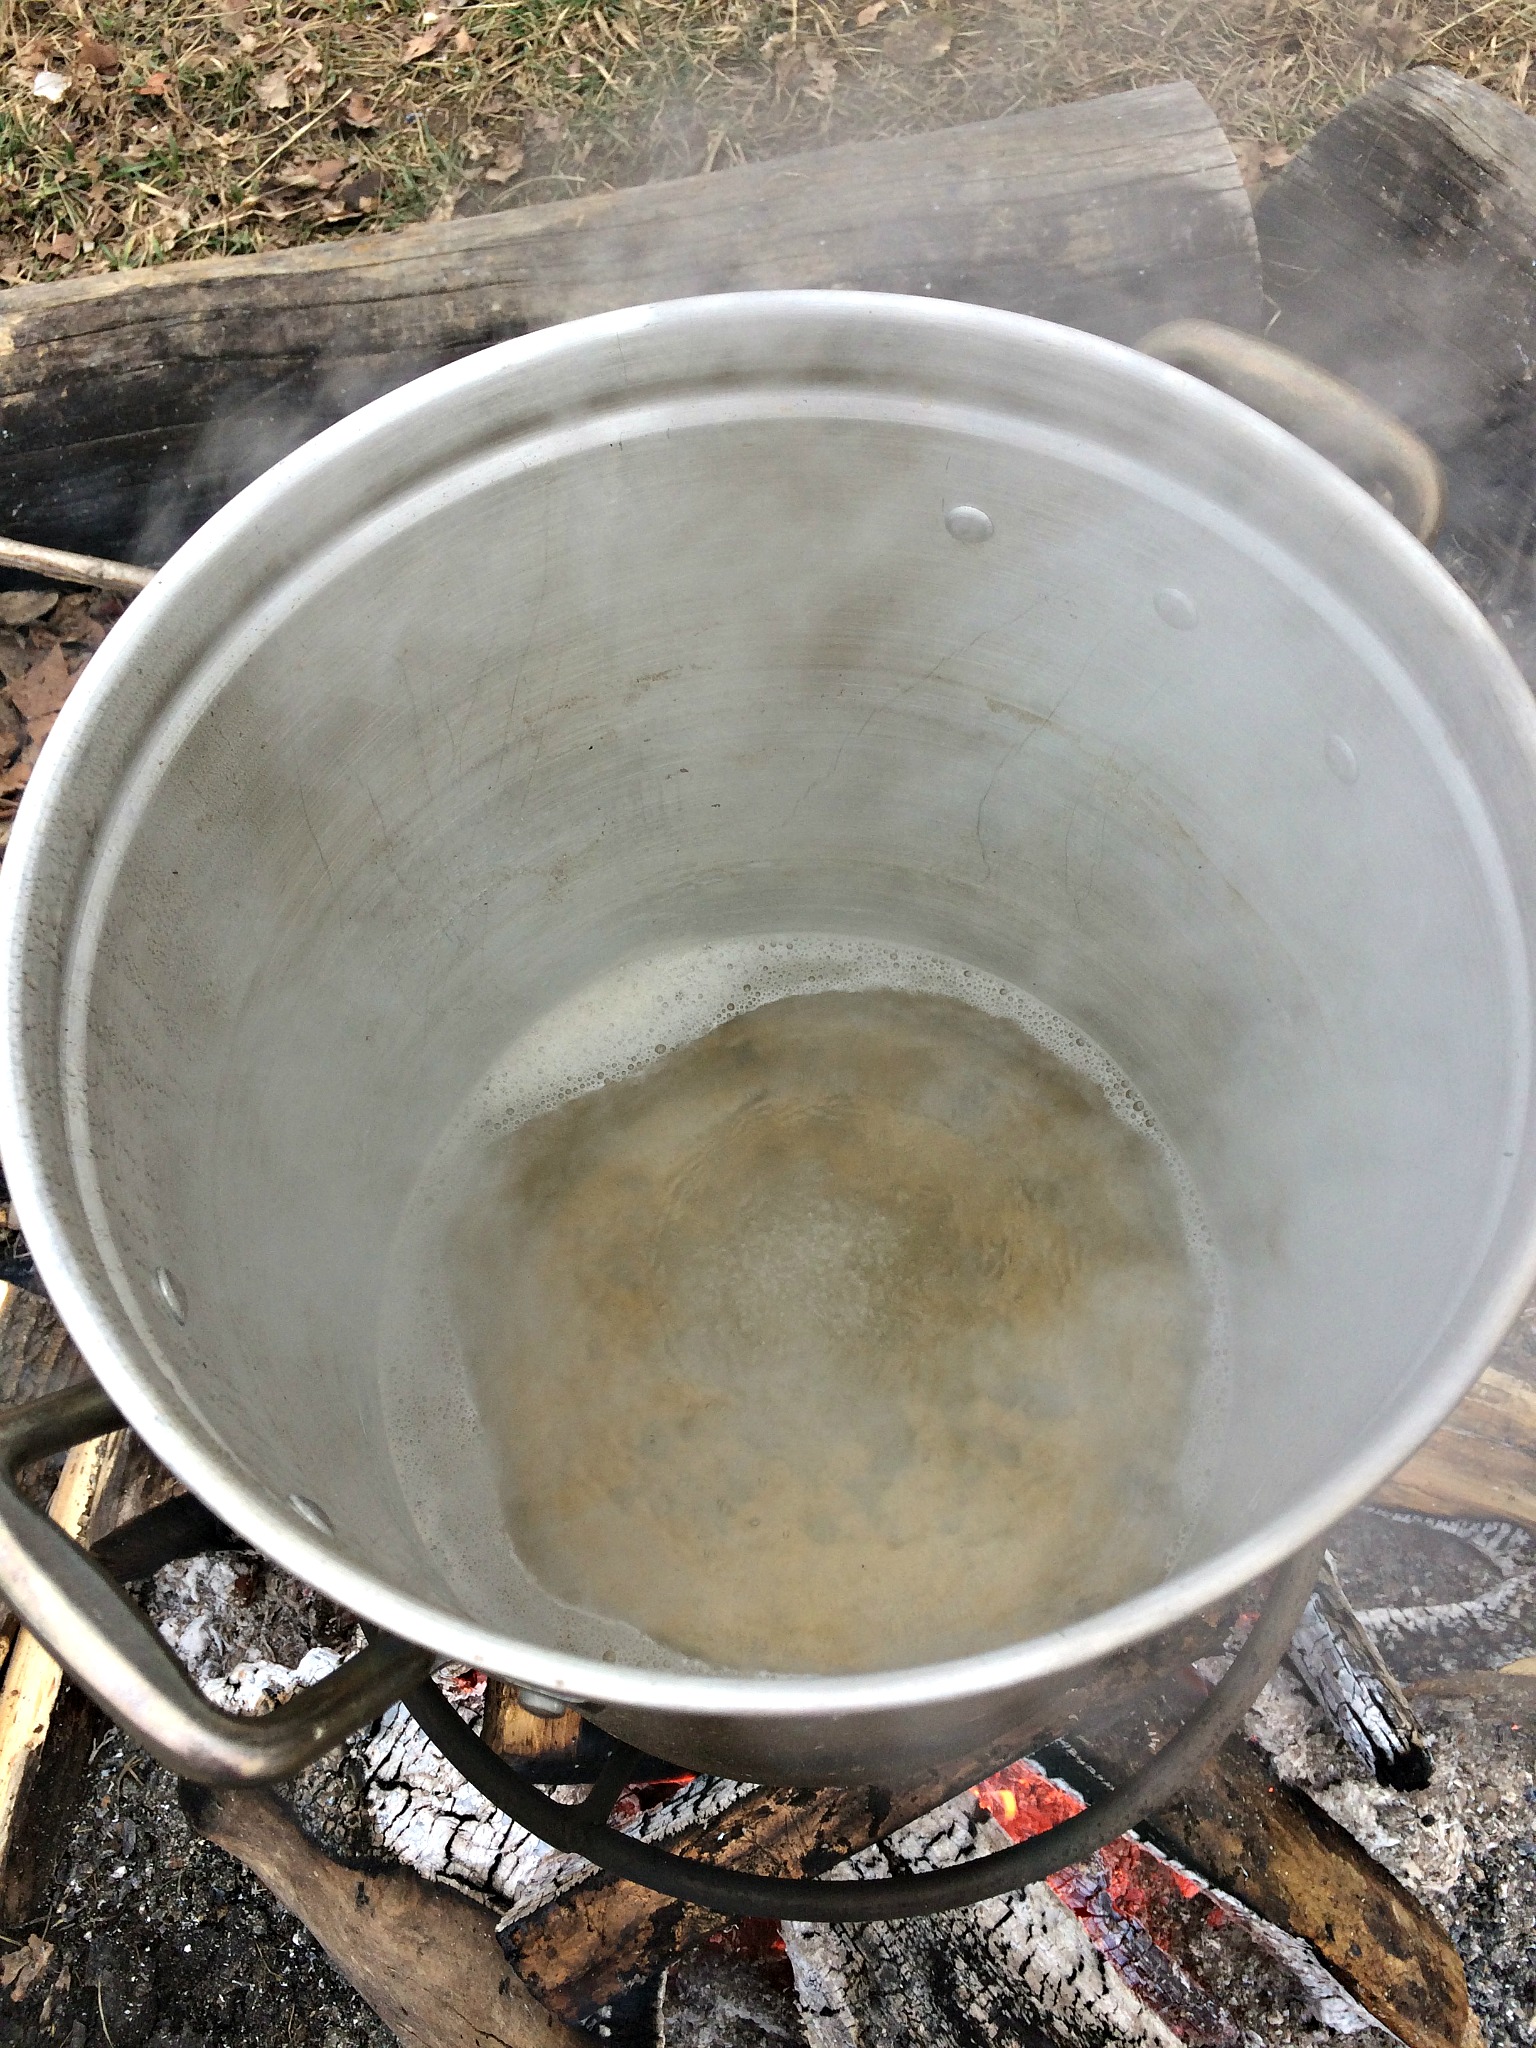
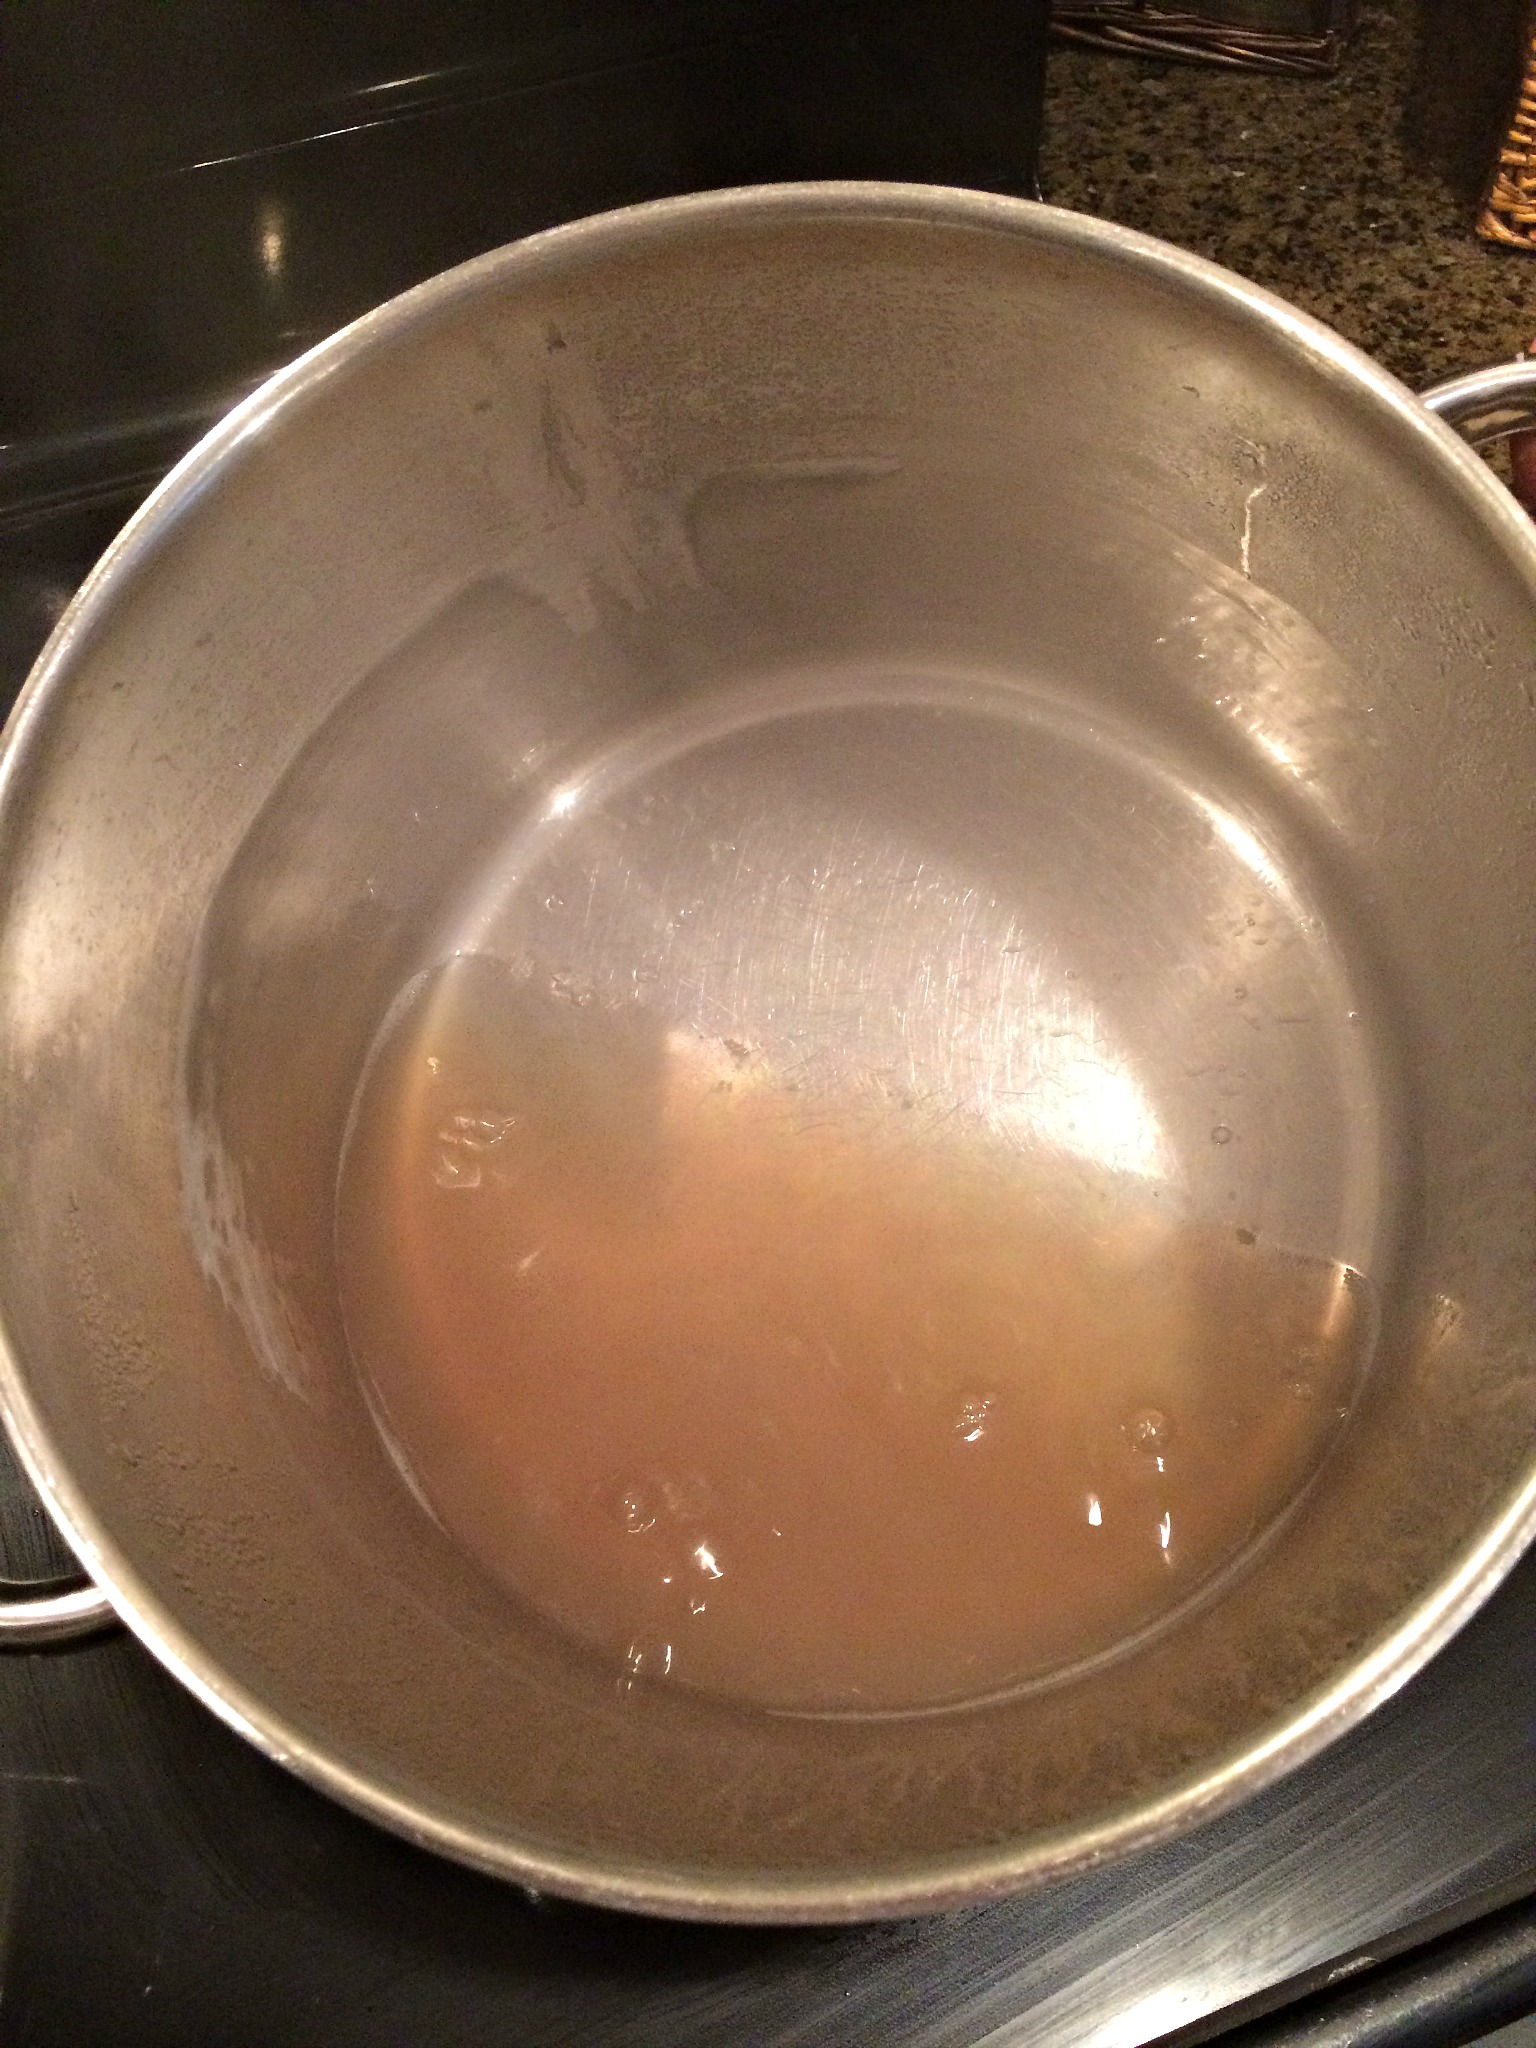
As the sap cooks down it will begin to turn a golden color. We kept ours boiling outside until there were about 2 inches of sap in the bottom of the pot.

Filter the maple sap again when you move it from the turkey fryer into a stew pot. Another fly or two could have jumped in there. I don’t want maple-fly-syrup.
Get it on the stove, insert a candy thermometer and continue boiling.
It will boil, and boil, and boil. One thing I found interesting was that during this entire boiling marathon we never once stirred the sap. Just boil it.
It will darken. Now, the tricky part. When is the syrup done?
- When the syrup reaches the color you want
- When the liquid “sheets” off the back of a spoon
This is a lot like jelly making. You just keep sticking that spoon in the syrup and when the syrup sticks on the back of the spoon instead of running off like water – you’ve got it!
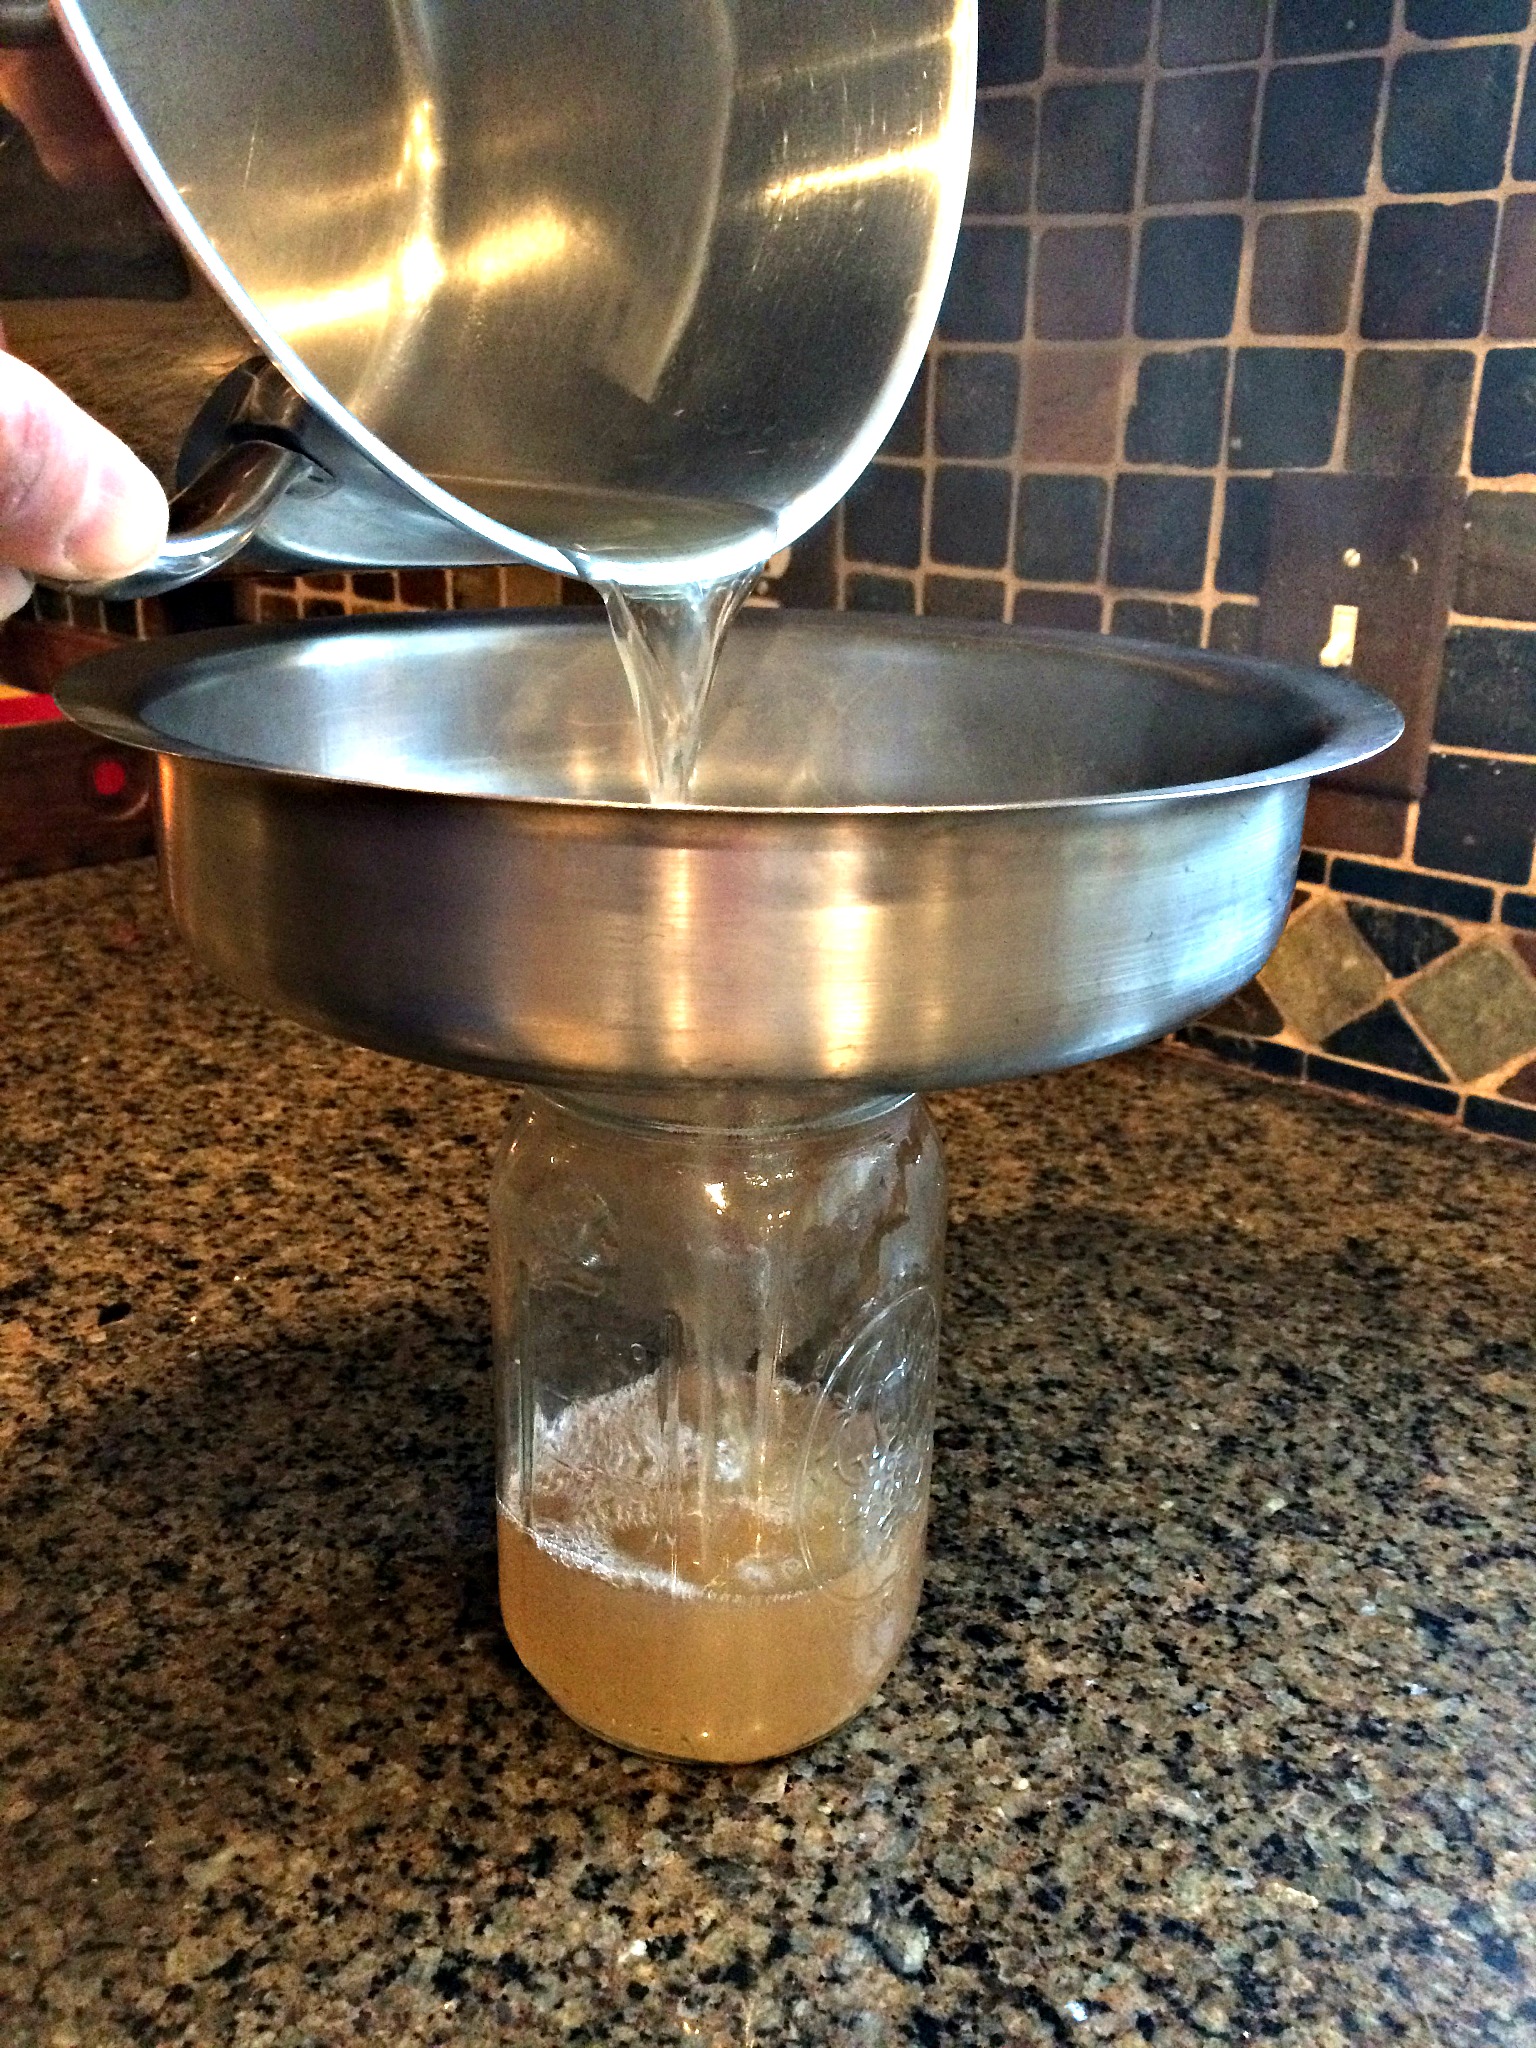
Strain again into a hot, sterile mason jar. Top with lid & stick it in the refrigerator.
All that’s left to do is make pancakes.
After Thoughts:
- We tapped trees last year and got NO sap. Turns out we didn’t tap the right trees. They weren’t maple trees. It was hard (for us) to identify maple trees in January. It is easier to locate maple trees in the fall when all the trees still have their leaves. That is what we did. In fall, we found maple trees and marked them. When tapping time came around, we were certain which trees to tap.
- Plan on hanging around the boiling sap all day. It took 6 hours and although we didn’t have to do much, we did need to keep the fire hot enough to boil the sap, skim off the scum, and watch it toward the end so it didn’t scorch.
- I’m pretty sure turkey fryers weren’t made to boil syrup all day. We pretty much killed ours and may have to buy another one or find something else to de-feather chickens in. Next time we do some Maple Sugar’in (this weekend) I’m going to use my giant steel bottom pot Mamaw gave me.
- If your trees aren’t yielding much sap possible problems could be:
- The tree isn’t old enough. The maple tree should be over 40 years old to produce a nice quantity of sap.
- You may be early or late. There is no set schedule for this. Once the days begin to get warmer and the nights are still dropping below freezing you will have the best results. If your sap isn’t quite running give it some time. Keep checking the buckets because when it hits – your buckets shall overfloweth.
- You may have tapped an oak tree. We did.
To get old fashioned recipes, farm tips and homesteading fun delivered straight to you be sure to subscribe via email (here).
XO,
Candi


